Lens Filter Kit: "Unboxing", install and review...

pault said:
Pull_Up, have you had a chance to see how good the cpl is in the Polaroid kit ? I ask because I have just read a review that really criticises it. It maybe that your kit is different so if you are happy with yours could you please post the link to where you got it ?

Here is the review I read : http://www.dpreview.com/forums/post/39264527

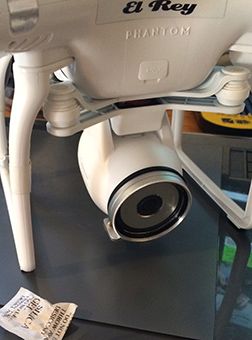
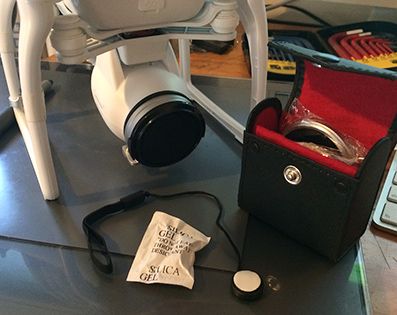
Nope, no chance at all to test it in anything approaching sunshine sadly. I'm not expecting it to be anything amazing, though. It was more to get something in at the cheaper end of the range to see the potential and how I'll use it before getting something more proficient...
 
Just thought I'd share this-

If you are getting horizontal lines or 'artifacts' in your flight videos particularly in bright sunlight from the prop shadows you may be interested in this very informative video tutorial for removing these lines and jello when using a gopro- I'm sure there is a way of making a similar DIY lens hood (to shade the direct sunlight from the lens) for the vision's camera, using the lens filter kit and or filters themselves (vid also talks about how the ND filter helps remove jello effects- if ou don't get a ND filter in the filters you purchase you could use the UV filter, which comes with most and insert inside a cut out ND filter from an ND lighting filter gel, as in the video, equally well)-

[youtube]http://www.youtube.com/watch?v=Wyl_6E9QmZ4[/youtube]
 
Bill_Burkert said:
Can't find them in the US? No surprise because DJI sent only two per vendor. DJI is a piece of shite company's. US Buyer Beware, DJI is a dead company, just wait and see.

I was able to pre-order one from a USA dealer. Here is URL: http://1uas.com/Part-27-Phantom-2-Vision. Price was $20.00 with free shipping. Received in one week. Great addition to the Phantom 2 Vision. Installed in about three minutes. Very easy install. High quality materials except for the allen wrench they supply. This is pure junk. Use a high quality allen wrench and install will be a breeze.

Purchase a good high quality 46mm UV/Haze filter and just leave it on the camera. Also, a good high quality circular polarizing filter can be screwed onto the UV/Haze filter. It does wonders for any landscape shots and videos over water or that have bright skies. The cheap filters available on the net will just cause you photographic nightmares. Don't skimp on the quality of filters you purchase.

Happy flying!
 
I hope this, my first posting on the Forum might be helpful.

Yesterday I ordered the P2V DJI Lens Filter Mount from Buzzflyer (UK) - it arrived first post today- super service. I immediately set about installing it but hit a problem. One of the two mounting pillars had evidently not been machined to tolerance - it would not enter the appropriate 4mm hole in the filter mount. Checking with a micrometer (useful being a model engineer with all the kit!) the diameter of the upper "ring" was 4.09mm (the other good one was 3.95mm). My solution was to go into the workshop and re-machine the oversize pillar in the lathe to fit. 5 minutes and the job was done. I rang Buzzflyer and had a very helpful conversation about the problem. They checked another mount from stock as we talked and found both their pillars fitted ok. So evidently DJI have a quality control problem somewhere in the production line for these. Buzzflyer promised to let DJI know and said they would be aware if anyone else hit the snag but didn't have the gear to fix it themselves.

Apart from that my P2V has proved splendid in operation with all the software upgrades going without any problems although I have been very grateful to these forums to get the RAW file and lens corrections going properly in Lightroom 5. Many thanks to all concerned.
 
reynoldsyoung said:
Was able to remove the first screw. The second screw just let the 1.5 hex just spin. Looks like it was buggered up when it was installed. Any ideas for removing it?


Had the same issue the 2nd screw was stripped before I even got to it. Very Very Slowly and with as little pressure as possible I drilled the head off that screw. I took the rear 2 hex screws off as well and removed the bottom camera cover. With a small vice grip removed the threaded portion of the screw that was left over. I replaced the rear hex screws with two phillips head screws of the same pitch and length. I don't know if it was included with the phantoms extra screws or from the vision screw kit I bought seperately.


Just installed this UV filter Food scale said 21 grams.

$_57.JPG
 
CunningStuntFlyer said:
arinvideo said:
Just installed this UV filter Food scale said 21 grams.

Congrats.

Why are you running a UV filter on a digital camera?

Paranoid I guess, Every Slr Lens I own has a uv filter in front of the glass just incase.
 
arinvideo said:
CunningStuntFlyer said:


Good read, I'm sorta set in my ways and I've seen too many photos like this on photography forums to change my mind just because of a possible lens flare. Im not a wealthy man so once every few years when I get a nice L series lens I just cover her up :)

http://s862.photobucket.com/user/fotoma ... e.jpg.html

a diy lens hood like in the video I shared on an earlier page to shade the sunlight (and take out the horizontal lines sometimes experienced in video from the rotors in bright sunlight) may be a compromise to using a UV filter- since it sticks out beyond the lens- it may protect most things from making direct contact with the vision camera lens..
 
Seahorse said:
Len filter ordered as well as these - only set I could find on Amazon tbh...

Forum clipping the images... :evil:

I work away from home during the week so only just home and it's dark with rain forecast for the weekend...still, got to unpack and install ready for any windows in the weather.
Filter Pouch.
http://www.dead-fish.com/Pictures/P2V/2014-02-07 17.23.12.jpg

Open.
http://www.dead-fish.com/Pictures/P2V/2014-02-07 17.23.27.jpg

Fitted & filtered.

http://www.dead-fish.com/Pictures/P2V/2014-02-07 17.19.01.jpg

It does look rather like HAL..."I'm sorry Dave I can't do that"

http://www.dead-fish.com/Pictures/P2V/2014-02-07 17.18.53.jpg
 
Thanks for the installation video. I used it as I put mine together.

Here's the result:
Lens_Installed.jpg


One slight issue I couldn't fix - the rubber seal and lens holder are offset
because I couldn't push the lens holder down far enough to line up withe the seal.
I tightened the posts that the holder sits on as far as I dared.
I was afraid of cracking the case or something if I pushed it.
However like you, the two original screws on mine were
very tight.
You can see what I mean here:
offset.jpg


Overall, I'm happy with how it went. Everything feels snug, and the lens kit I bought
came with a snap on cover that acts as a nice, secure protector - unlike the original
white cover.
Lens_Kit.jpg
 
Hi. If it works for you and doesn't cause any vignetting then that's great. If you find you do get shadows in the corners of shots then it might be worth backing off the grub screws and trying to reseat the metal ring further down the pegs if possible. I agree with you, I wouldn't nip down the posts any tighter than you feel is comfortable!

Hopefully it will work fine. I still haven't got out flying since I fitted mine (perhaps it's cursed).
 
Pull_Up said:
Hi. If it works for you and doesn't cause any vignetting then that's great. If you find you do get shadows in the corners of shots then it might be worth backing off the grub screws and trying to reseat the metal ring further down the pegs if possible. I agree with you, I wouldn't nip down the posts any tighter than you feel is comfortable!

Hopefully it will work fine. I still haven't got out flying since I fitted mine (perhaps it's cursed).

On your setup, do the posts sit flush with the face of the lens holder - or within fractions of a millimetre of sitting flush?
If so, then there's not much more pushing I can do to the holder. If the posts are slightly raised, that gives me something to look at.


Cheers
 
Just had a close look - by the way mine looks pretty centred to the naked eye - and looking at the filter holder from the front (looking into the lens) the top of the right-hand post sits slightly proud of the holder, and the holder and is seated fully down against the stop ring on the post. The left-hand post top is flush, but there is a gap to the stop ring, it's not fully down. The whole unit is solid as a rock though. This implies there's perhaps a 1/4 turn difference in the seating of my 2 posts, but I have centred filtered.

It looks like my posts have got perhaps half a turn more into the screw hole than yours, maybe?

Take a quick snap or two - any vignetting? If not, I wouldn't sweat it if everything is tight and there's no play.
 
Well I envy those of you who got your filter kits, I ordered mine from intelligentUAS (clearly an oxymoron) back on 1/28 as "in stock" and have yet to receive it and a few other items. Like DJI they're non-responsive to inquiries by email, website contact forms, or even their "Live Chat" communications... whose agent is coincidentally named "Daisy" (...tell me your answer true).

Must find a better dealer here in the USA to do business with to purchase spare parts & accessories.

iDrone :(
 

Recent Posts

Members online

No members online now.

Forum statistics

Threads
143,094
Messages
1,467,602
Members
104,980
Latest member
ozmtl