Hi everyone.
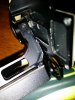
Recently i had a crash and broke the main ribon cable of the Zenmuse H3-3d, the one that connects the motors. I bought one on ebay and did the replacement. After the replacement and updated the zenmuse firmware, the gimbal went crazy as you can see in the video.
Just a sum of the all process for you to understand better:
1- Replacement of the Ribon
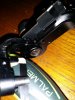
2- Alignment of the pitch motor in the sensor. (align the flat part of the metal axis with the flat part of the sensor)
3- Reset Zenmuse and and update to latest version
4- Update phantom main board
But the result was a crazy gimbal") . I've done several hours of research on this forum and all over internet but couldn't find any answer.
. I've done several hours of research on this forum and all over internet but couldn't find any answer.
If someone more experiencied have some cloue please let me know.
Recently i had a crash and broke the main ribon cable of the Zenmuse H3-3d, the one that connects the motors. I bought one on ebay and did the replacement. After the replacement and updated the zenmuse firmware, the gimbal went crazy as you can see in the video.
Just a sum of the all process for you to understand better:
1- Replacement of the Ribon
2- Alignment of the pitch motor in the sensor. (align the flat part of the metal axis with the flat part of the sensor)
3- Reset Zenmuse and and update to latest version
4- Update phantom main board
But the result was a crazy gimbal
. I've done several hours of research on this forum and all over internet but couldn't find any answer.If someone more experiencied have some cloue please let me know.