No image transmission signal - P3P

Do you have light on the front of the gimbal? I see it isn’t showing a sd card inserted, have you put one in to see if it’ll show it?
If it has a blinking green light and shows when a sd card is inserted, then just re-flash the board.?
this particular gimbal that gives a black image and dji in app, can read sd, can take pics and video but they are very dark , ill attach one below
what do you say is it worth a flash??
 

Attachments

  • DJI_0002.JPG
    DJI_0002.JPG
    868.8 KB · Views: 151
hello guys, this thread should be updated, first the good news , let me find a way to describe my experience, have you ever messed in the ****** of an ant, i did the gimbal that is write protected and failed to flash, and the bt0 , bt1 got ripped pads , i manged using the help our friend diver suggested for alternative pads as he suggested in his pics , i cant describe the feeling i was rubbing with the head of inulin syringe what i was only seeing thinner than the hair under the magnifier , but i succeeded , its the ***** of an ant scaleo_O, now again the flashing failed its because of write protection, now here is what i suggest, this thread was started by the method of sunset catcher i really thank him for great participation for us finding and sharing this fix but this method will work for a non write protected dm 365chip, and it seems the german guy method DJI Phantom repair - no FPV / black screen / strong interference - german version - YouTube , will work even for the copy write protected boards now we need a german guy to help us , or any one who has an auto translation vid app or knows german to translate and we are good to go.
ant ***** scale, been there done that,:mask:
 

Attachments

  • ant.jpg
    ant.jpg
    748.9 KB · Views: 143
hhh i didnt know the forum automatically deletes the term p.u.s.s.y. hhh insert it in place of *****
 
not to forget the similar great method done by quaddamage on his thread i thank him too.?
 
please some one should translate the german vid or just make one i bet it will get 100s of kilo views on youtube , you will win a great channel!!
 
and it seems the german guy method DJI Phantom repair - no FPV / black screen / strong interference - german version - YouTube , will work even for the copy write protected boards
It’s been my experience that this doesn’t work for nand write protected issue either. When I connect to serial to do a re-flash, if using @sunset catcher method of using ‘sfh.exe -nandflash -v -p “COMx” ubl1.img u-boot.img’ doesn’t work, then I automatically try the ‘sfh_DM36x.exe
 
It’s been my experience that this doesn’t work for nand write protected issue either. When I connect to serial to do a re-flash, if using @sunset catcher method of using ‘sfh.exe -nandflash -v -p “COMx” ubl1.img u-boot.img’ doesn’t work, then I automatically try the ‘sfh_DM36x.exe
I meant to attach the translation of the video to the thread. Here it is.

Text:

Hello, together with this video I would like to help you to repair your DJI Phantom 3 Pro if you do not see a live image on my mobile phone. The problem is with the gimbal top board. that's directly the electronics above the camera. First of all I have to mention that please only carry out my procedure here if you can solder well, because otherwise you can break more than you already have. this is just a warning. The real problem is a lost firmware for the lightbridge and this lightbridge streams the video signal on your mobile phone and if the firmware is lost then it can no longer be updated with an update. To be sure that you actually have this problem, you have to look at an update log file. what you think of a failed update. the modules are listed in the middle. the lightbridge is the module 15.00 if there is “device not detected” then your firmware is definitely gone. In order to be able to carry out the following procedure reasonably, you need a sensible soldering station with a tip no more than 1 mm wide. A 5 volt power source such as a cell phone charger but which can deliver at least 1 ampere otherwise the board will not work. A USB RS 232 adapter with TTL level output very important. TTL, otherwise it will destroy the board. As well as some other cables for other connections that are still needed. Any terminal program I prefer Putty. and my repair my DJI file in the attachment. The first to be removed is the gimbal topboard and gimbal from the drone. after that you can remove any plastic lids with the two Torx screws as shown in the picture with the red arrow. Next you remove the flex cable that goes to the gimbal. that is stuck in time on the housing. best with a thin lever in between and loosen carefully. be careful this flex cable is very sensitive. Now you loosen the small grub screw on the Gimbal arm. just loosen don't unscrew. at the end you have the two remaining Torx screws from the housing cover and then you could carefully lift it off. it looks like this now comes your next hike what procedure. you have to run the flex cable from the mainboard. this is connected to two connect and this opens up by carefully folding up the black lock. the flex cable is also still glued to the floor so you shouldn't just pull it out but you should carefully loosen it upwards and then pull it back. When this is done you can now completely remove the gimbal. just pull away over the motor axis. So now it's time to solder. you close the USB RS 232 adapter. according to the following scheme. RX and TX may be interchanged. if it does not work then simply replace the lines and yes nothing can happen. For the 5 volt supply you best take an old USB cable, cut off the end, people put the two cables on it, and the other cell phone to a cell phone charger, which, as I said, can supply at least one ampere of current. we don't need the two hero cables yet. we only need it when programming. It looks like this to me. Now connect the USB RS 232 adapter to the PC and check which comport team has been assigned in the device manager. for me it is COM1. So now it will be exciting. opens the appointment and program as I said I'm using PuTTY here. Set the mode to serial, baud rate is 115200. com port COM1. for me after device manager and confirm with Open. now connect Finn full supply and you can see what the board is doing. not much "NAND boot Failed" is proof that the lightbridge firmware is definitely spanked. Now in the park you have my file repairmyDJI.rar directly on the C drive. The folder is only called 1 for the sake of simplicity. If you have extracted the RAR file there is a file “repairmyDJI.batch. you have to edit these with the text editor and set the COM port according to your configuration. otherwise the flash process will not work later. then save and close the file. Now we have to put the mainboard in boot mode. this requires these two thin blue connections which are shown here on the diagram. please pay attention to the people to the left of the meat. there it is extremely narrow because of the thin soldering tip I mentioned at the beginning of the video When you have done that, the Porty closes the supply voltage and it must report to BootMe. if you see that then you won. Now close the terminal program so that the COM port is released for the programming environment. Now a DOS console opens for you. changes to the location and where the files are extracted and carries out repair my DJI. Here the submarine is flashed louder. after the process, use control-c and run the file again. Submarine is flashed again. and in this second round the image is flashed afterwards where the operating system is on here and now you have. won thank you that's it from me. continue to enjoy flying and all the best greetings from Switzerland
 
  • Like
Reactions: gppms and mj2019
i saw all those big names of the files, i thought the German or Switzerland method will help with write protection but it didnt :disappointed: succeed, any way its a great contribution from you Diver, thanks and we all will wait for some one to do that achivment and override that copy write protection if ever possible!!
 
this particular gimbal that gives a black image and dji in app, can read sd, can take pics and video but they are very dark , ill attach one below
what do you say is it worth a flash??
i flashed it successfully , now it gives only black image with no dji, i was turning it around it started giving very dark vid, i pointed the camera to the lamp in the room it is actually giving very black vid ,so it is streaming the vid but it seems i should suspect the flat cable i ordered one
 
i flashed it successfully , now it gives only black image with no dji, i was turning it around it started giving very dark vid, i pointed the camera to the lamp in the room it is actually giving very black vid ,so it is streaming the vid but it seems i should suspect the flat cable i ordered one
It could also be that the sensor board in the camera head is bad, or the flat film connection to the board is not good. Like you said, replacing the cable is a good idea anyway ?.
 
i flashed it successfully , now it gives only black image with no dji, i was turning it around it started giving very dark vid, i pointed the camera to the lamp in the room it is actually giving very black vid ,so it is streaming the vid but it seems i should suspect the flat cable i ordered one

Make a reset to the camera settings from the camera menu.
 
If anyone wants an English guide with a software tool that takes the hassle out of flashing its here

 
I'm not sure if anyone is still following this thread but I just wanted to see if anyone could give me some advice. I have tried to read up on my issue. I have the No Video Transmission issue. Flashing my update fails and I have the 008 and 0015 device not detected errors in my AB file. I followed the flow chart on the forum that Quaddamage created and it leads me to the 'Problem with AC camera will not work until this is fixed' . So just to summarize I can pair the RC to the AC, my app says all is up to date despite FW update saying it failed and gimbal light solid red after every try, and I can move the gimbal with the RC but I cannot start my motors with CSC. Will these solutions possible address my issue or do I need to look at something else? I'm sorry if this is already answered. I have tried to research as much as I could on here but am stuck on what I should try or what to check first. Just need pointed in right direction.
 
Last edited:
Is the 8-15 the only modules that are not detected?
I'm not sure if anyone is still following this thread but I just wanted to see if anyone could give me some advice. I have tried to read up on my issue. I have the No Video Transmission issue. Flashing my update fails and I have the 008 and 0015 device not detected errors in my AB file. I followed the flow chart on the forum that Quaddamage created and it leads me to the 'Problem with AC camera will not work until this is fixed' . So just to summarize I can pair the RC to the AC, my app says all is up to date despite FW update saying it failed and gimbal light solid red after every try, and I can move the gimbal with the RC but I cannot start my motors with CSC. Will these solutions possible address my issue or do I need to look at something else? I'm sorry if this is already answered. I have tried to research as much as I could on here but am stuck on what I should try or what to check first. Just need pointed in right direction.
is the 8-15 the only modules that are not detected?
 
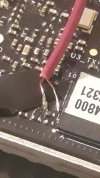
Yes they were. I haven’t had a chance to update this yet. I was able to successfully completed the TTL to USB process and get the modules to update. I was also able to get the motors to start. Have successfully flown drone 5 times now with zero issues! I had removed the IMU and gave it several hard taps on all sides but still wasn’t working. After I completed the TTL to USB flash process everything started working…not sure if that’s coincidence since the flow chart says the motor issue isn’t related to the 8-15 module issue. Also, just to note- I ripped off the solder pad (like an idiot) on the Boot 0 pad. I was able to scrape where the pad came off and luckily got a bit of solder to fuse with it enough to make a connection. Thought I had ruined the board but I guess I got lucky! The info and videos on this site were awesome! I have a fully operational P3P at this point for $100 (plus several hours of research and soldering/disassembly/assembly). Thanks so much to everyone who has contributed all this info, video and software tools to fix the issue. You all rock!
 

Members online

No members online now.

Forum statistics

Threads
143,087
Messages
1,467,534
Members
104,965
Latest member
cokersean20