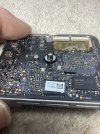
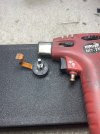
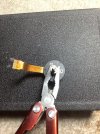
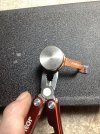
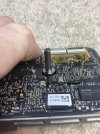
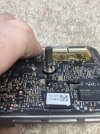
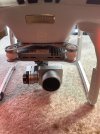
Make note of which direction the camera is pointing, as looking at the the front of the drone. First the yaw motor needs to be removed. Then I use a permanent marker to mark the original position of the magnetic ring on the yaw motor shaft ( picture #1). Then using a mini-torch(picture #2) apply heat to the yaw arm shaft, being careful not to overheat it though. I will heat it a little, then stop for a few seconds then apply more heat to it. When the end of the yaw motor shaft starts to turn a brownish color stop applying heat. Immediately after heating, with a small pair of needle nose pliers, CAREFULLY push down to release the adhesive that holds the magnetic ring in place (picture #3 and #4). These magnetic ring are very brittle and will break easily! If the camera was pointing to the right, then the magnetic ring needs to be rotated in a clockwise direction. The attached pictures are of one that was pointing considerably to the right.If it was pointing considerably to the right, then I start with the mark on the magnetic ring rotated clockwise just to the edge of the flat spot on the yaw shaft. Gently push the magnetic ring down on the yaw shaft to its’ in place’ position. Install the yaw motor back into the gimbal board housing,assemble the camera and mount back onto the drone and start it up to check the position of the camera. You may need to disassemble and reassemble the camera/gimbal and repeat the above procedures several times before it gets into the correct position. It doesn’t take much rotation of the magnetic ring to make a difference in the camera position, so make small movements of the magnetic ring. After you get the magnetic ring into the correct position,then I apply a small amount of super glue on the shaft where the magnetic ring is, on the opposite side of the shaft flat side. Pictures #5, #6, #7 show the final position for the camera I was working on.