Hello all,
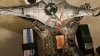
I have what I think is a unique problem. I have a Phantom 1. Had it about two months and have had many successful flight. Recently crashed it into some trees and it slightly bent one of the arms to where the motor would not turn without the prop scrapping the top of the arm. There was no other problems with the quad. I bought a new upper and lower shell and carefully moved everything to the new shell making sure everything was connected just as it came from the old frame. Now here is my problem. Once I got everything back I tried to do a test got continuous flashing yellow light from the drone. Looking up the problem in manual says the link between the controller and the receiver is gone. Following the linking procedure in the advanced manual is not working; in fact it seems like a totally different issue. What I mean is the manual says when you hook up to usb and power the phantom and controller; if you have a solid red light then you don't have a link, then follow the procedure to make the link. So here is where my problem is. If I power the phantom and have it hooked to the usb on the computer, the link light is solid red, but when I turn on the controller, the link light turns green. There is no mention of a green link light in any literature I've found. Additionally, the manual says hold the link light button for three seconds until it starts flashing and then turn on controller while holding the power stick down. This is the linking procedure and the problem with that is after holding the button down till it flashes, it only flashes for two more seconds at the most and then goes back to solid.
Needless to say I can't calibrate the phantom. The only thing I can do once in the NAZM software is a motor test and that works as expected. TX and RX Calibration of stick movement is basically dead. The sliders are all black in the software and doesn't do anything. It appears that it can do a basic and advanced IMU calibration using, at least it goes through the motions and completes. Anyway, I don't know if it is truly a link problem as described above or something else. Any help from anyone would be greatly appreciated.
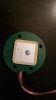
Oh, and one more thing. When I hooked up to do the calibration, I was get a CFG-ERR pop up in the bottom right corner of my screen. One of the things I thought to do was change the batteries in my controller because I never changed then from when I first started using it even though the light on the controller is green when I turn it on. That said, the error I get now when hooking up is ERROR(27); saying "GPS not calibrated, or magnetic field interference. Please calibrate GPS again in good condition.'
I really don't know what to do at this point!
I have what I think is a unique problem. I have a Phantom 1. Had it about two months and have had many successful flight. Recently crashed it into some trees and it slightly bent one of the arms to where the motor would not turn without the prop scrapping the top of the arm. There was no other problems with the quad. I bought a new upper and lower shell and carefully moved everything to the new shell making sure everything was connected just as it came from the old frame. Now here is my problem. Once I got everything back I tried to do a test got continuous flashing yellow light from the drone. Looking up the problem in manual says the link between the controller and the receiver is gone. Following the linking procedure in the advanced manual is not working; in fact it seems like a totally different issue. What I mean is the manual says when you hook up to usb and power the phantom and controller; if you have a solid red light then you don't have a link, then follow the procedure to make the link. So here is where my problem is. If I power the phantom and have it hooked to the usb on the computer, the link light is solid red, but when I turn on the controller, the link light turns green. There is no mention of a green link light in any literature I've found. Additionally, the manual says hold the link light button for three seconds until it starts flashing and then turn on controller while holding the power stick down. This is the linking procedure and the problem with that is after holding the button down till it flashes, it only flashes for two more seconds at the most and then goes back to solid.
Needless to say I can't calibrate the phantom. The only thing I can do once in the NAZM software is a motor test and that works as expected. TX and RX Calibration of stick movement is basically dead. The sliders are all black in the software and doesn't do anything. It appears that it can do a basic and advanced IMU calibration using, at least it goes through the motions and completes. Anyway, I don't know if it is truly a link problem as described above or something else. Any help from anyone would be greatly appreciated.
Oh, and one more thing. When I hooked up to do the calibration, I was get a CFG-ERR pop up in the bottom right corner of my screen. One of the things I thought to do was change the batteries in my controller because I never changed then from when I first started using it even though the light on the controller is green when I turn it on. That said, the error I get now when hooking up is ERROR(27); saying "GPS not calibrated, or magnetic field interference. Please calibrate GPS again in good condition.'
I really don't know what to do at this point!
Last edited: