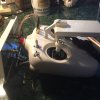
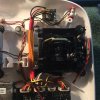
//edit// the "Imgur" links are the links to the photos....
Well thank you to everyone who has helped me through this thread.
I thought i would create this "mini tutorial" on my experience with the DBS01 Mod for Phantom 3 Standard Installation incase anyone else is nervous or would like additional detail that isnt covered elsewhere.
Here is a link to the whole "album" on imgur for future reference if need be:
DJI Phantom 3 Standard with ITELITE DBS01 Mod
Step 1 (no photos for this, if you cant identify screws and an ability to use a screw driver, you might be in trouble

:
Unscrew the 4 screws from the back of the controller and remove the Phone holder to make it easy to work with.
Step 2:
Very carefully start to pull the case apart on the remote controller. Do this with caution as my cable that was connecting my USB port was glued / siliconed to the otherside of the case making it hard to get into it. It required me to carefully slice away the silicon holding it down.
Step 3:
Imgur: The most awesome images on the Internet
disconnect the power supply. This pulls horizontally out. ITs easy to identify (its the 2 wire thing in the picture and its connected to the big circle cylinder thing in the remote - aka the battery)
Step 4:
Imgur: The most awesome images on the Internet
Disconnect the three wire plug (brightest thing in the picture and in focus) this pulls directly up. From memory this is the gymbal control
Step 5:
Imgur: The most awesome images on the Internet
Disconnect the USB cable. Again this pulls directly up.
You should now have your 2 halves disconnected and it should appear something like this
Imgur: The most awesome images on the Internet
Step 6:
The main antenna from the middle and the 2 antennas all meet in much the same point on the boards. You need to use a razor / hobby knife / anything that is sharp and painful and able to work in small areas. You need to pick off the silicon that is holding the antenna cables onto the board. Here is what it looks like with 1 done, and then all 3 done.
Imgur: The most awesome images on the Internet
Imgur: The most awesome images on the Internet
Step 7 (no photo you decide if you want to remove or just move out of the way):
Remove / move out of the way the existing antenna cables and antenna's
Step 8:
Drill 3 holes in the case. I used a 6mm drill bit and it was a very snug fit for the connectors. I attempted to put them in the top aligned to the ports on the new antenna plate
Imgur: The most awesome images on the Internet
Imgur: The most awesome images on the Internet
Step 9:
Connect the 2 which are close to each other (aligned to Port 2 and 3 on the DBS Antenna) to the 2.4ghz ports
Step 10:
Connect the single connector to the 5.8ghz socket (this was the one that the main antenna was connected to)
Step 11:
Feed the new wires down the middle and make it pretty and neat
 Step 12:
Reconnect USB & Gimbal cables
DOUBLE CHECK THAT THE POWER SWITCH IS OFF ON THE REMOTE CONTROL BEFORE PLUGGIN IN THE POWER
Step 13:
Plug in the power after confirming IT IS OFF
DO NOT TURN IT ON UNLESS THE MOD IS CONNECTED TO THE ANTENNA - as per note that comes in the package
Step 14:
Connect the representative external ports to the antenna and mount appropriately.
Imgur: The most awesome images on the Internet
Imgur: The most awesome images on the Internet
FLY LIKE THE WIND BULLSEYE!


