My complete MOD list, w/ how-to, tips, and tricks!n

Joined
Apr 10, 2014
Messages
2,278
Reaction score
1,256
Age
51
Location
Sarasota, FL. USA!
Hello Everyone,
I wanted to share some info with you, more for our new friends here, but I'm sure, something for everyone!

I've had my P2v for nearly 2 years now, and have done a lot of options, and mods, on it! So I wanted to share some tips, secrets, tricks, and how-to's with you.

At some point, most of us decide to change something on our crafts, so I'll go through a couple simple additions, that should be done on ALL our phantoms!

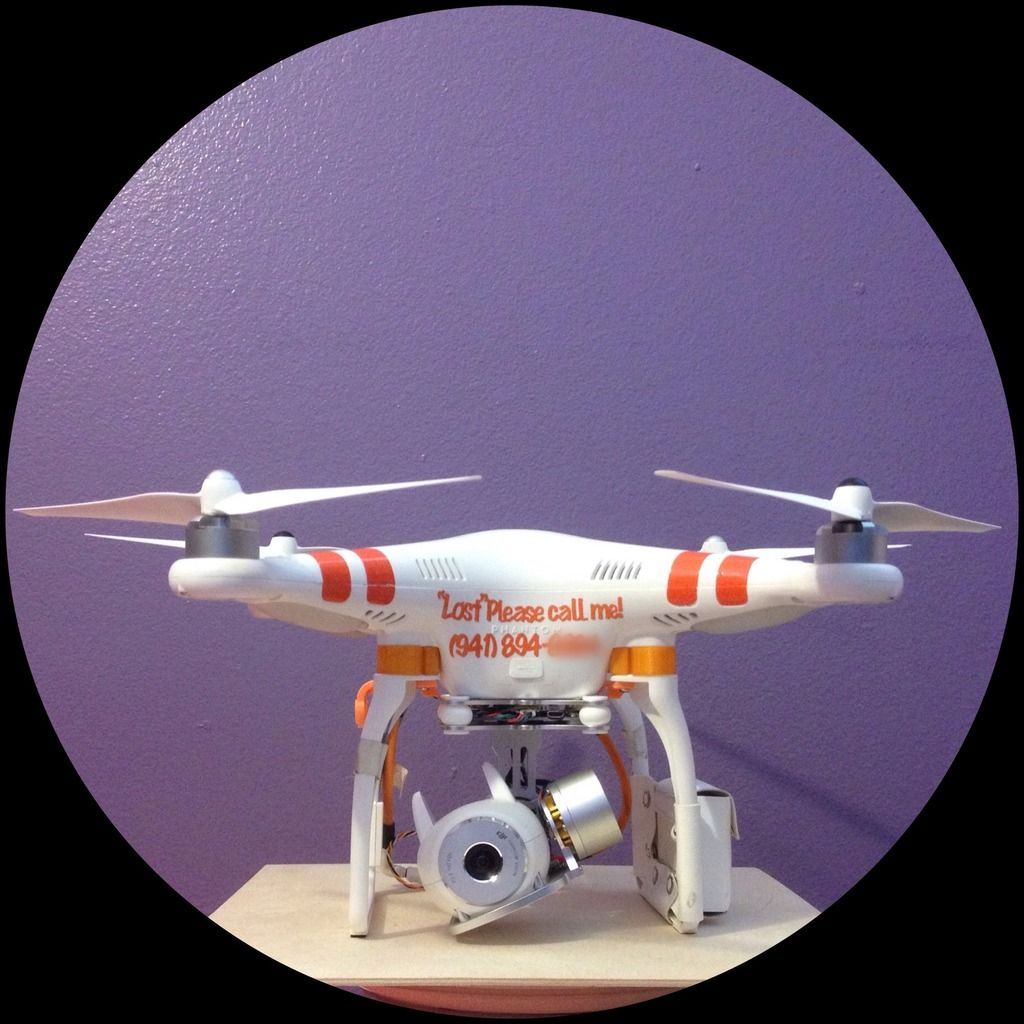
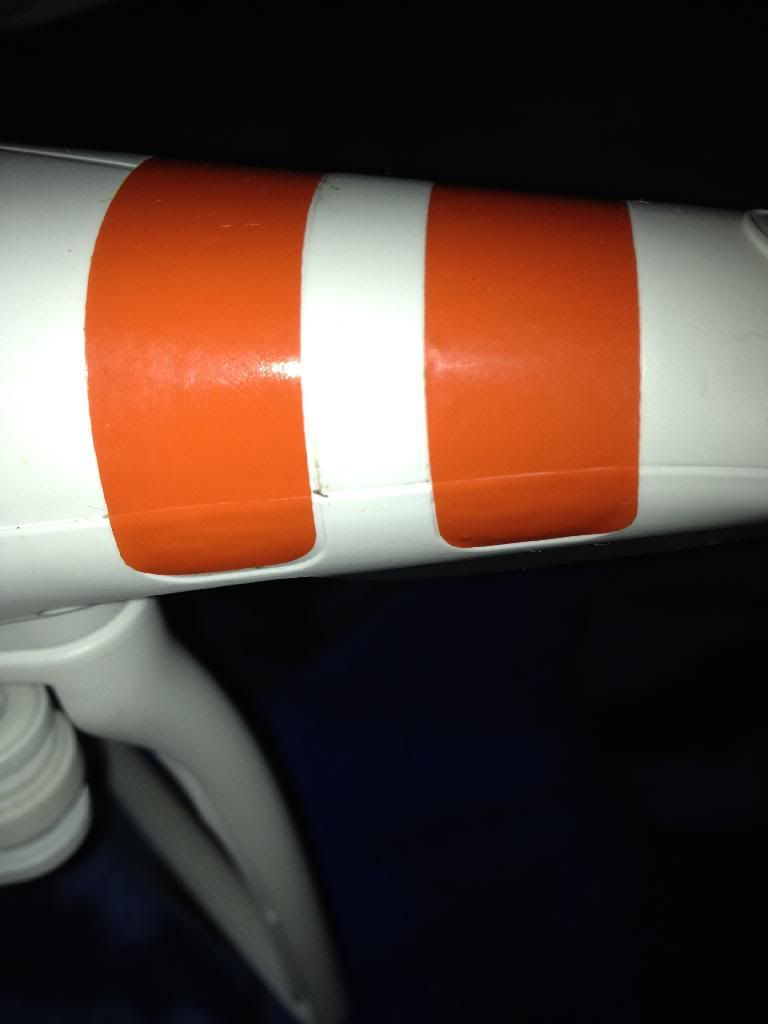
First thing you want to do with your new bird ( or old ).
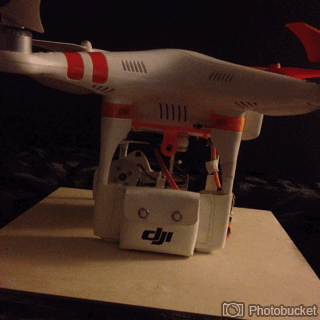
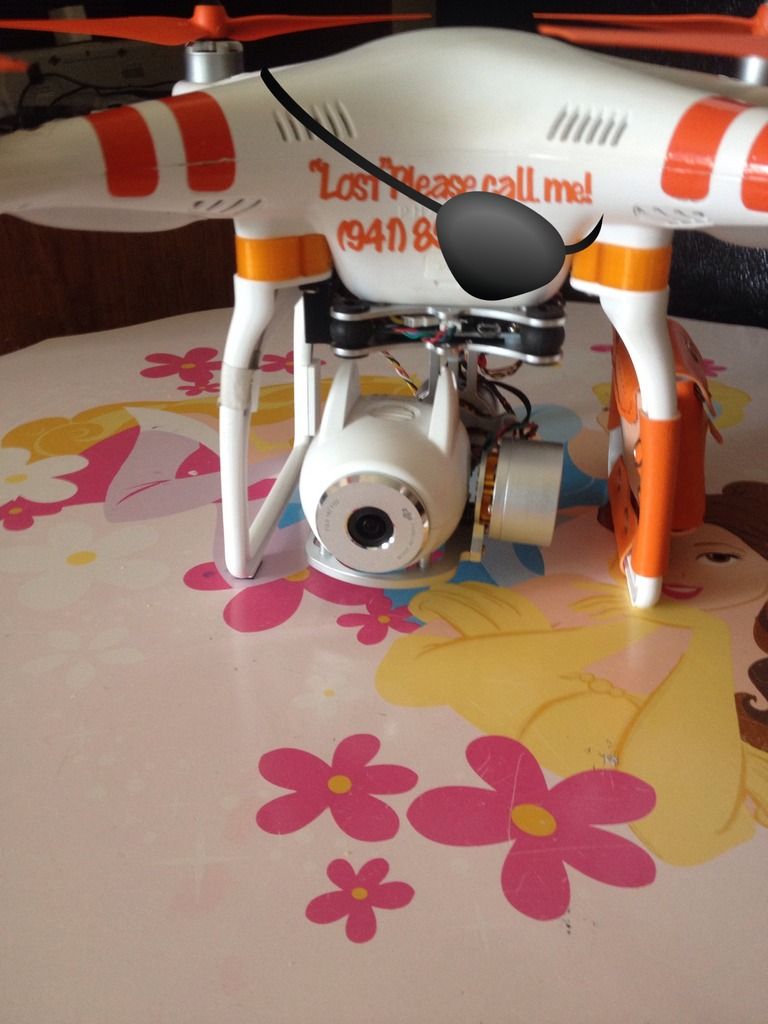
Put you contact info on your craft, something like," lost please call 111-111-1111 " or " If found, return to John Doe, 1111 s lake dr, ect. ".
Similar to this:
F5D1CD2C-C1AB-4D2D-A9F4-F3C6D4C82EF3_zpslidr1q5r.jpg


Next:
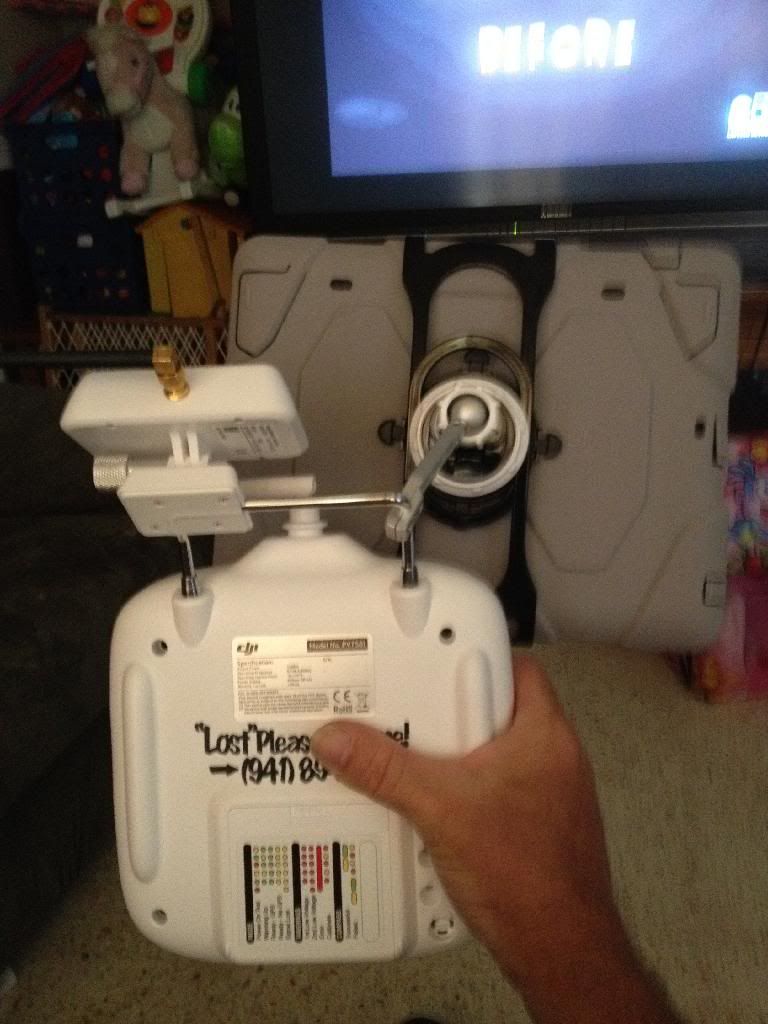
Put your contact info on your Remote, as well, you might leave it somewhere by mistake? ( also put info on your case, if you have one! )
Like this:
A30E7223-BA9F-475F-AFC5-3E873E2B85EF_zpsarwzitos.jpg


Next
If you have more than 1 battery, number the batteries, ( 1-2-3-4-ect. ) this way you can alternate batteries, or tell which is bad, and good ( if you have a bad pack )
Like this:
EFDD88CE-51DA-4C44-AFBD-4B9DE48547D9_zpsbsg75rrf.jpg

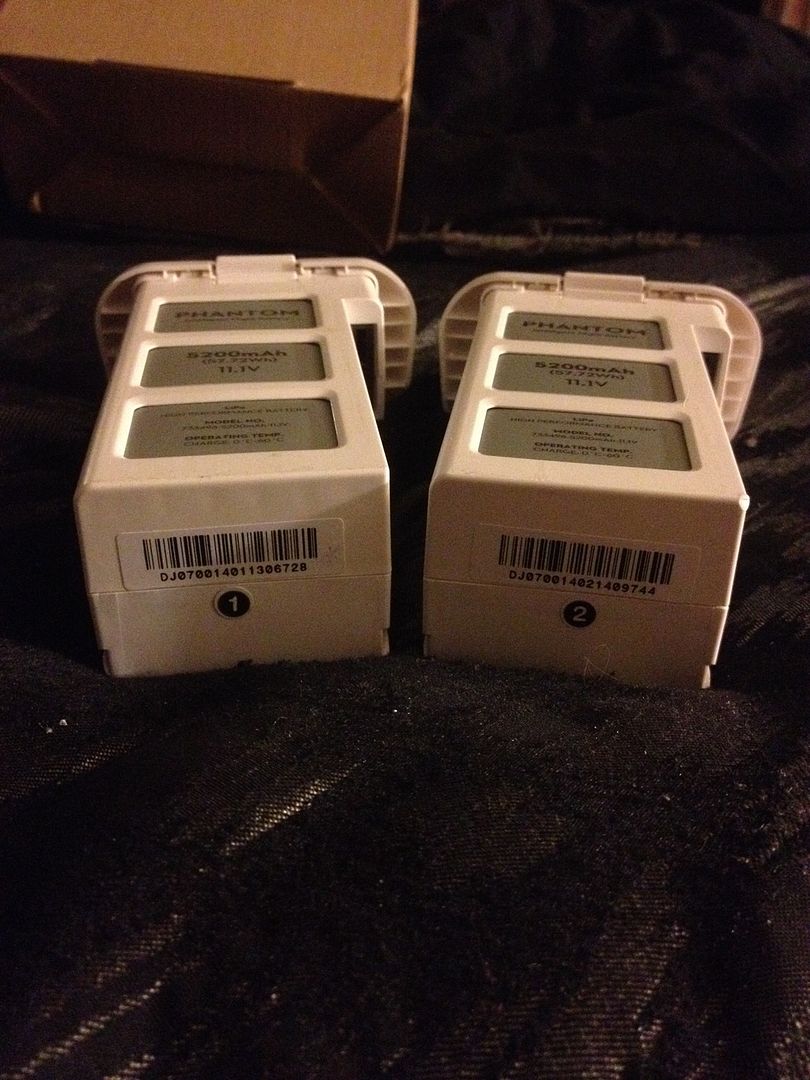
( All stickers above can be purchased at any sign shop, or online sticker maker )

Next,
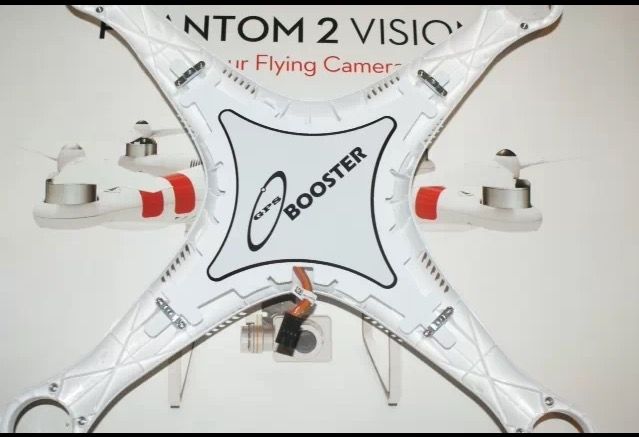
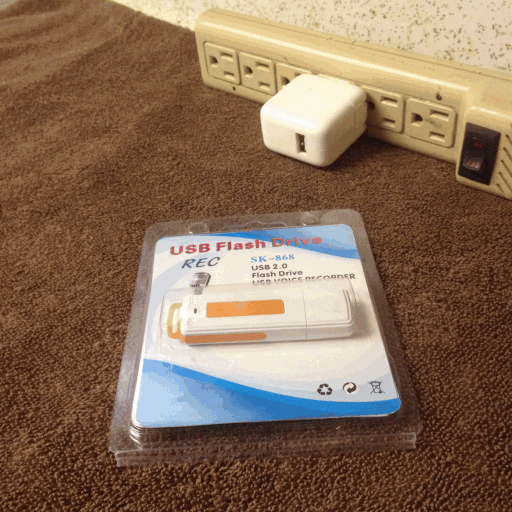
You'll want to add a portable GPS Tracker ( like a Tk-102b, or alike ) as some have a 72 hour battery life, gives you plenty of time to find your missing friend!
Like this:
5125669F-65BC-4BBC-957B-127E81E36F0E_zps7yiygrbe.gif

( I bought mine on eBay ( global tracker Tk-102b ))

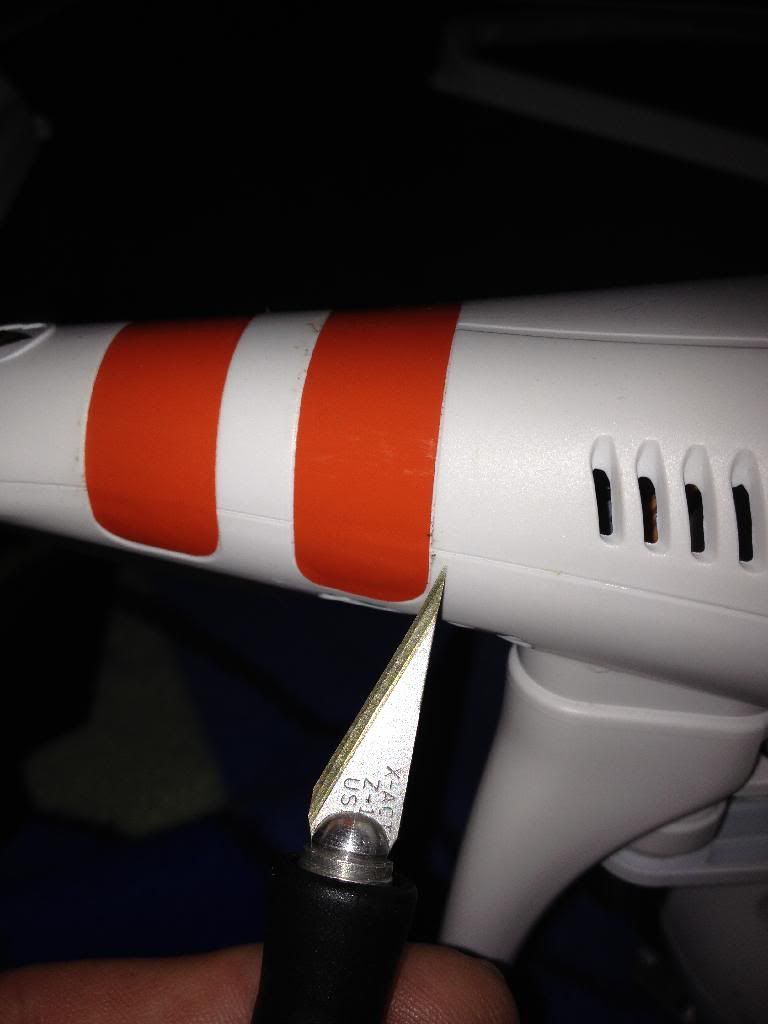
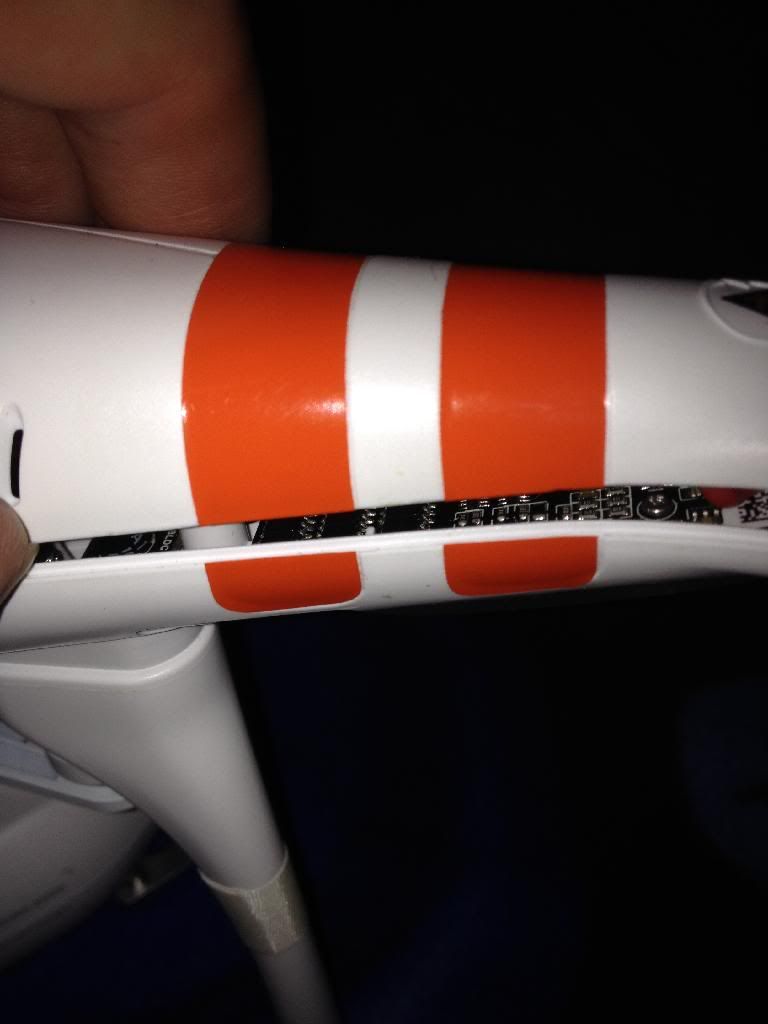
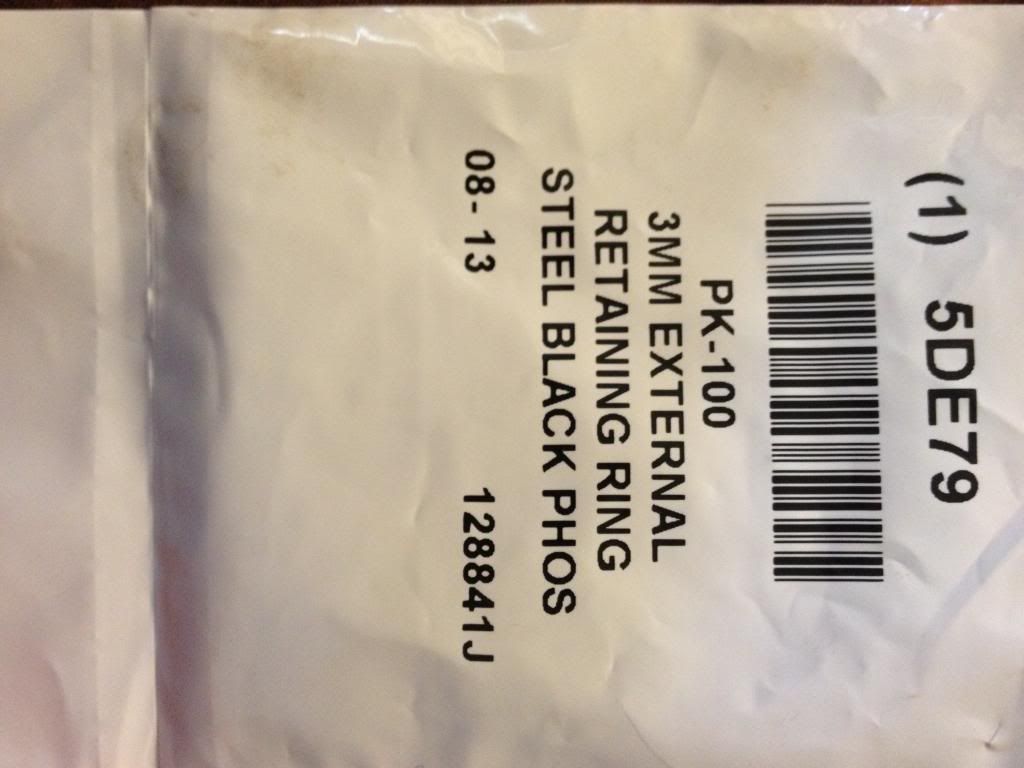
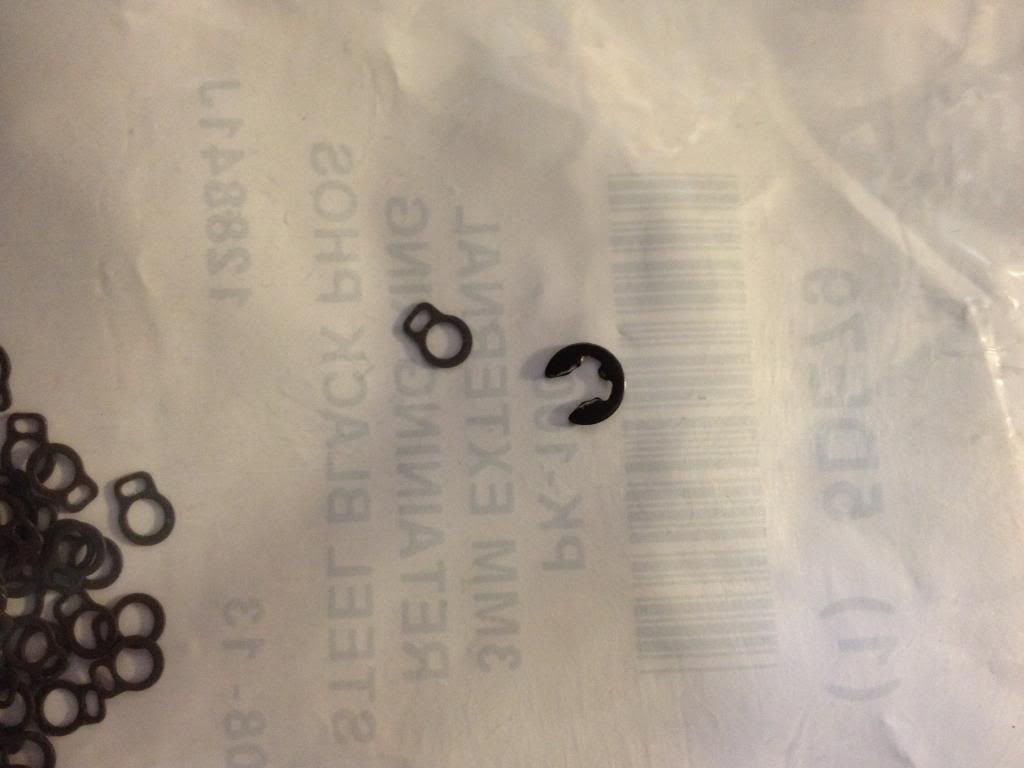
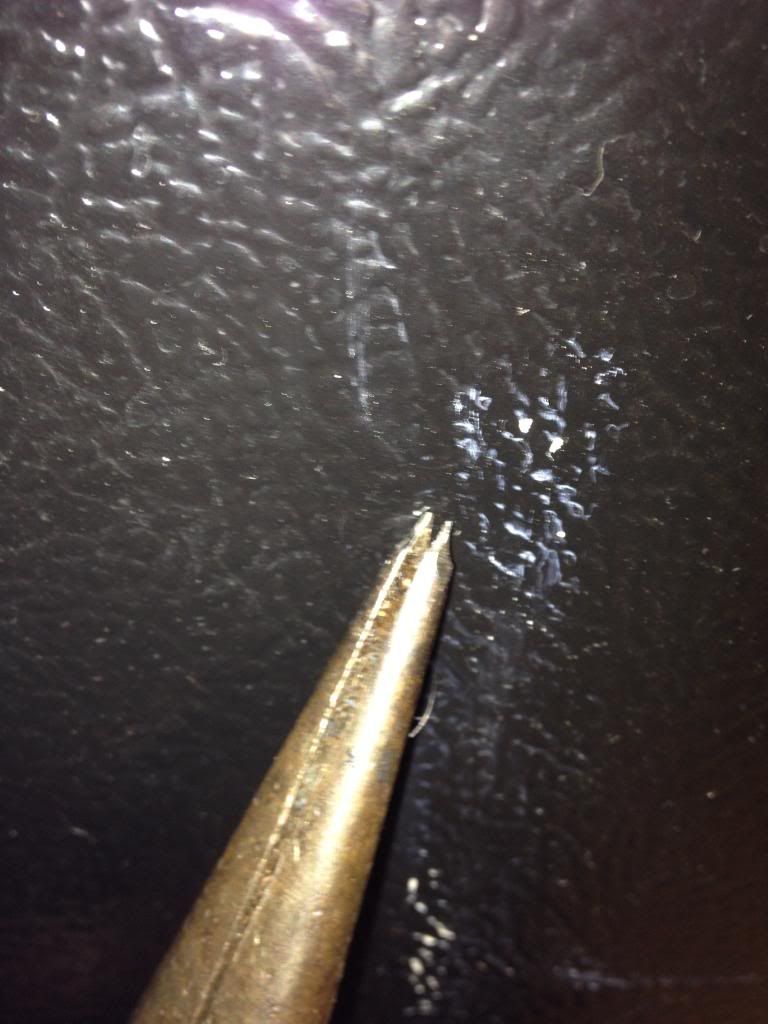
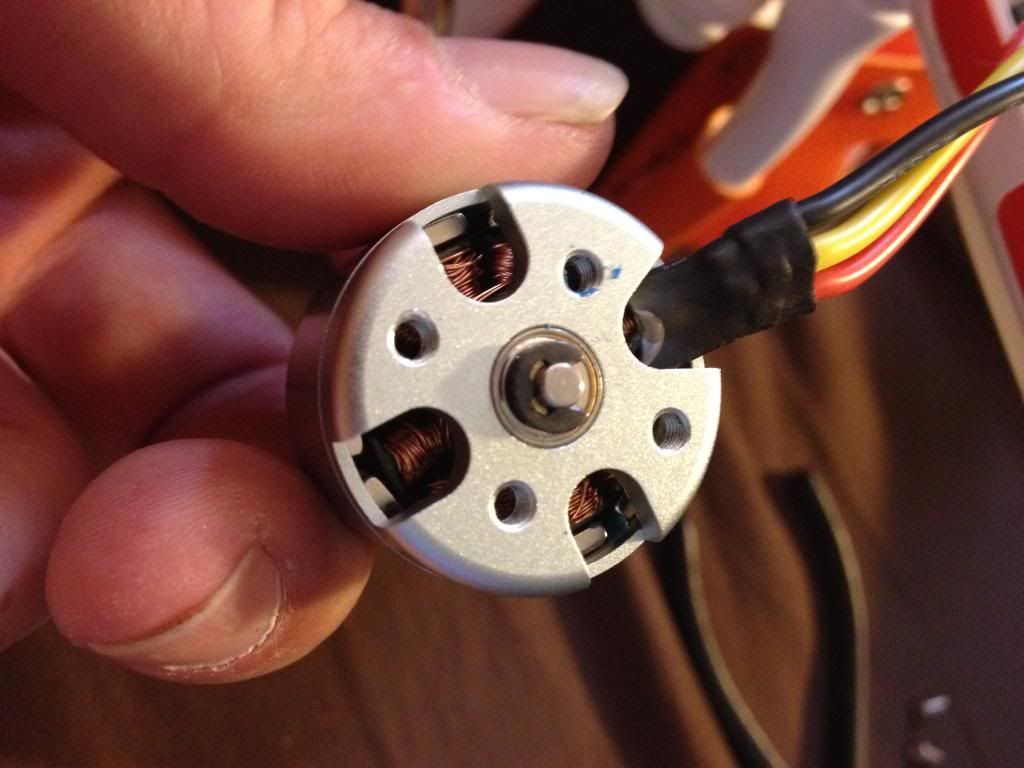
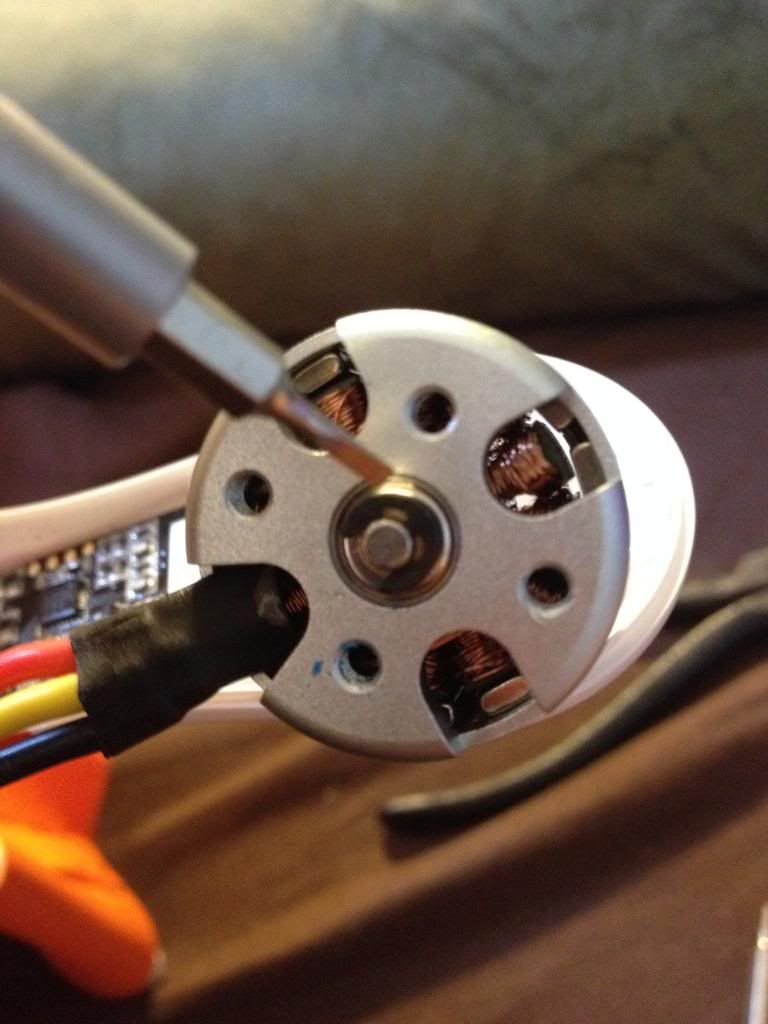
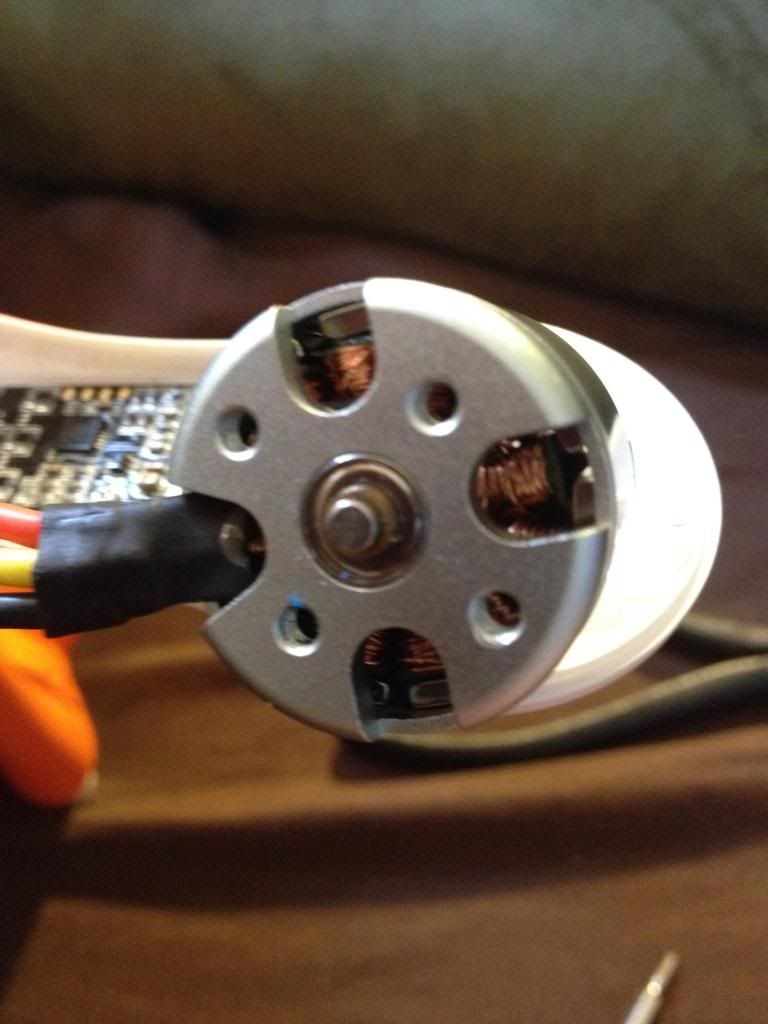
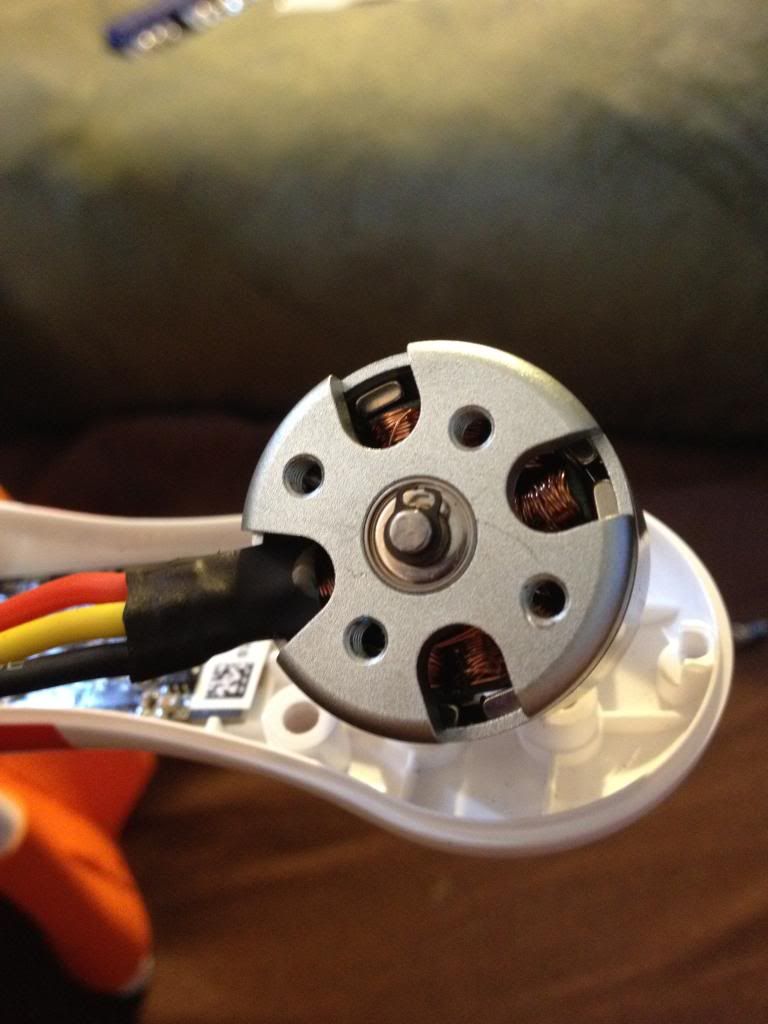
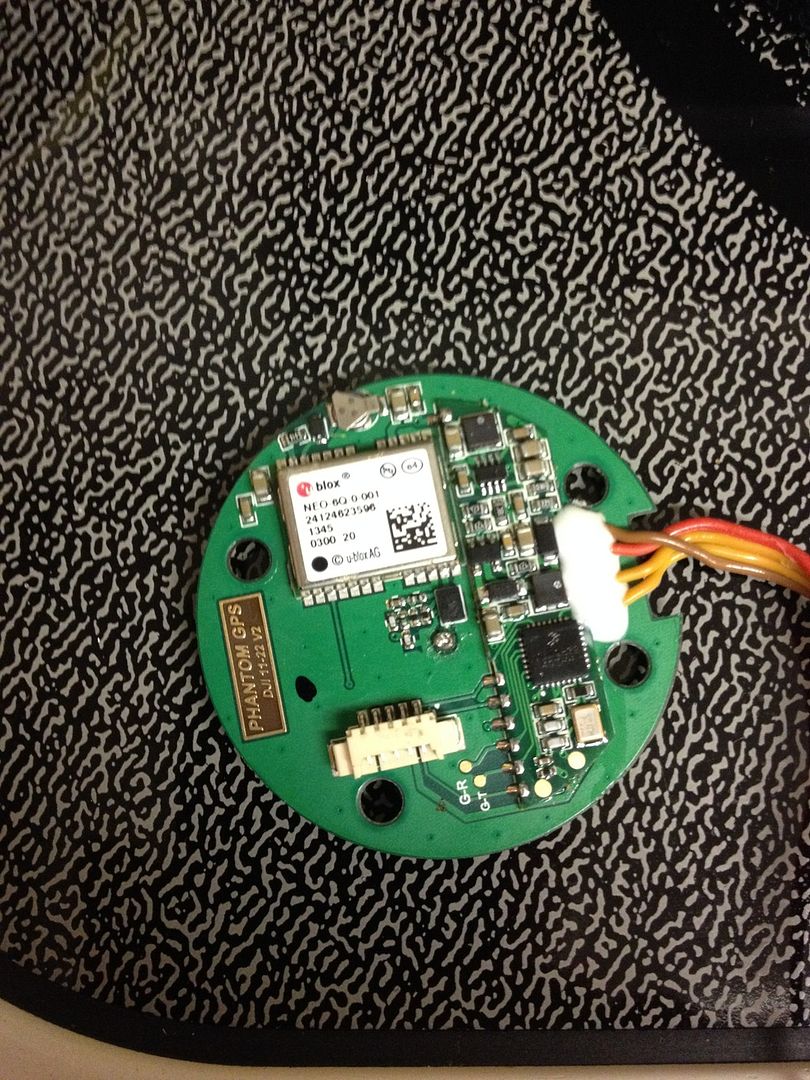
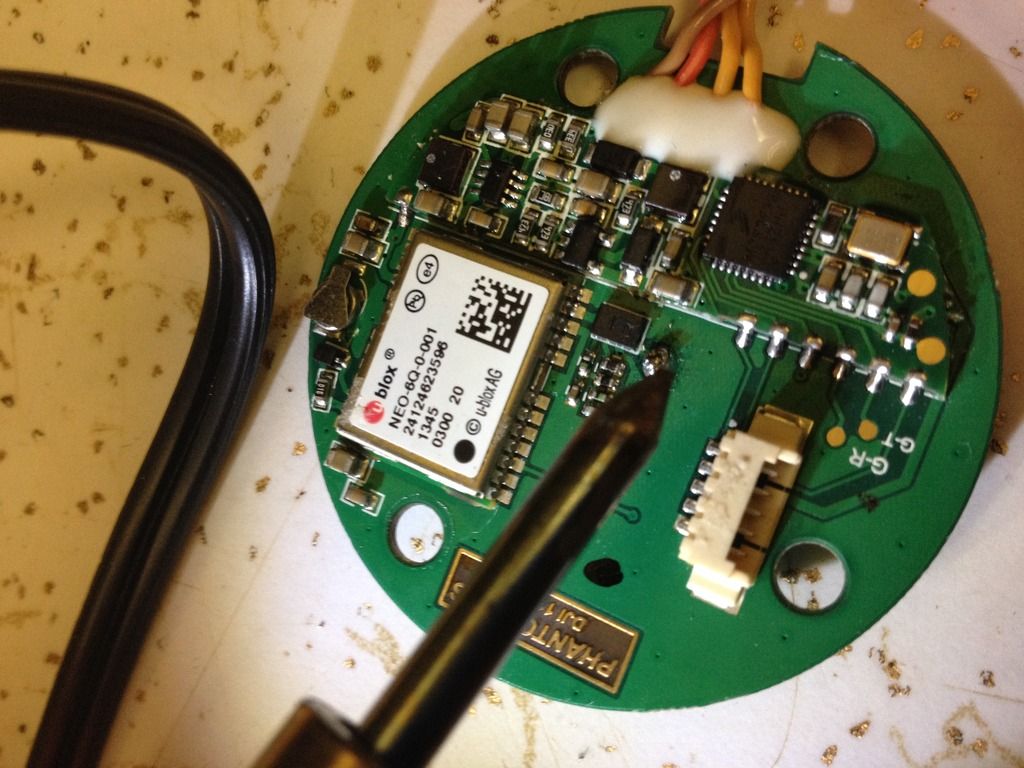
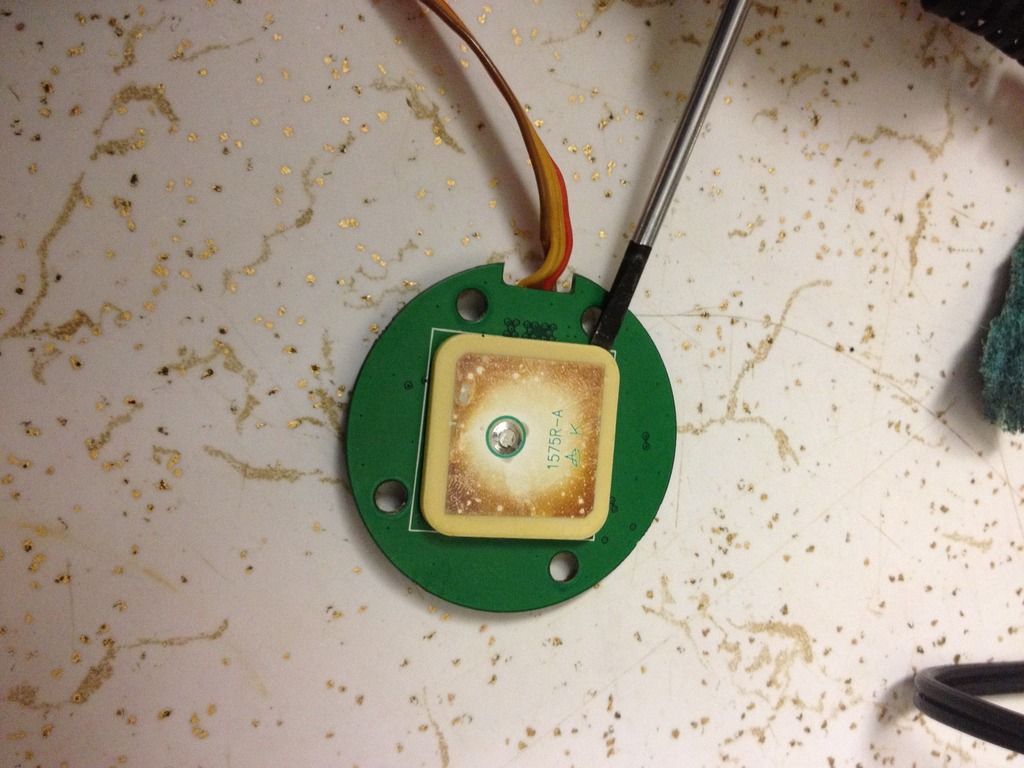
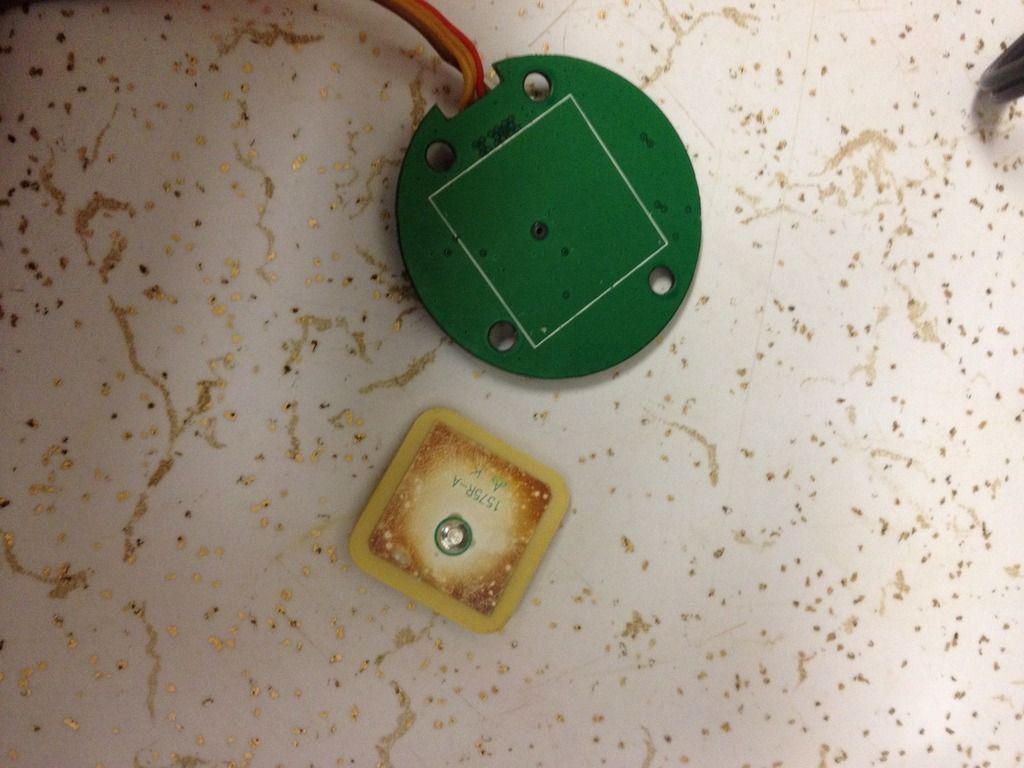
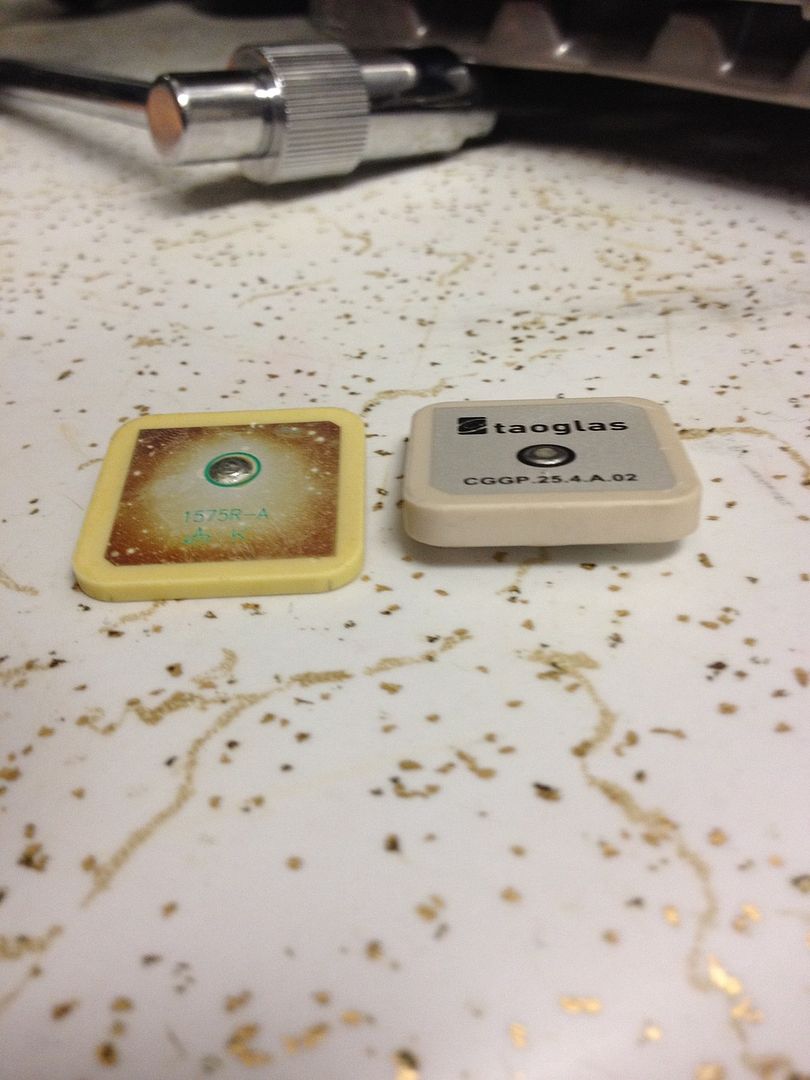
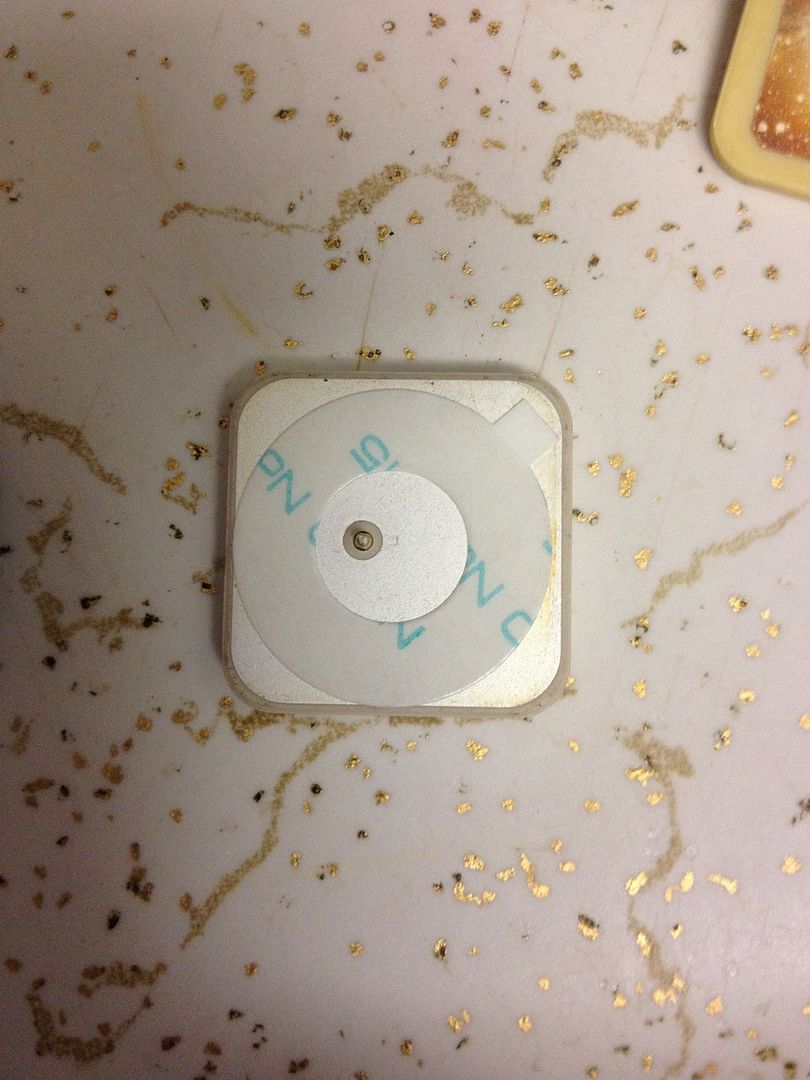
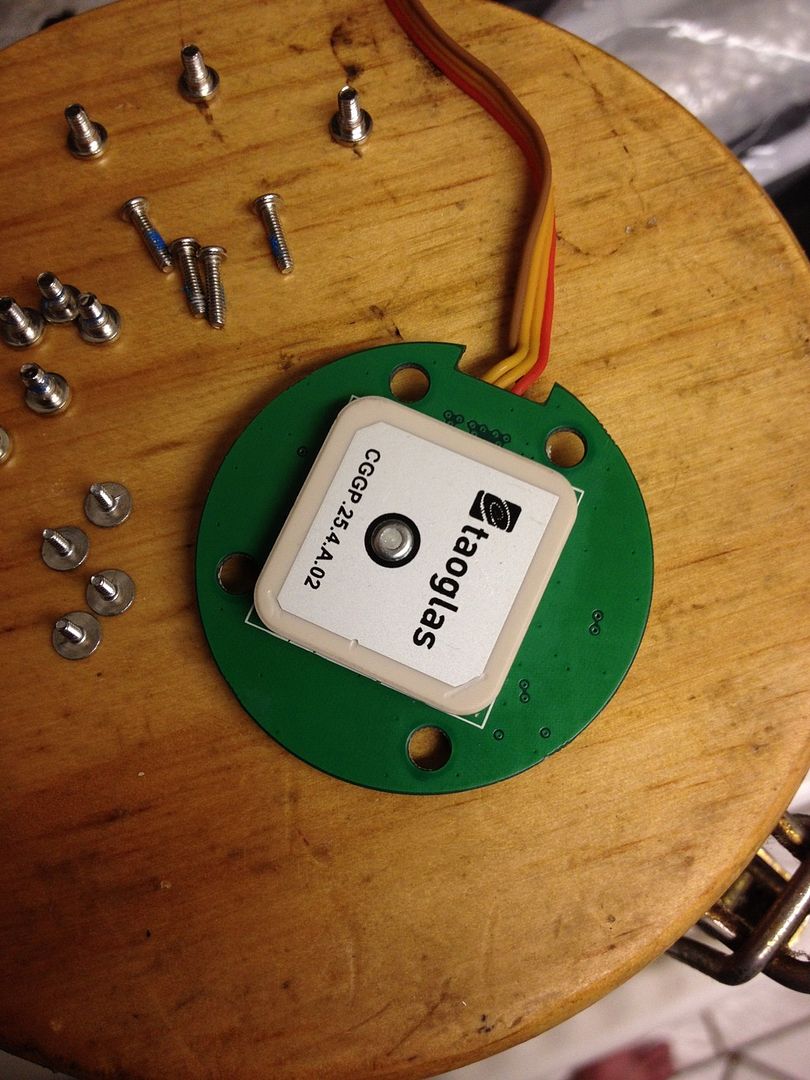
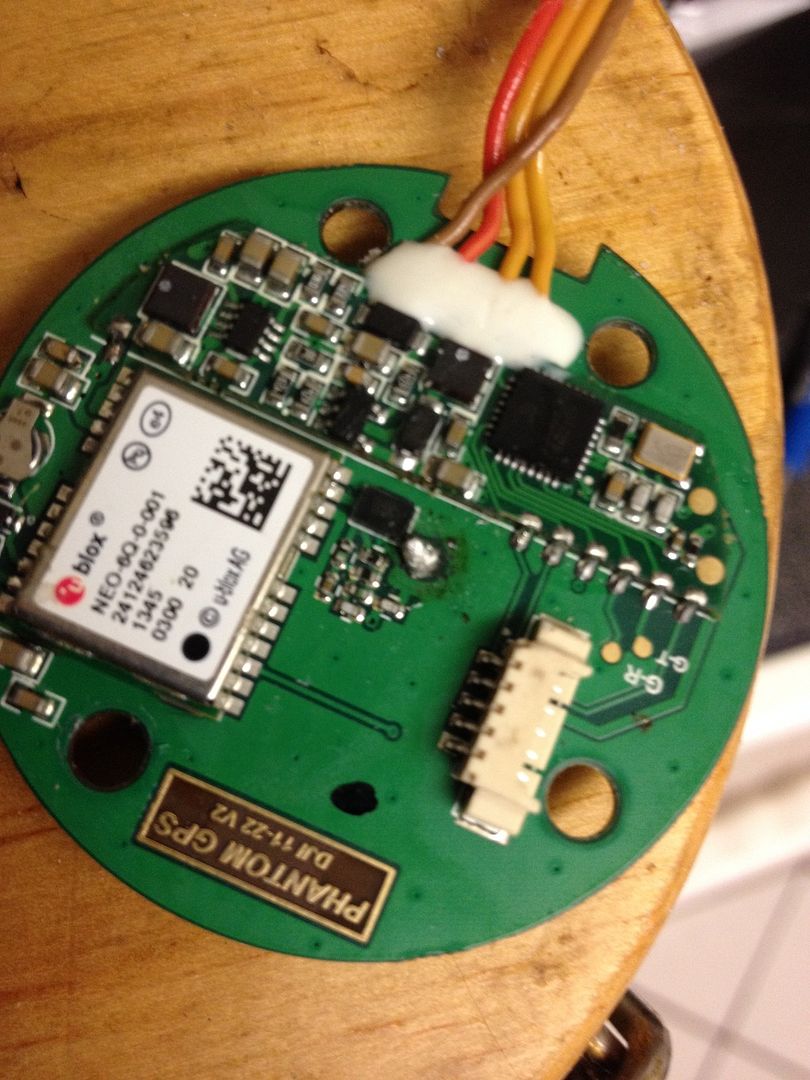
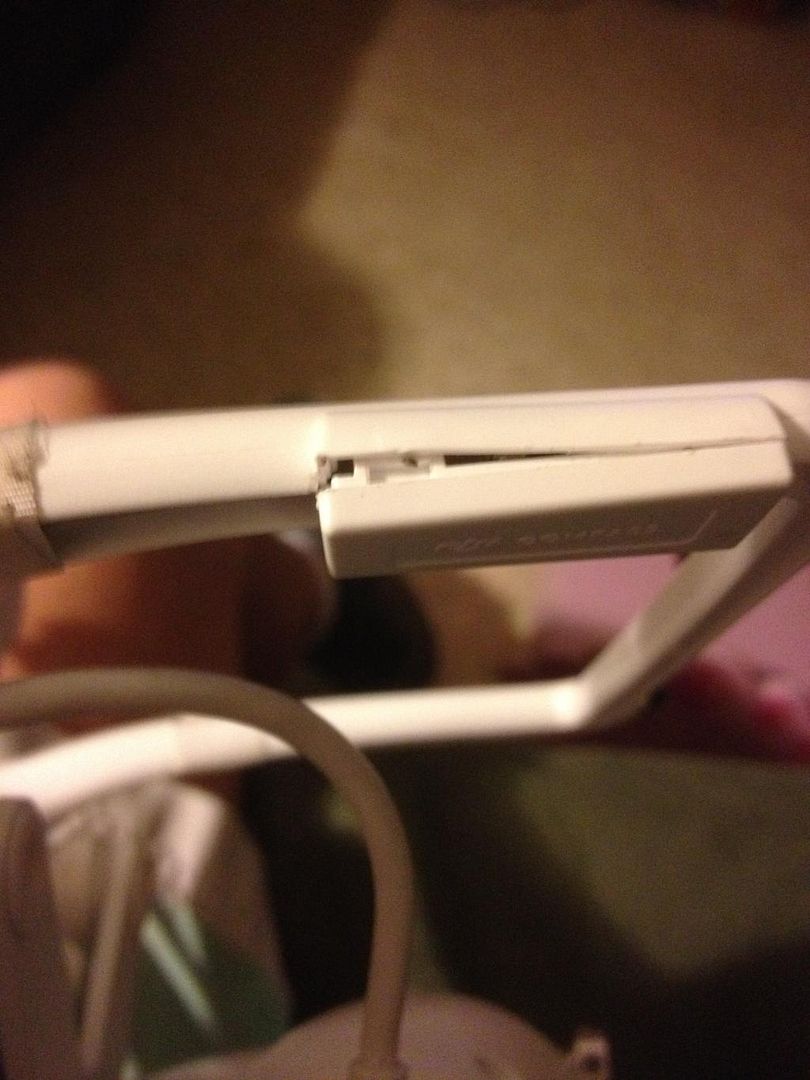
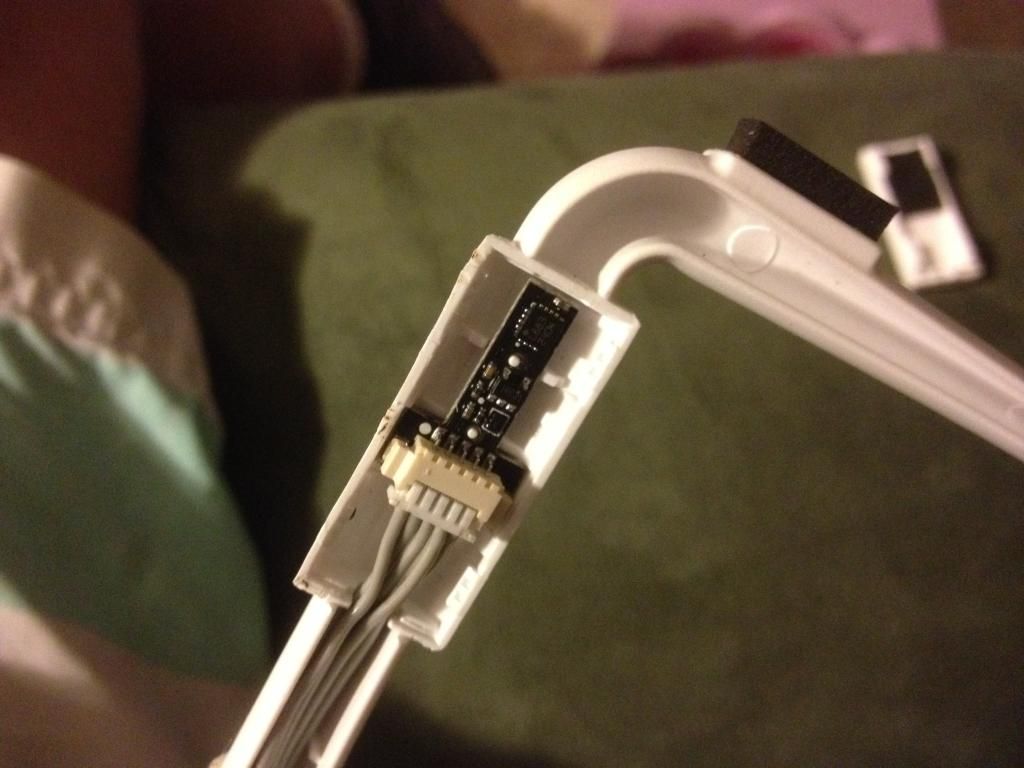
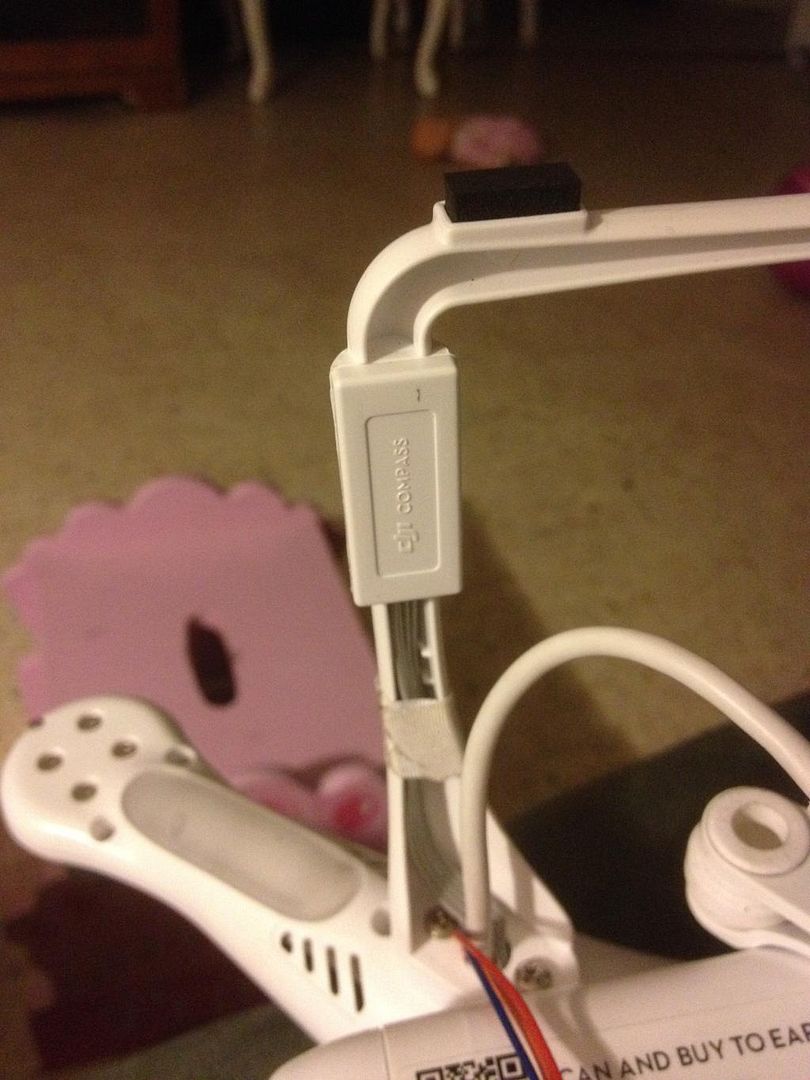
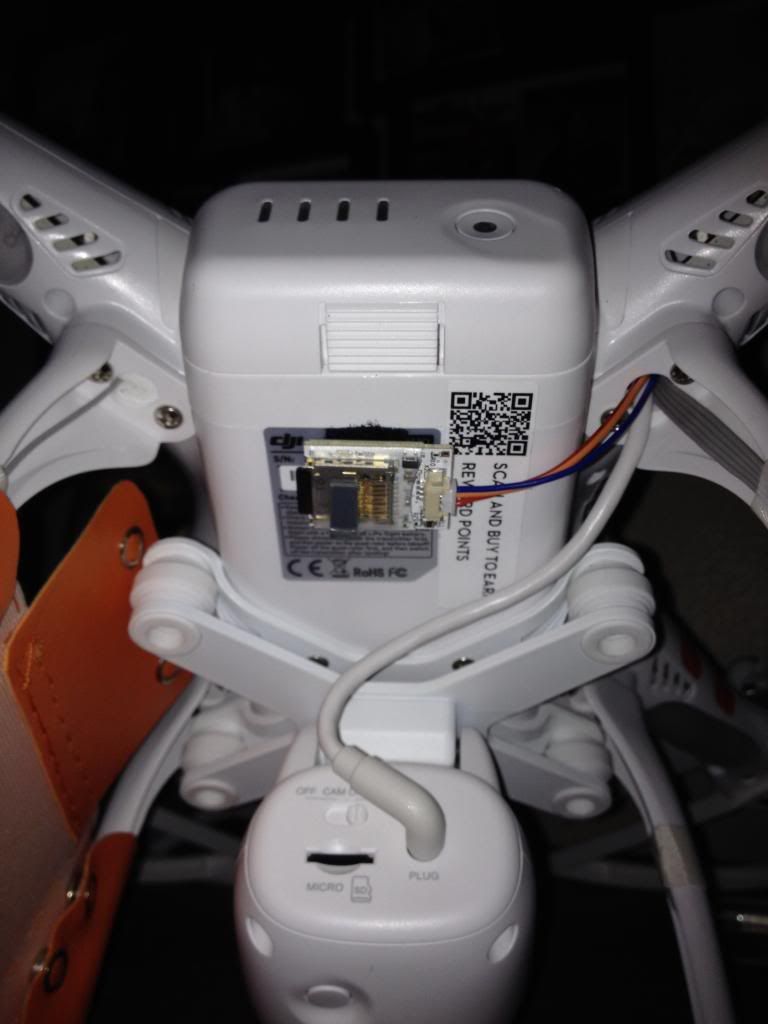
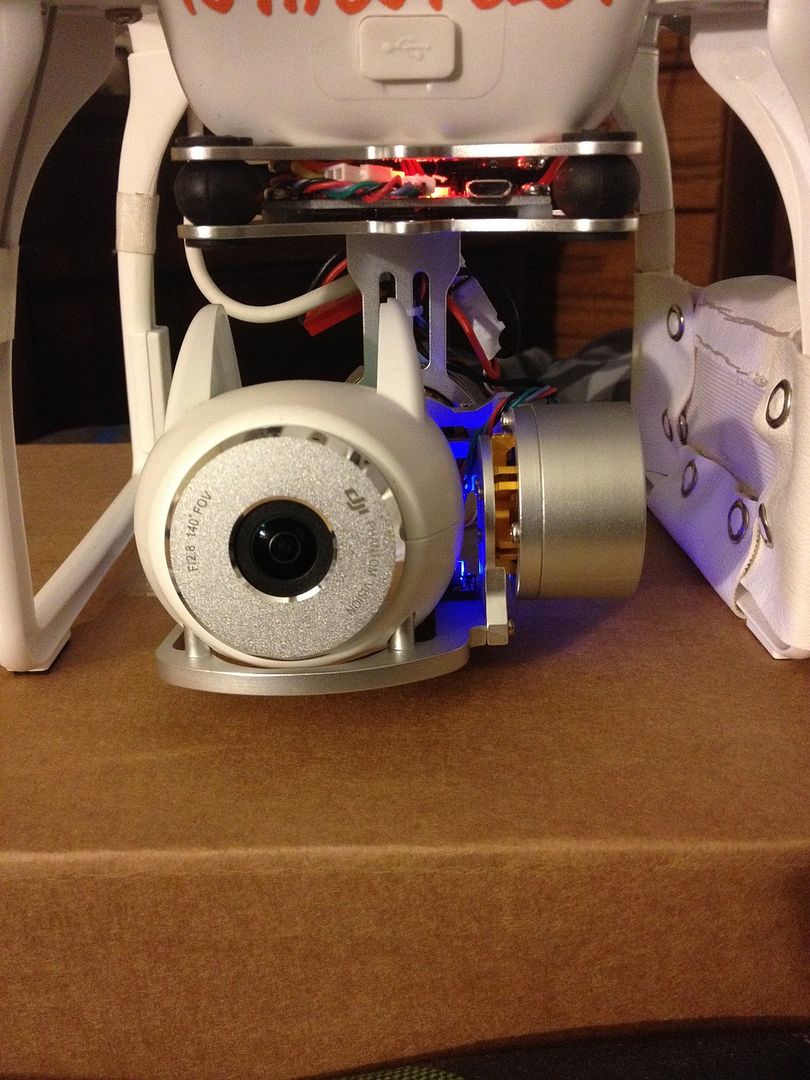
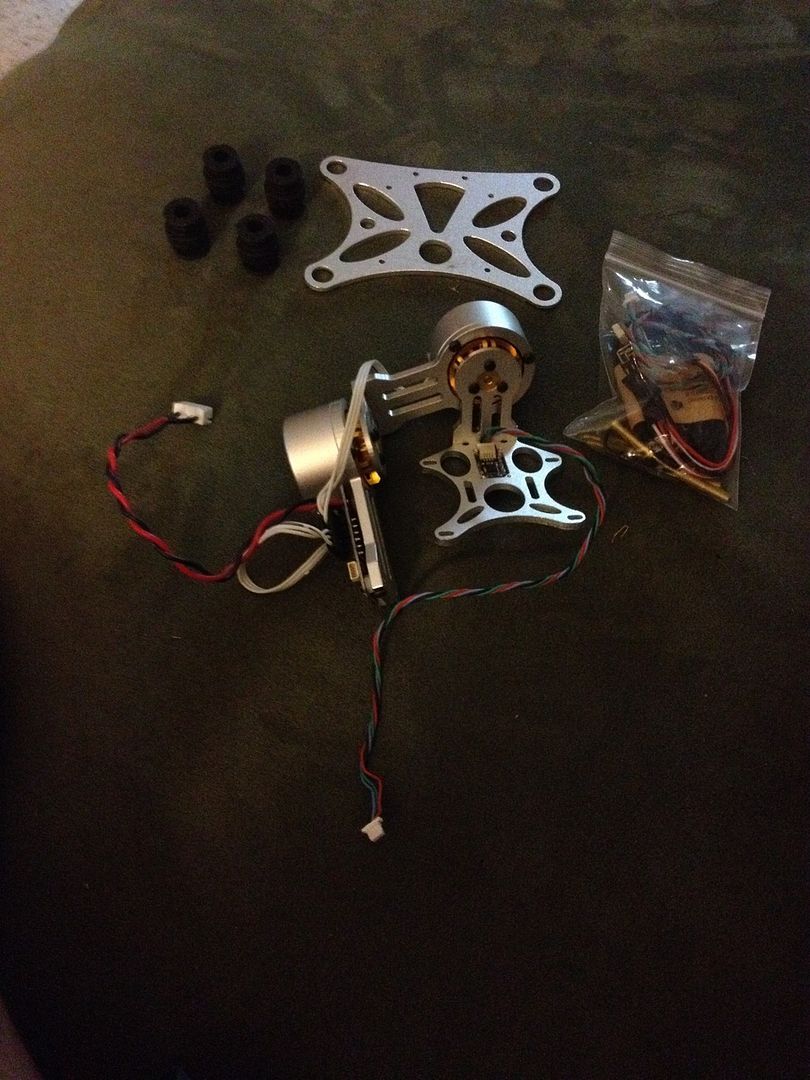
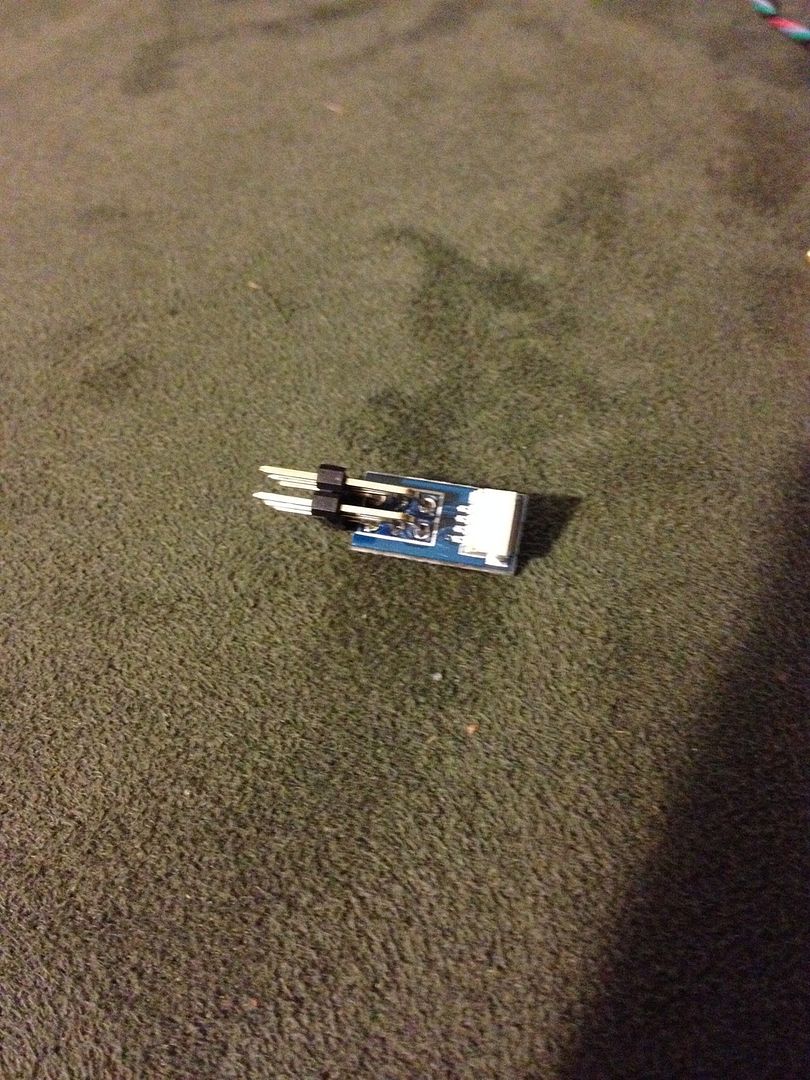
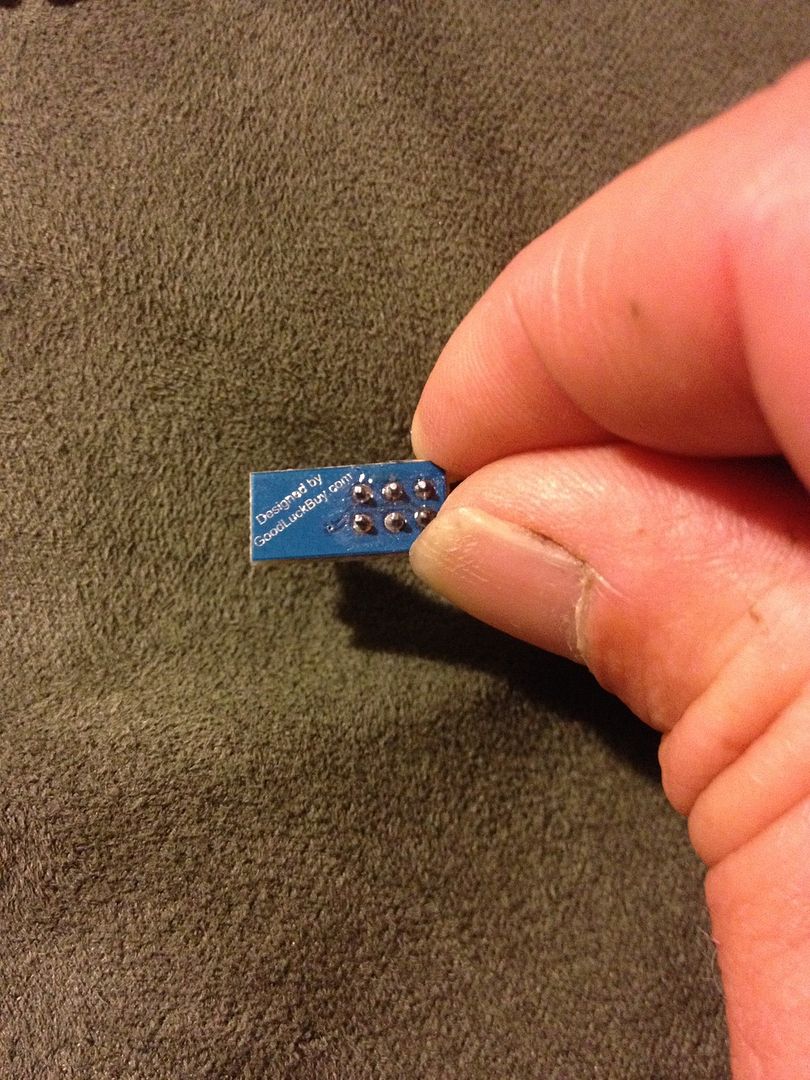
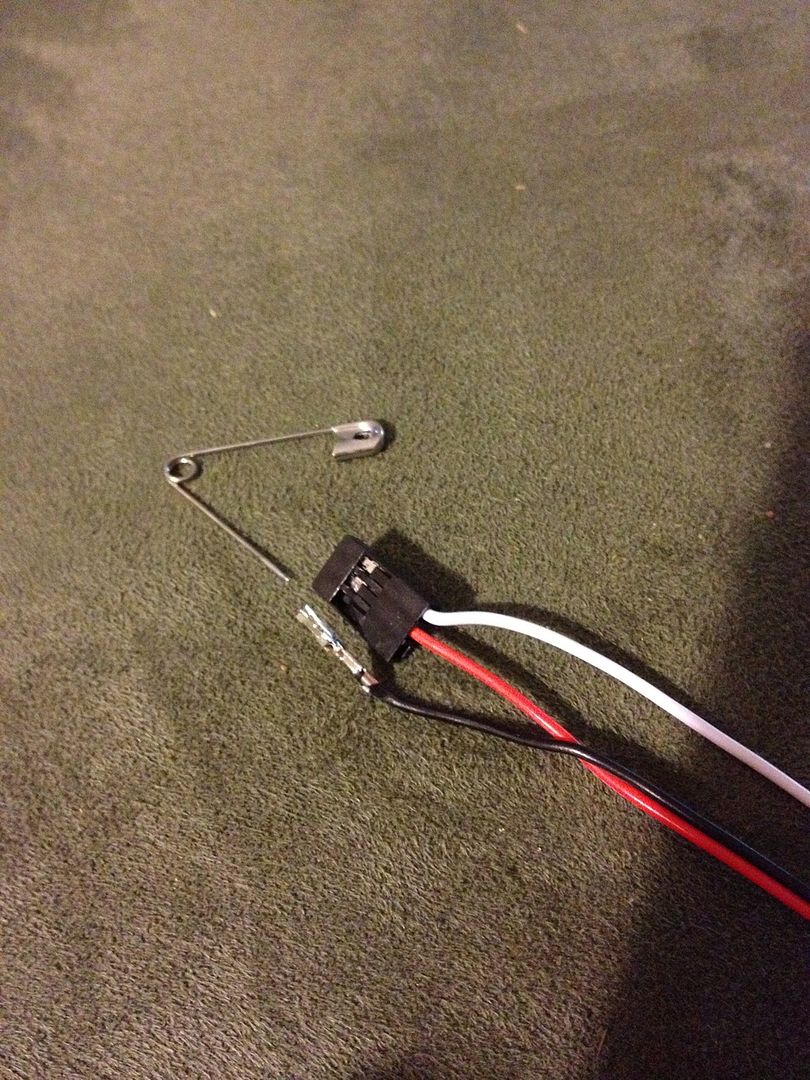
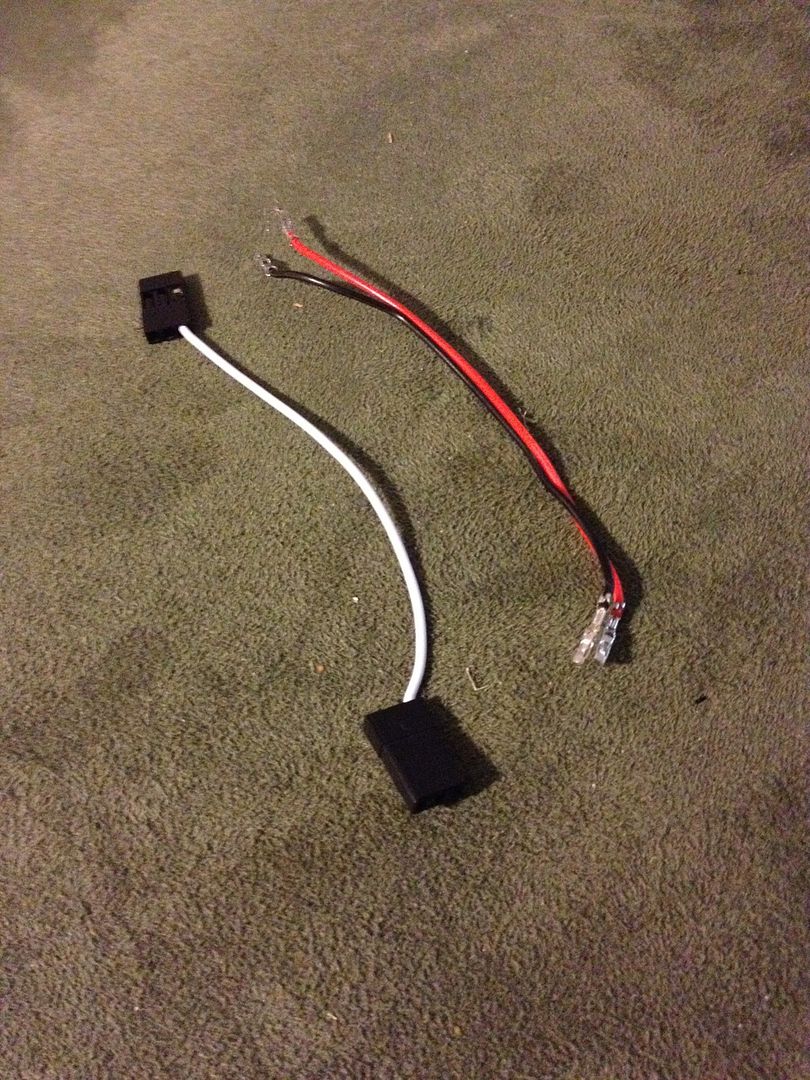
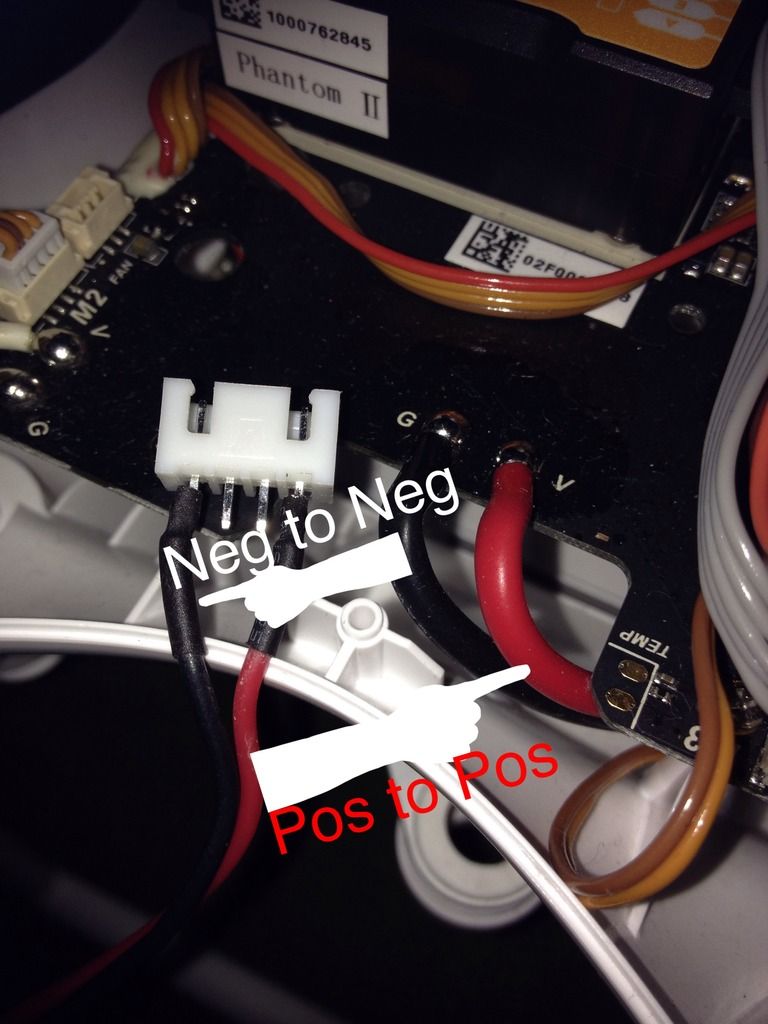
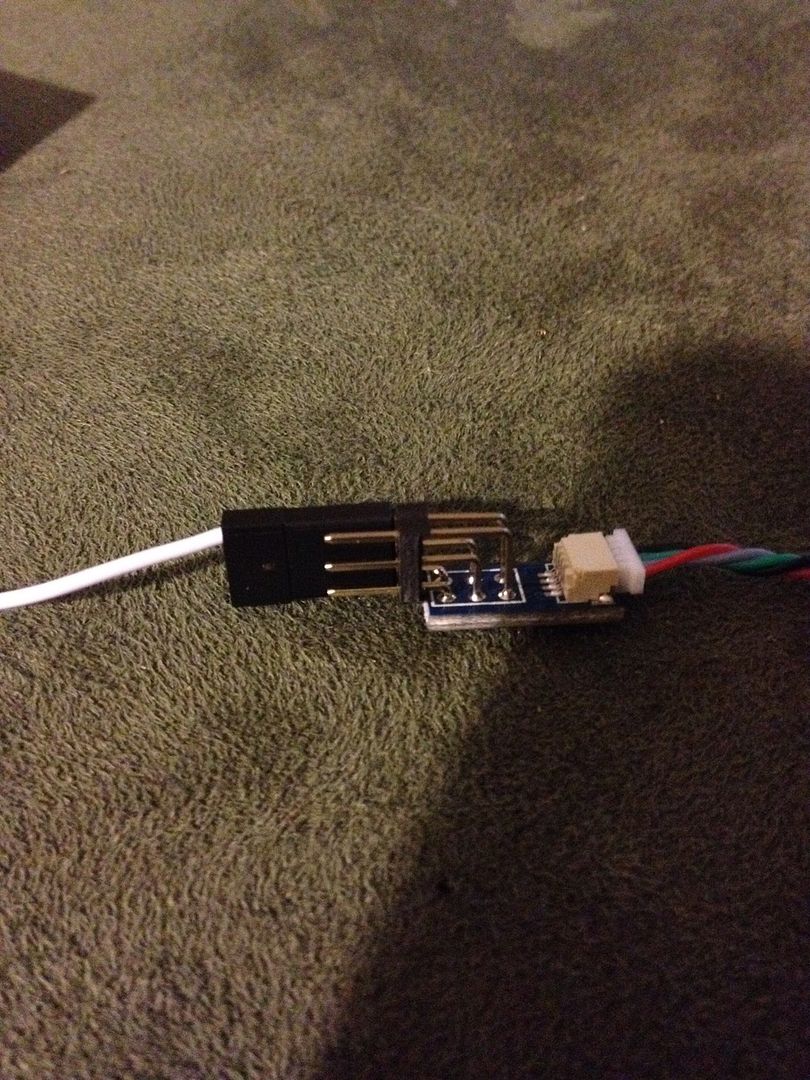
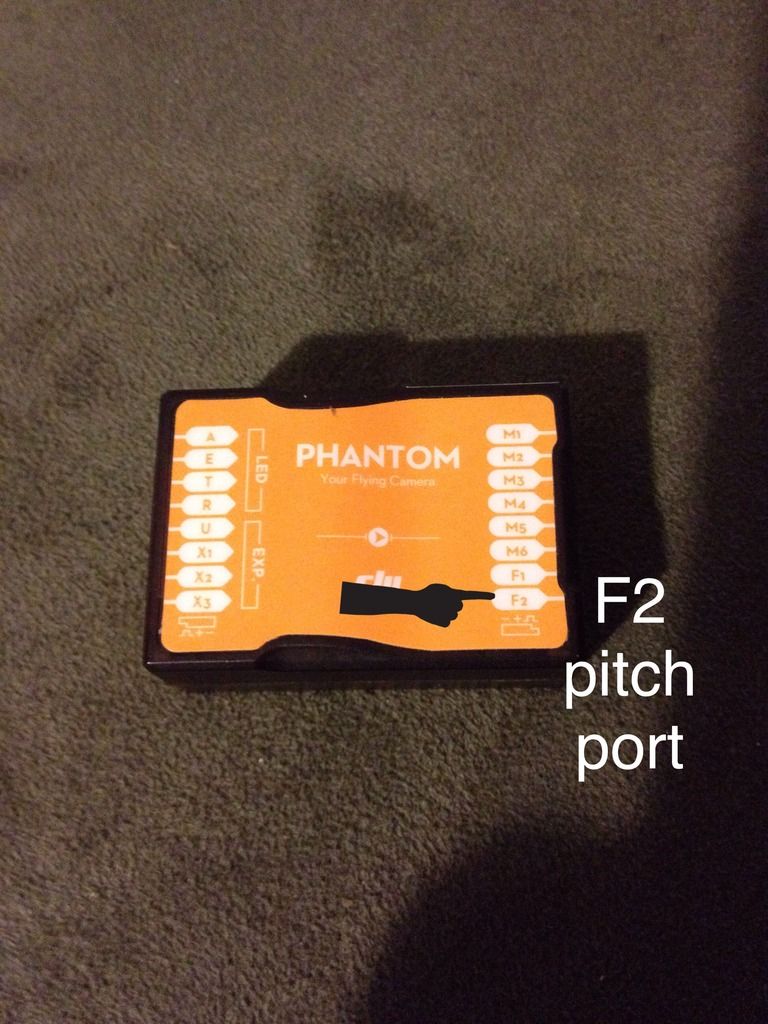
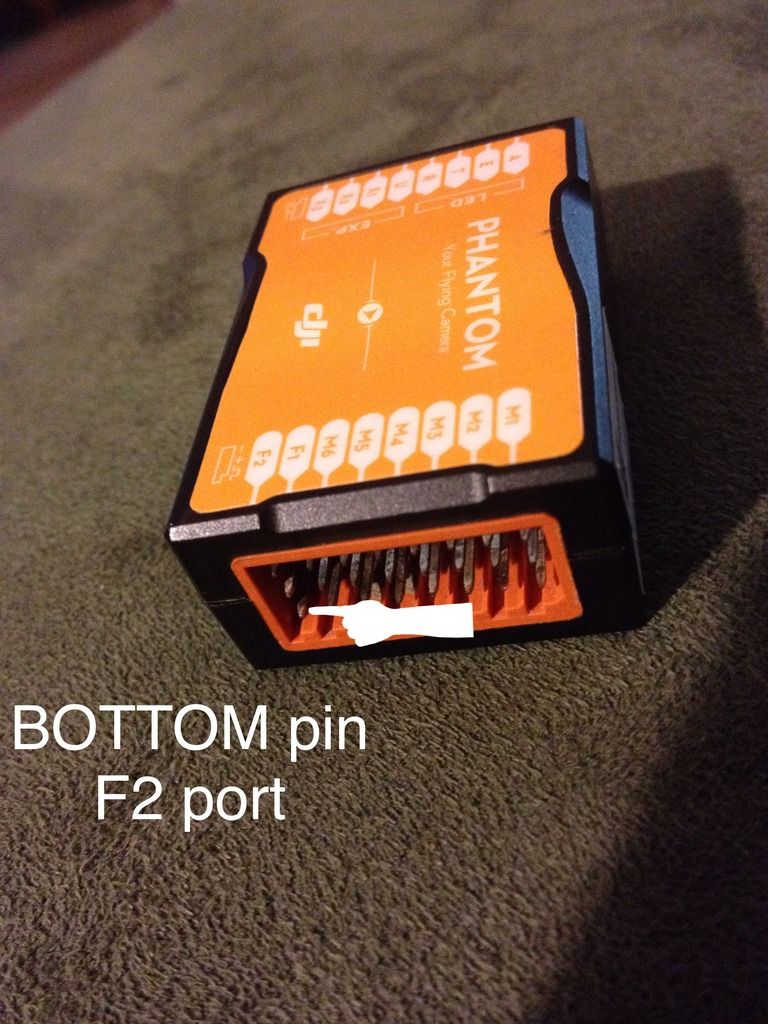
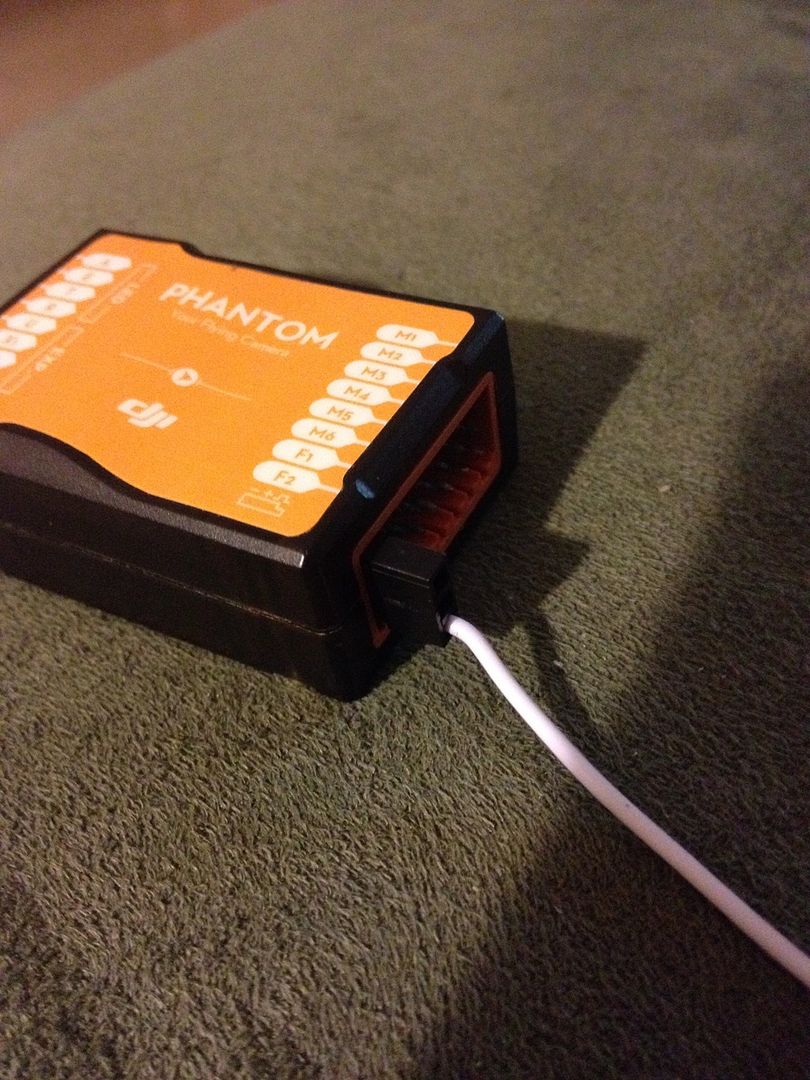
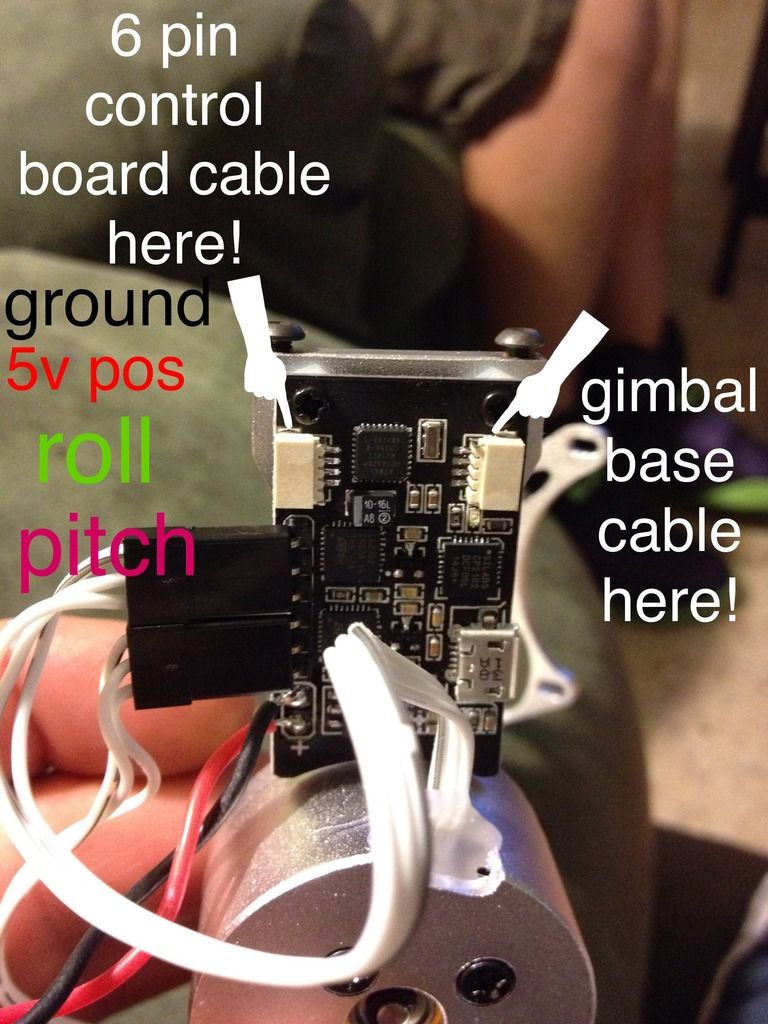
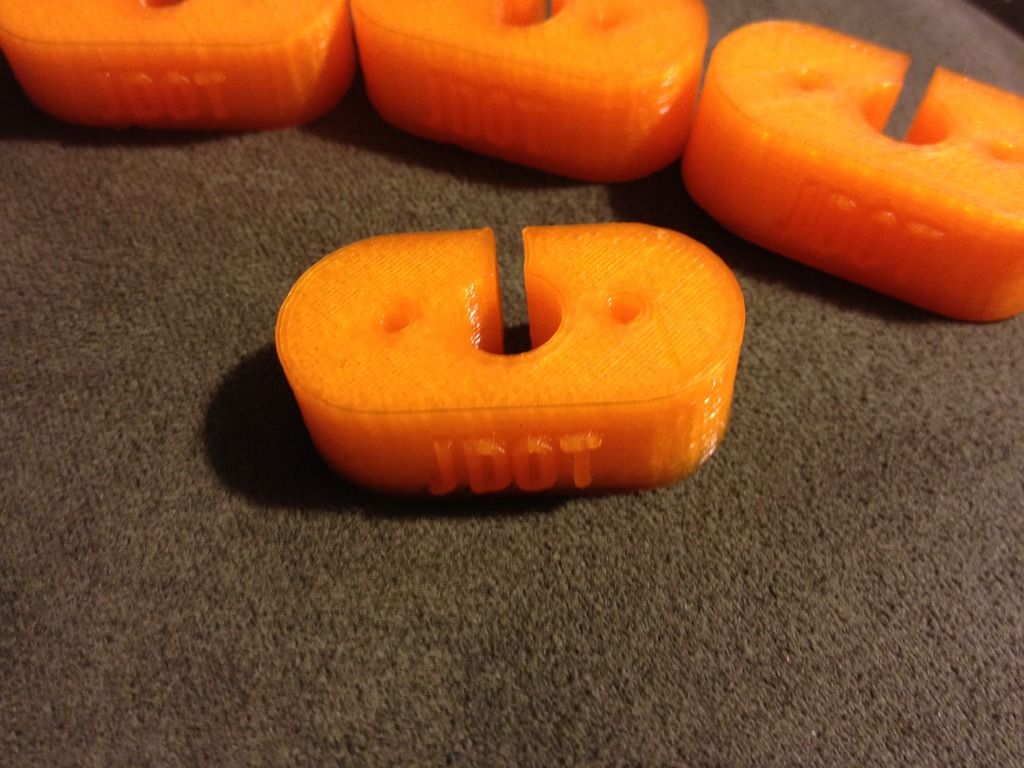
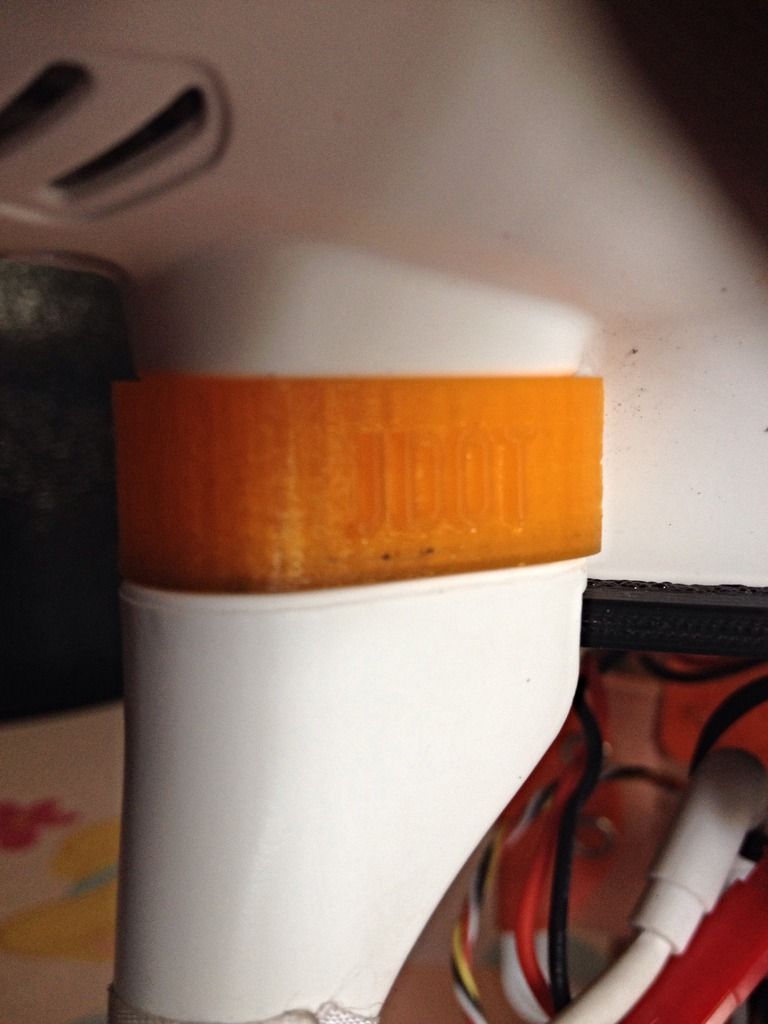
Here is a trick, most know to do this, but some may not? At one point you will need to open shell on phantom,
Here is a easy trick, to save headaches:
4A44B8D1-133A-41B1-924B-1DA44086492D_zps2fs1qgtw.jpg

63D265A7-409F-45C4-83E2-7817CB60A2E6_zpsbww9d1si.jpg

686BCEAD-4AA3-4B8D-AB92-BC191ECB3828_zpsk7ynezwr.jpg


Next
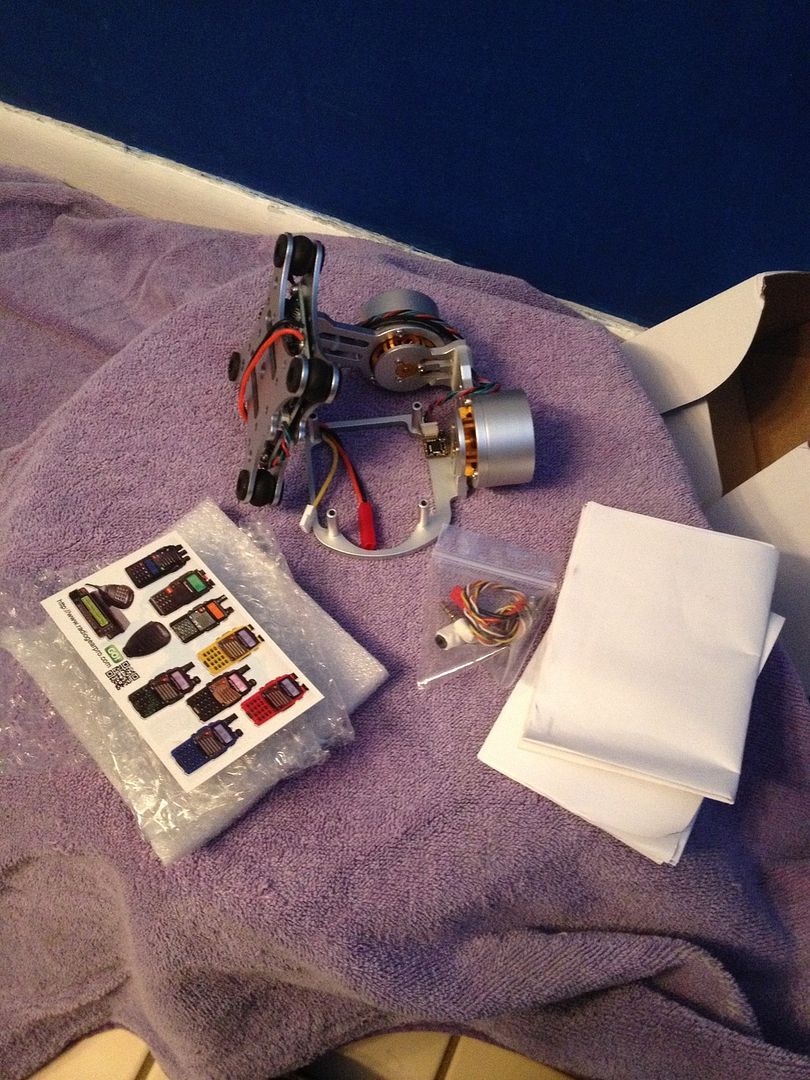
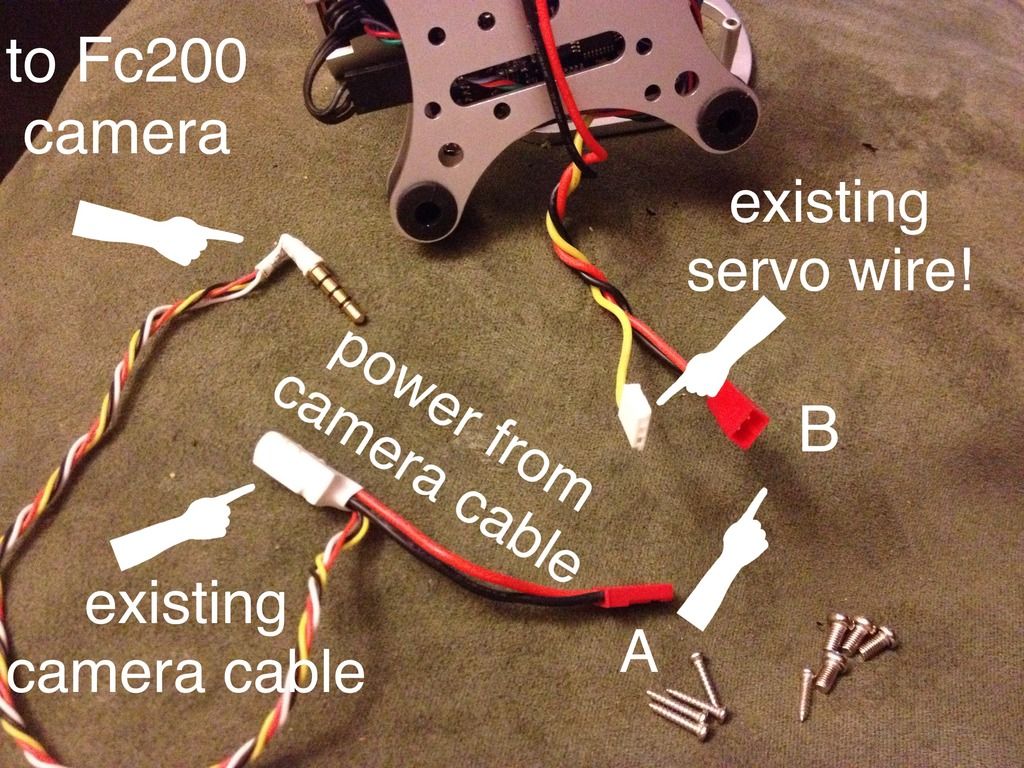
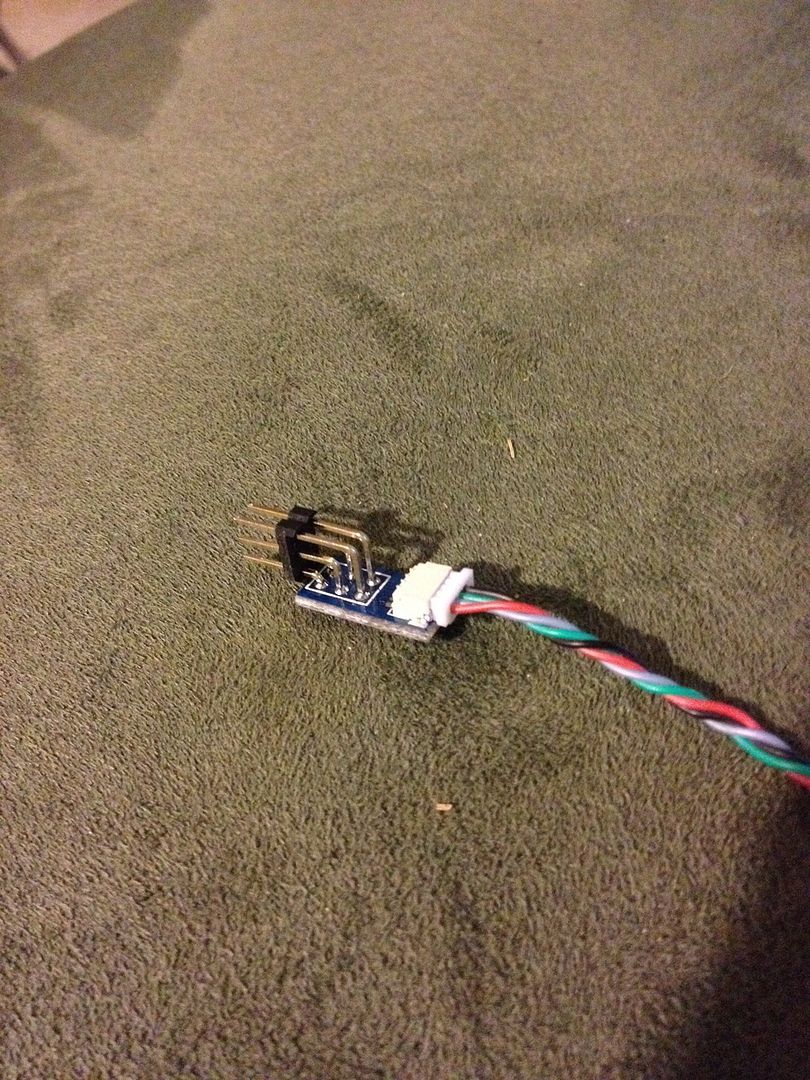
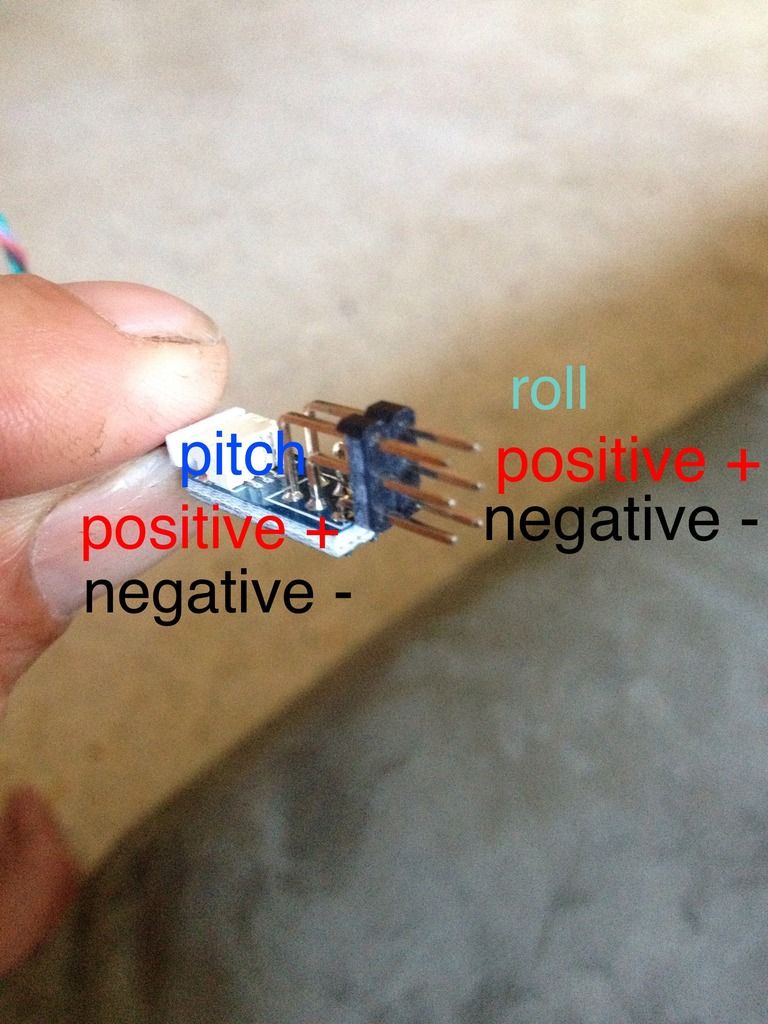
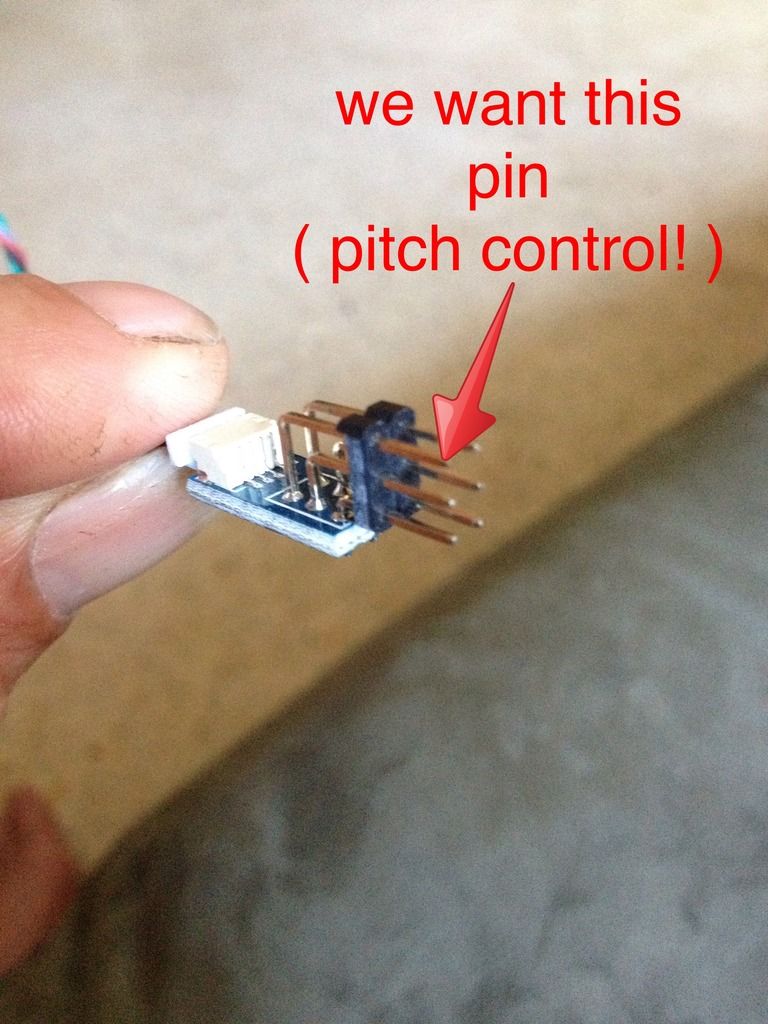
A fun little bolt on mod.
The dji lens filter kit, and lenses, this helps get a nicer shot, by changing different filters for your particular shot
Here it is installed:
92758B34-5E64-4D5E-A4B5-5BAC9CA120ED_zpsnjpazini.jpg

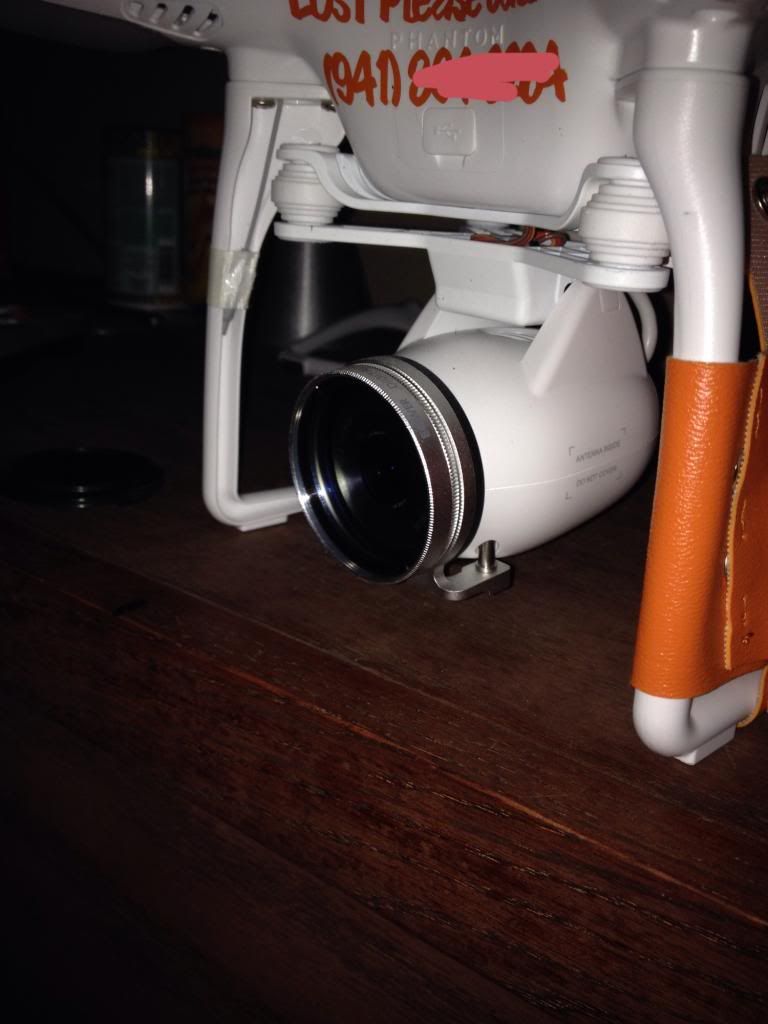
The lens kit I bought:
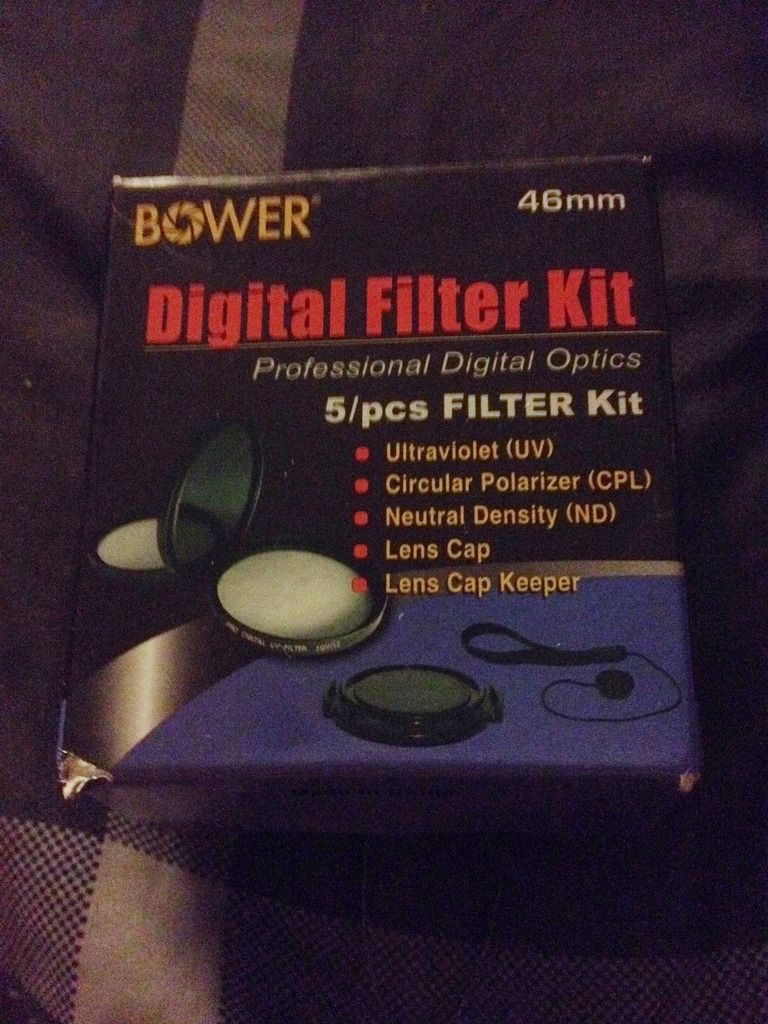
76FFEC60-DDC5-41A3-96AE-A05DF924DD00_zps0yxakj49.jpg

( 46mm lens )
( Both dji lens kit and filters can be bought on eBay )

This is part #1 of 5
Scroll down for other parts!

Take care,
J Dot
 
Last edited:
From here on out, use these mods if you want, or not, this is all stuff I did to my bird.

The first mod I did was the " E-clip " mod. Some of the earlier phantoms, were having issues with the motor clips coming off, and bouncing around inside, shorting things out, or seizing the motor, ect!

I did some research, and came up with this:
737C6C94-5825-4442-A492-5942540C3C7F_zpsgsaypogh.jpg

D2815A0F-11F2-4B30-910B-4E129C0E81B6_zpso1nxfh6y.jpg

I could not find a clip tool small enough, so I made one out of a needle nose pliers
4DA59E8A-0923-4FFF-93E9-2B703FC7EBCA_zpsgbjkzl8r.jpg

Here are the steps ( with motor removed from arm mount )
B060D777-4C6D-48E4-9FDB-669C8DBEBFD5_zpscyxth1h5.jpg

D367BB88-B82E-44D4-8758-87AFA22174B4_zpsld60o4m9.jpg

08BF0742-5495-41B6-BBA7-685675F42A6F_zpseor4om7i.jpg

EB485CEF-28BE-43DB-8A71-619DAC4A2F57_zps26qdf7wf.jpg

( I bought clips off eBay, but can be purchased at hardware store. )

Ok,
Next, thing on my list was the GPS issues, some of us face, due to location, and solar flares!
First we'll start with the GPS unit itself, it comes factory with a 2mm patch antenna pre installed, if we remove this patch antenna, and replace it with a Taoglas 4mm antenna, you will get a better, stronger GPS signal. ( I did not get MORE satellites, but did get a stronger lock ( locked indoors ) and much QUICKER lock, just a few seconds, where before mod, sometimes took 10 minutes to lock onto 6 satellites.)
Here are the pictures.
Old style GPS ( 2 port )
54338265-F97C-4919-9A3E-5D347062A90A_zpszp6blpel.jpg

Bottom view:
A9922CDF-DB05-4185-993F-C35E1E70A643_zpsslcr3pbb.jpg

De-solder here:
7FBCC317-A3DA-429D-93C6-5E81AB9CECC3_zpsbloonhvy.jpg

Take small flat screwdriver, pry up old patch antenna:
F3D2537A-8AAF-452B-9E8B-4711F1DFB669_zpsrcer2wmr.jpg

E704A5F0-9E8A-4A03-8BD1-A3D55CE289E1_zpsropeegue.jpg

New antenna ( 4mm ) compared to old 2mm
185049E3-6834-4AD6-A210-6F5A07608A1C_zpsoyinv6rq.jpg

Peel of tape guard
C54DB5A1-DCAD-407F-97A6-D44E6B1B0C07_zpsvjcsssjb.jpg

Put new antenna on like this
62434375-F454-498D-AF10-F2FC2F702223_zps1zuhuwzr.jpg

Solder back together
D8D71AF3-50AB-400D-92CD-4F09277E02AC_zpskidkivvx.jpg

Reinstall GPS unit, and done!
( antenna is:
Taoglas 4mm patch antenna, I bought at ( Mouser.com ) but can be bought else where.
Model # CGGP254a02
Mouser part # 960-CGGP254a02 )

Ok ( GPS continued )
After antenna mod, some pilots especially p2v+ users, complain about RF interference, messing up Satellite lock, some use tin foil, or copper tape, to shield GPS from this interference. ( problem is, it can void warrantee ) I found this online, works BEAUTIFULLY, went from 6-8 satellites, to 9-11 satellites after mod.
This thing just clips in, you can remove anytime, or reuse, and does not void warrantee!
Here are the pics:
45A6FAD1-7196-4DA5-A3DE-2E1B34EE09E1_zpsjzd4pkqj.jpg

Only found on eBay here ( I bought several )
http://pages.ebay.com/link/?nav=item.view&alt=web&id=251962229691

This is part #2 of 5
Scroll down for other parts!

Take care, Fly safe!
J Dot
 
Last edited:
Ok,
Since we're on GPS , let's talk about compass! If you have an older P2v version 2 or older, you have old style compass ( metal housing ). DJI has brought out a new ANTI-STATIC compass, you can upgrade to it!
There are a couple issues we need to tackle first!
1) if you upgrade compass to anti-static, you will have to ALSO upgrade your GPS unit.
( here is why )
Old GPS puck uses 2 ports, 1 for compass to hook to, other is for motherboard to hook to.
New GPS puck uses 1 port, to hook to motherboard, NO COMPASS HOOKUP! Compass must now hook to motherboard as well, but new compass and old GPS DONT WORK TOGETHER, hooked this way! And new compass cable is too short to hook to GPS puck! But new GPS and new compass DO work hooked this way!
2) I found a way to get new compass to work with old style GPS puck!
Like this:
BCA7586A-9318-46FC-BF3A-6A17991E194D_zpsskc3cuvy.jpg

17B33F3A-5A89-487E-A9E8-23A15EC93E62_zpsmcwuw1m3.jpg

Remove white wire, replace with stock compass grey wire like this:
38EB1EDF-5114-4B37-B788-22E00442FF92_zpseemubpn2.jpg

0CDB6A77-38B8-4963-AEE1-79FA9500AB95_zpszbb34gum.jpg

This way hooked to the GPS, works great, without buying new style GPS puck!
( p2v version is skinny landing gear, p2v+ version is wide landing gear )
Can be bought eBay, hobby shop!
If you decide to upgrade GPS as well, it can be bought eBay or hobby shop as well!

Ok,
Now let's talk about Flytrex! It is a black box ( so to say ) keeps a flight log of every flight, altitude, speed, flight path, ect! Very useful info it provides, and if used in conjunction with dash ware, or similar, you can create cool dashboards of your flight path with gauges showing speed , ect! A lot of fun! Plus you win badges, for breaking your own records, and such!
I use a Fltrex 2 core ( they now have ( live ) not gotten there yet!)
6DA8C7AF-F7E9-4C23-A1CE-32D983EE7F86_zpshhevilbb.jpg

2CE85700-4709-48FA-B294-18C85F56EE14_zpshq7cyogq.jpg

Can be bought through ( Flytrex.com )

Ok,
Next, is going to be GIMBAL, as you fly and get better, you start to want better, cleaner, more steady and stable videos, so only thing to do is upgrade gimbal, to 2-3 axis. I used a 2-axis gimbal designed for vision camera egg, it is ( Plug and play ) but I will also talk about non-plug-n-play gimbals as well!
1)
Plug-n-play CNC Gimbal for vision ( China gimbal ) around $90. Very nice gimbal. Comes with everything you need, takes about 10-15 minutes to install.
4D2141C6-3D46-4EE6-902C-D40E0E503514_zpswpujejlo.jpg

BAE0064D-3E6D-4CC8-8002-651660BF9234_zpsdwlxldms.jpg

9907F2F4-44D9-4D2A-A726-7AB37C79F808_zpssrmfue42.jpg

Can be bought eBay :
http://pages.ebay.com/link/?nav=item.view&alt=web&id=171777218300

This is part #3 of 5
Scroll for other parts!

Take care, Fly safe!
J Dot
 
Ok,
Now NON-plug and play gimbals:

2) regular China gimbal ( cast aluminum, much cheaper quality than CNC Gimbal ) plus HARDER to hook up!
I'll walk you through in pictures! How-to-install correctly without burnout!
3F85A165-5E46-4400-B748-BC2DD2D19F12_zpsm5jpycwn.jpg

Different parts to hook up
8E59FFE9-1AFD-4136-B899-ADCD68C553DA_zpsvm9eo5wg.jpg

05089F6F-DC85-44B5-B27B-651A73DF75DF_zpsfzsbcsg7.jpg

5AE5DABD-22D3-4BFF-81CC-6C501C4664B5_zpsxwtafw86.jpg

CD3C1467-120B-4BBD-976E-DD4493D3CB73_zpsozti5hjr.jpg

First we need to ( alter 1 cable ) to prevent BURNOUT! This is IMPORTANT!
Take a safety pin or similar, to alter plug like this ( as we only need 1 wire for pitch control ( WHITE WIRE ), and since we have a designated power source we don't need other 2 wires ( Pos. ( red ) & Neg. ( black ))
C7770072-0936-49CD-823F-B78534DBB6EE_zpsrpo2vway.jpg

We want to keep white wire only!
59C8CF48-8D73-43AF-8ACD-432F998C700C_zps8dlnoje4.jpg

How to get power:
You'll have to cut end and solder wires to phantom motherboard here:
( or use separate battery 3s )
D381B5FE-B673-4316-9D44-BEABF21F3192_zps2o5bf2xv.jpg

Now let's look at control board, need to plug wire in like this
88D24794-A51B-465E-A061-DD5303657363_zpsln3z83cd.jpg

Now let's look at pins and what they do!
5068C2D0-7ACA-4ACB-A869-280E7B693730_zpsuyb5kvrh.jpg

We only need 1 pin, this pin ( pitch control input.
A5F45C4B-2E77-44AA-A9AC-4095E3EF5AD4_zpsoyl2dax3.jpg

Now that wire we altered, hook it up like this ( make sure white wire, is on pitch pin )
E0B34C71-DC46-43E1-8193-048CBE21ABEB_zpsjuol0ylt.jpg

Since we are on this wire, let's look at where the other end hooks to naza flight controller.
We need to find F2 pitch port on naza m unit, it is here:
5544D8FB-CD31-49DA-9006-DBAF070CDF2E_zpsxwieoqro.jpg

We need the BOTTOM pin ( port pins go up-down ) top pin is Neg.( black ), middle pin is Pos.( red ) BOTTOM pin is pitch control, like this
68A66992-1412-4B3F-9516-BD621B691285_zps2irz76jk.jpg

Plug other end of white wire like this
ADB333D8-6E14-49A3-9C36-039CA6DB6276_zpst5dfsosv.jpg

Now let's talk about top gimbal control board, and the plugs.
B673C90B-BDD9-43E1-8EE5-ABD3CDF711D5_zpskltneiri.jpg

Now we need to connect the multi colored wire from control board to top gimbal control board like this, to complete pitch control circuit:
648EFB38-ADD8-4475-AE72-912BC806C7F6_zpsuijbklzo.jpg

Now let's look at lower gimbal control board and 2nd multicolored wire:
52F3902D-784C-45D5-8CF8-EC94A8680A7B_zpsj6vvakvi.jpg

This wire plugs here to top gimbal control board to complete gimbal stabilization circuit:
9EE7C5C0-FB6C-497D-9542-C7275EABBD39_zps8miwoemo.jpg

That completes the wiring part of the install, the rest is simple!
This gimbal can be bought through ( Banggood.com )

This is part #4 of 5
Scroll for last part!

Take care, Fly safe!
J Dot
 
Next
( some gimbals hang too far below stock phantom legs, and require leg spacers )
Leg spacer mod!
D0374D3C-4525-45B1-866D-F08A0C93E9DF_zpsrqkquzzk.jpg

Closer pic installed
E0577772-978A-4A4F-9AA1-EF722A4C2DCB_zpsy8kznrpp.jpg

0A37BC31-46C0-4C12-9DCD-3FE8EB210103_zpsuq7mt8o0.jpg

These can be purchased on eBay, or ( Shapeways.com )

Now,
Slow YAW mod!
We've upgraded our Gimbal, and have smooth, stable video, you'll notice, your bird YAW's a bit too fast, for smooth video, this next mod tackles this issue, by suppressing the voltage through your yaw stick, slowing speed of YAW ( spin )
By utilizing 10k resisters in line, you YAW speed will be reduced to ( close to ) 1/3 the original speed.
You'll need:
Matched pair ( 2 ) 10k resisters
Small gauge YELLOW wire ( 6 inches )
Small gauge BLACK wire ( 6 inches )
1/8" shrink tube ( black / yellow )
1 ( on-off ) dpdt switch ( double pole, double throw ) micro / mini switch
Soldering skills.
Here is a video:
To view this content we will need your consent to set third party cookies.
For more detailed information, see our cookies page.
( parts can be bought eBay, or circuitry shop ( radio shack, ect ))

Ok,
Some gimbals pitch very fast ( up-down ) this next mod tackles this issue,
Slow pitch mod:
Same as above, this time we need 2.2k resisters ( 2 )
On-off dpdt micro switch
Black / red wire
Black / red shrink tube 1/8"
Soldering skills
Here is the video:
To view this content we will need your consent to set third party cookies.
For more detailed information, see our cookies page.
( parts can be bought at circuitry store such as radio shack or alike )

SOUND MOD ( P2v )
This mod allows you to add SOUND, to your SILENT P2v videos, you'll need a USB recorder!
Here is the USB Voice recorder I used!
9CC518C9-5C11-4E51-B23E-813346F0A79B_zpsyod6xszs.gif


I found when using this, you need a point of reference when editing sound into video! I start my phantom 2 vision, wait for satellite lock, home lock, turn on recorder, start recording, then I CLAP 2 times, take off and fly!
When I land I stop recording, and shut off recorder! Now you can line up clap sounds with hands clapping in video, now they will be synced together! Here is my video!
To view this content we will need your consent to set third party cookies.
For more detailed information, see our cookies page.

Hope you like it, I bought my recorder on eBay, here is a link:
http://pages.ebay.com/link/?nav=item.view&alt=web&id=181632701910


Here are a couple TIPS:
When going flying always:
1) charge Tx batteries ( make sure you have fresh AA's installed )
2) charge repeater battery
3) charge smart device
4) charge all phantom batteries
5) charge tracker battery ( if you have one )
6) make sure your memory card is installed
7) carry extra memory card
8) carry extra props
9) carry small Allen wrench ( to remove lid )
10) carry small and medium Phillips
11) carry spare AA's if you have older Tx
( I have a field case, and keep these item in it at all times ) I also Cary extra Tx, and extra repeater ( re-500 ) normally use ( re-700 ). You never know what could happen, so be prepared for darn near anything!

This is part #5 of 5!
Thank you for the look!

Take care, Fly Safe!
J Dot
 
Last edited:
Nice one J Dot.

Do like your check list;)

6 & 7 I have already done:(:( that's not gonna happen again....
 
  • Like
Reactions: dirkclod and J Dot
clapping.gif
 
  • Like
Reactions: dirkclod
Can you please tell me where I can order those leg spacers thank you

Thanks Dirk,
Hello Markstoys, I cannot fin the guy who made them for me? He was on eBay, he offered whatever length ( in milimeters ) and whatever wording you want up to 10 letters ( I believe ) he could do 5 letters on 2 lines ( 10 total ) I'm on an iPhone, and it won't let me search history, so I'm going to bust out the old laptop, and see if I can track him down for you.

J Dot
 
  • Like
Reactions: dirkclod
You've put a LOT of time and effort into this thread and I personally appreciate it!

I also appreciate having a V3 P2V!
 
  • Like
Reactions: J Dot and dirkclod
good info...
 
  • Like
Reactions: J Dot

Recent Posts

Members online

Forum statistics

Threads
143,066
Messages
1,467,352
Members
104,933
Latest member
mactechnic