After a crash, my H3-2D gimbal no long points forward. It moves 90 degrees, but from -30 downward to -120. I have calibrated the RC controller and tried calibrating the gimbal with Phantom Assistant, but Phantom Assistant can't connect or calibrate gimbal.
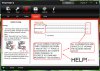
As shown in the screen shot, the gimbal parameters are grayed out. Got any ideas?
As shown in the screen shot, the gimbal parameters are grayed out. Got any ideas?