Re: Video: Fitted my Phantom v1 into a Phantom 2 shell (easy
gen3benz said:
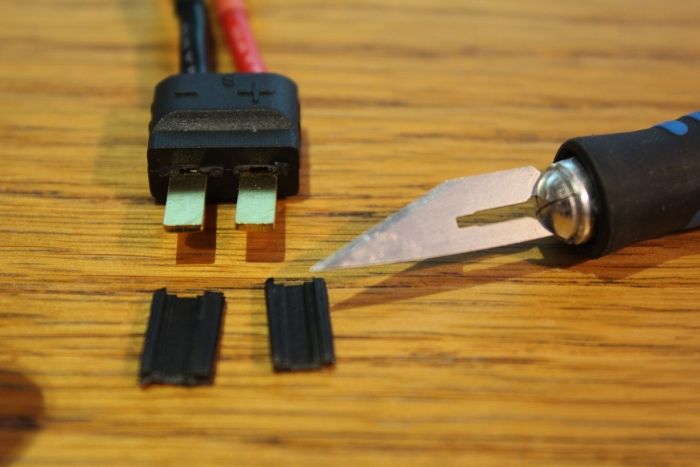
Traxxas female plug

Maybe I will get one of these and cut off my xt60 PITA(pain in the ***) plug off and shove it onto the P2 plug.
Way ahead of you there... although I should note that on my initial inspection all is not quite as comfy as it seemed! (well there is a surprise hey!).
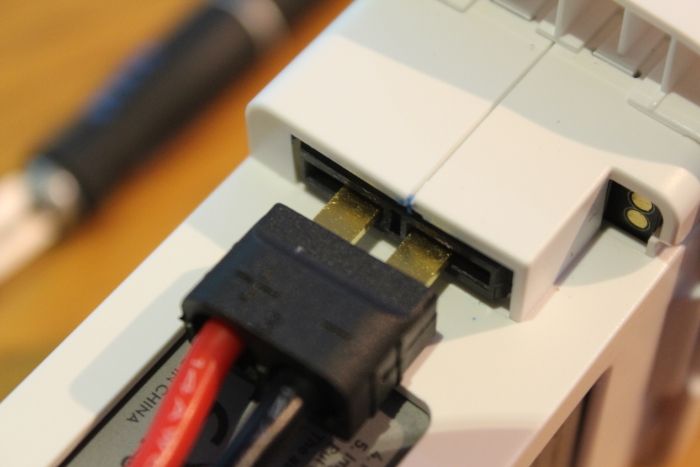
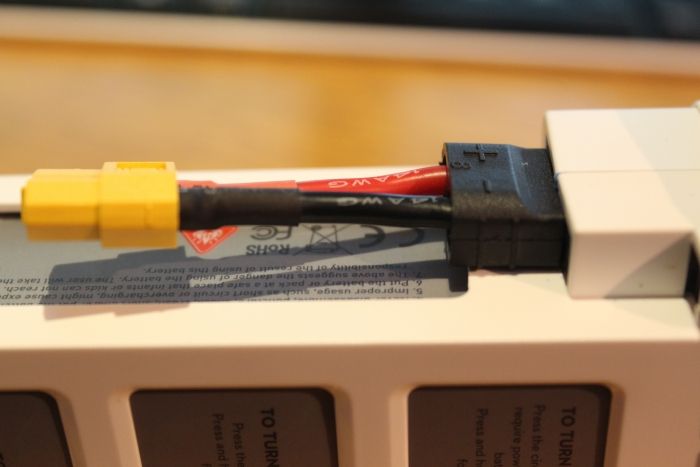
Because I bourgt a female Traxx --> Xt60 (as per above pic) as well as a Male one, I decided to remove my Phantom's XT60 plug and use the male Traxx one full time. It is about the same weight but it makes fitting the P2 battery soooo much easier to fit... or so I thought. If I want to use a standard Lipo I can simply use the Female Traxx --> XT60 adapter on the battery.
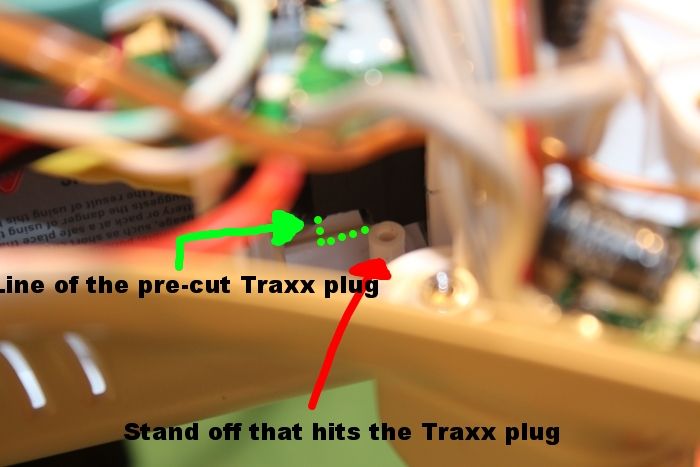
What I found (after i'd soldered it of course :roll: ) was that the lower standout screw hole (for the P2 Internal power supply) impacted the lower edge of the Traxx.
To combat this I got the the craft knife out and chopped the lower edge down a bit. This worked fine.
Next thing I found was that the loose wire kept snaging and pinching on these standoffs.... to compat this I used a long length of heat shrink. I pushed the wires together to form a slight upward angle. Idea being that the angle/heatshrink (like my other attempts) would impact the standoffs and slide up them (rather than snagging).
Lets see the pictures to explain.... not easy ones to take I can assure you!
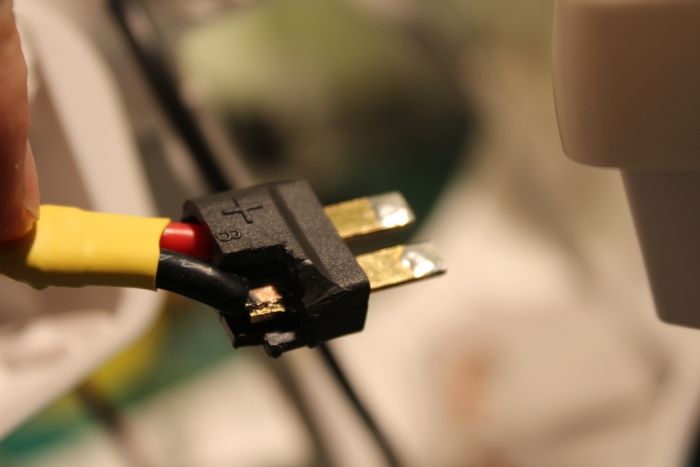
This is what i stripped back. Structure is fine and I could have added some heat shrink to the terminal (had I remembered to do so!). You will also notice the solder blobbed tips. This grips inside the P2 batter connecter much tighter now... a nice way to contol how tight it is!
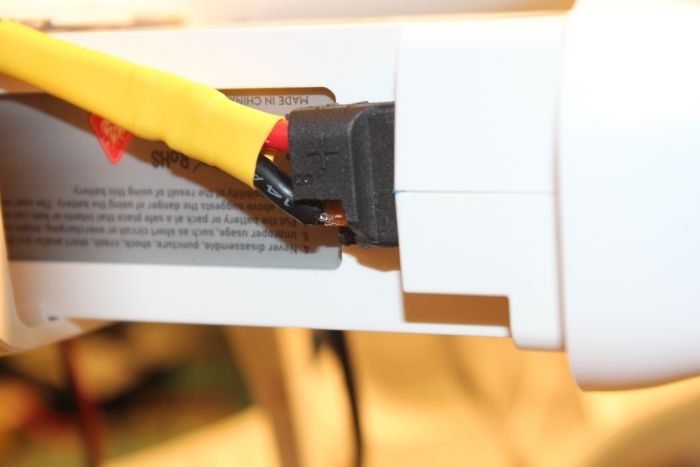
This is where you can see the angle I am talking about with the heat shrink.
Before sliding in... you can see how i routed the black and red battery cable and how the the end of the heatshrink is at the top of the battery opening at the angle.
Finally this pic shows how the modified Traxx plug now misses the standout... sorry its a bit crude - bad lighting!
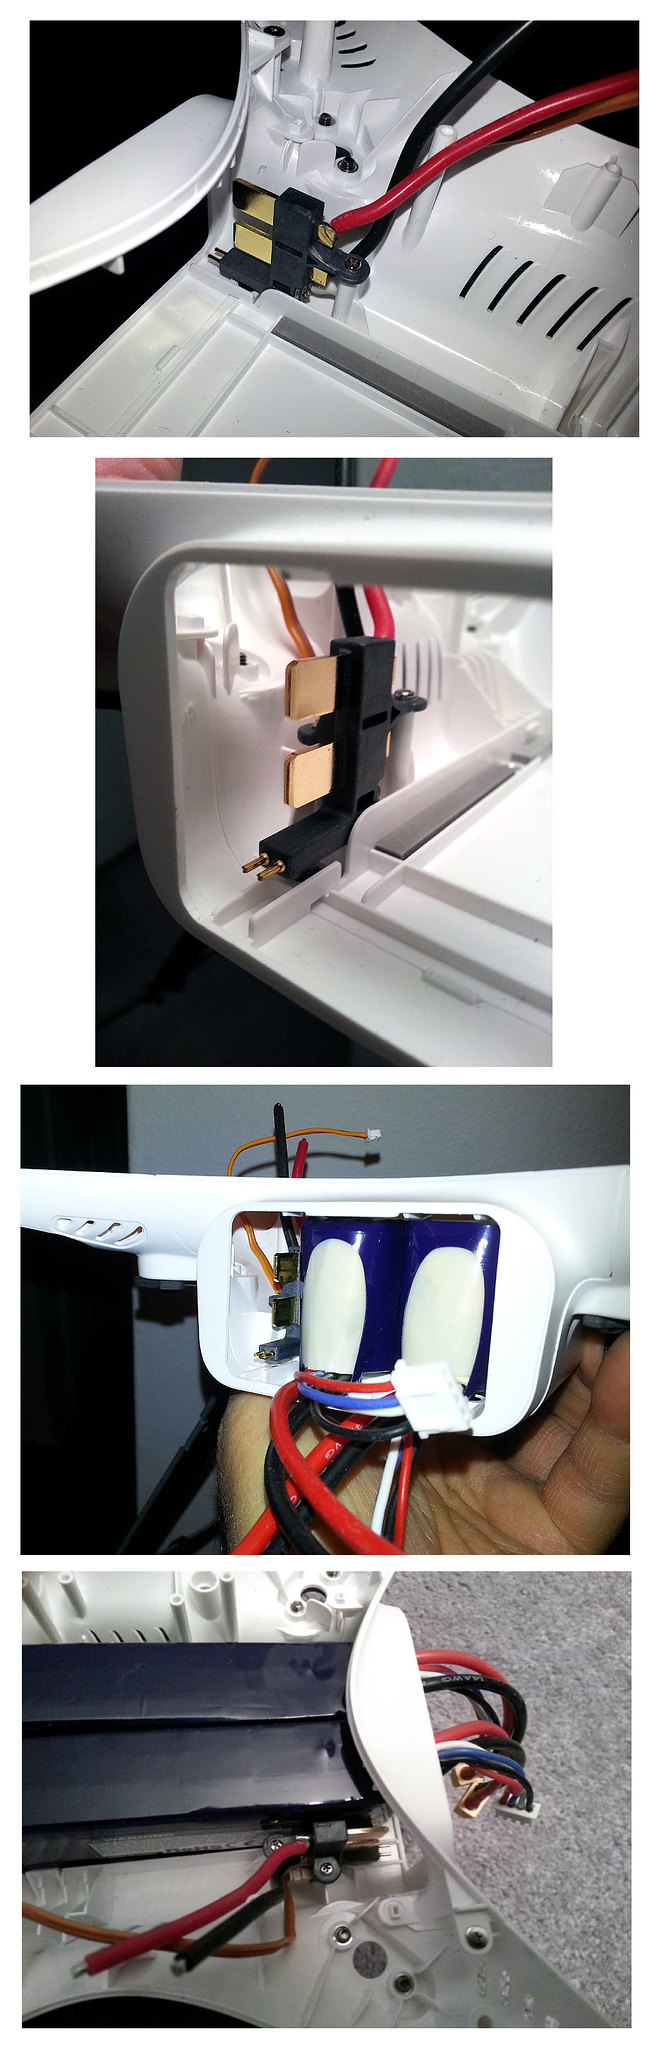
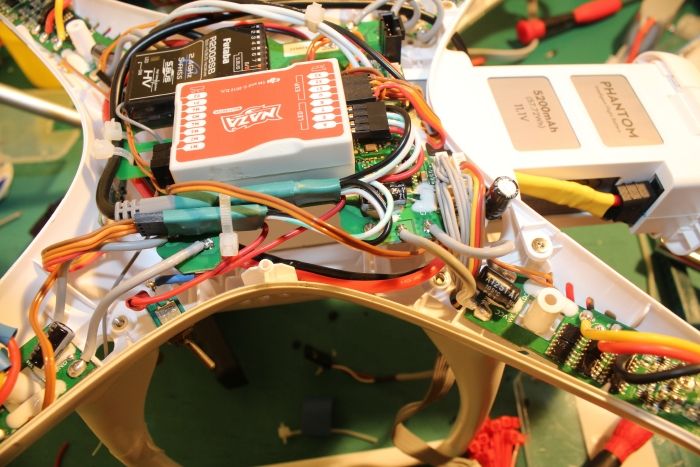
Again this really highlights how handy the internal power plug will be! Grab one if you can but be aware you will need to undo and lift the main board to put it in there (so if you are reading this and havn't started the process yet buy one now and be patient!!).