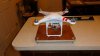
So, after all the back and forth trying to get the paper pieces just right under my Plus V3's skids to fix the yaw drift, which I probably did about 8 to 10 calibrations, I decided to be smart and do a cali on a level surface first!
My Plus is only a month old and last week or so I noticed it drifted about 3 feet or more to the rear and left when I yawed. So, I immediately started raising the skids on the opposite side and trying to counter the drift, assuming my IMU wasn't level inside the quad.
Today, I got my bubble level and discovered that my kitchen granite counter tops are dead on level, so I just did a calibration there, flew it and now it is dead on when it yaws. It's like it is mounted on the end of a pose when it yaws! It's fantastic!
If only I'd thought to do a calibration on a level surface FIRST ;-)