Phantom 4 Advanced yaw motor issues.

Joined
Apr 14, 2021
Messages
8
Reaction score
2
Age
48
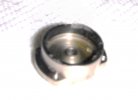
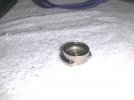
I crashed my P4A a few weeks ago and had issues with the gimbal thermal overload message after. The yaw motor was making noises and was slightly bent. I ordered a new yaw motor last week and it came in. I did some research here and elsewhere and before I took the project on of taking replacing it. I've seen where the old casing has to be retained and used with the new motor because the motor won't be calibrated properly to return to center. My problem is, the old casing is chewed up inside, it's destroyed and not usable. I called an authorized DJI service dealer and they said that the yaw motor would have to be calibrated at the factory and they couldn't do it. So, I'm left thinking my camera/gimbal is just a brick now, and worthless. My only choice is to get a complete gimbal/camera assembly, right?
 
Use the one that came on it. Could be close enough to use the yaw adjustment in the app. If still too far off there are ways to force it past the stops to re-aim. Not much other choice, good luck
 
Yip always handy to try pic up a used working drone for parts ,you never know when these bits are needed and good to have on hand
 
  • Like
Reactions: Capt KO
and just like that, here I am. Always watching. Yes do try the one you got. In my experience about 1 in 10 will center. Some just come close and a lot swing way left or right. I have a lot of drums. Are you anywhere near Central Florida?
 
  • Like
Reactions: Capt KO
Thanks for the input. A couple of small chunks have fallen off the inside of my existing motor casing. I was under the assumption that it's probably no good now.
 
You might be surprised. if it is still round I would give it a try. I have seen where they have chips out of them but they still work. You have nothing to loose. Put up a photo of the damage to the casing and i will tell you what I think
 
  • Like
Reactions: vfrf2 and Capt KO
Thanks for the input. A couple of small chunks have fallen off the inside of my existing motor casing. I was under the assumption that it's probably no good now.
I meant to say just try the new one you bought but now you have advice from the pro. He has taught me a lot. Good luck.
 
  • Like
Reactions: vfrf2
I had to step away from this for a few days, life has kept me busy. Took a couple of pics, but they are not really focused enough. Will have to get more, but this one should give you an idea of the damage.
 

Attachments

  • HPIM8754.JPG
    HPIM8754.JPG
    89.6 KB · Views: 153
I have another question that's not related to this problem, but is related to Phantom 4 Advance. If I purchase another Phantom 4 Advanced could I use my current P4A's controller to operate it? I'd assume I'd have to bind the 2nd P4A with the controller, but would I have to bind them each machine every time I'd switch between the 2?
 
I managed to find a complete donor P4A and used the yaw motor's casing with mine machine I've installed everything and it seems to be working OK so far. I got a better pic of my original yaw motor casing and it shows the damage to it. Still usable or is it roached? If so, I'd like to find a used motor casing if anyone has good one you'd like to part with.
 

Attachments

  • HPIM8761.JPG
    HPIM8761.JPG
    667.6 KB · Views: 122
I would try that casing. It does look bad but It could still work. Clean it out to be sure there are no debris in it. I use acetone and a q tip. Acetone is finger nail polish remover.

The remote is the same and you are right. You will have to rebind every time you switch. It will also work on the P4Standard and the P4 pro but not the p4p v2.0.
 
  • Like
Reactions: Andyfalc
Thanks for the input. Your video really helped with this, Ted. I'm mechanically inclined, so I didn't mind taking this project on. I think the trick is watching videos and absorbing as much information to familiarize yourself beforehand. Acquire all your tools and parts before you start. The small size of the screws really made it a bit of a challenge, getting some back isn't as easy as taking them out. I had a couple of stripped heads on screws and had to get creative with a Dremel to help remove them. Magnetic bits really do help to hold screws while reinstalling them. I had some Loctite around and used is very sparingly when putting it back together.

I think they have 6" tall gremlins with little hands putting these things together, everything is just so small.
 
  • Like
Reactions: Droneted
A trick I was taught years ago was to take a piece of paper and draw different parts on it as you take it apart. Put the screws on each as you disassemble. Sometimes I take photos. Some of the tiny screws look similar. I don't have to do this anymore as I have memorized where they go.
My hands are huge arthritic nubs. I can still manage them!
 
  • Like
Reactions: MTO and vfrf2
Oh yeah, keep everything organized! I used ice cube trays and egg cartons to keep track of all of it. Took a few pictures. I had a spare camera/gimbal sitting here that I used as a visual guide. Had to refer to that a couple of times.
 
  • Like
Reactions: MTO
I got it back together, the yaw motor seems to be OK. Now I seem to have some roll motor issues. I had to replace the one I had, but I still have the old one. When replacing the roll motor, do we have to use our old roll motor's casing and reuse it in the same way we have to reuse the yaw motor's casing.
 

Members online

Forum statistics

Threads
143,085
Messages
1,467,523
Members
104,962
Latest member
argues