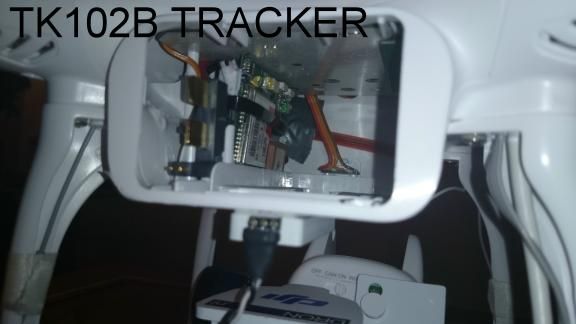
I needed a way to attach my TK102 Nano to my P2.
Main goals here were to allow the device to have some LOS to the sky, while keeping it as far away as possible from things like the radios in the landing skids, the compass, the bulk of the Phantom which may block GPS signals, and out of the way of the gimbal system. I also needed an easy way to be able to access the device to change the battery.
Here’s what I came up with. You'll need: 2 x long elastic bands, 1 x strip of velcro. I removed my CAN-Bus connecter and left the lead where it is for now. You could just as well leave it in place and re-arrange the bands.
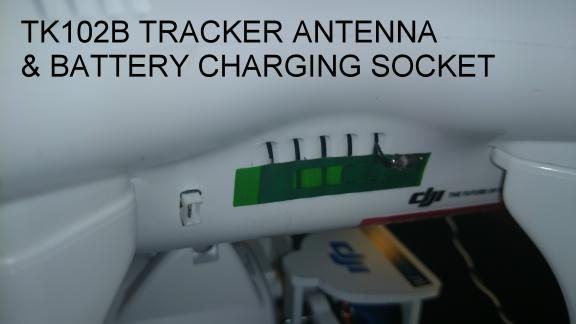
Not the most pretty solution, but it’s very cheap, fills all the boxes, and is rock solid in that there is no vertical play from either the tracker or elastic bands due to the velcro keeping them in place. Even if you crashed the Phantom the tracker will stay where it is, which is a very important feature as this in no doubt when you need the thing to do it’s job ; )
The tracker weighs 50g, so there is a chance I may need to counter balance the other skid.
I’m still yet to do some extensive testing of the TK102 in situ / mid flight, so I’ll report back on that asap.


Main goals here were to allow the device to have some LOS to the sky, while keeping it as far away as possible from things like the radios in the landing skids, the compass, the bulk of the Phantom which may block GPS signals, and out of the way of the gimbal system. I also needed an easy way to be able to access the device to change the battery.
Here’s what I came up with. You'll need: 2 x long elastic bands, 1 x strip of velcro. I removed my CAN-Bus connecter and left the lead where it is for now. You could just as well leave it in place and re-arrange the bands.
Not the most pretty solution, but it’s very cheap, fills all the boxes, and is rock solid in that there is no vertical play from either the tracker or elastic bands due to the velcro keeping them in place. Even if you crashed the Phantom the tracker will stay where it is, which is a very important feature as this in no doubt when you need the thing to do it’s job ; )
The tracker weighs 50g, so there is a chance I may need to counter balance the other skid.
I’m still yet to do some extensive testing of the TK102 in situ / mid flight, so I’ll report back on that asap.
") I would imagine that 50g on that leg may cause stability issues and having to add another 50g to the other leg will seriously start to deminish your flight times. Are you also carrying a Zenmuse + GoPro?
I would imagine that 50g on that leg may cause stability issues and having to add another 50g to the other leg will seriously start to deminish your flight times. Are you also carrying a Zenmuse + GoPro?
")