BOCA Lightning bearings MOD!

Joined
Apr 10, 2014
Messages
2,278
Reaction score
1,256
Age
51
Location
Sarasota, FL. USA!
Hello Everyone,
Well, I'm at it again. Since I posted my adding sound to P2v mod, I've received several replies about a sound they are hearing in my video, of a possible BAD BEARING?

So,
I decided, that must be my next MOD! New bearings! So I got ahold of a local business, named BOCA BEARINGS. I ordered 1 of 3 sets offered! They have a set that is steel bearings, steel shielded, high quality bearings ( econo version ) for $39.95set of 8, then set 2 is a higher quality ceramic bearing, steel races, shielding.
( mid grade very high quality ) for $62.95 set of 8, then they have the Top of the line, Orange seal, ceramic bearings ( super high quality bearing ) for $88.95
Bocabearings.com

I bought the super high quality ceramic ones, plus I bought their lightning oil/grease. ( lightening lube $14.95 ) For preventative maintenance.
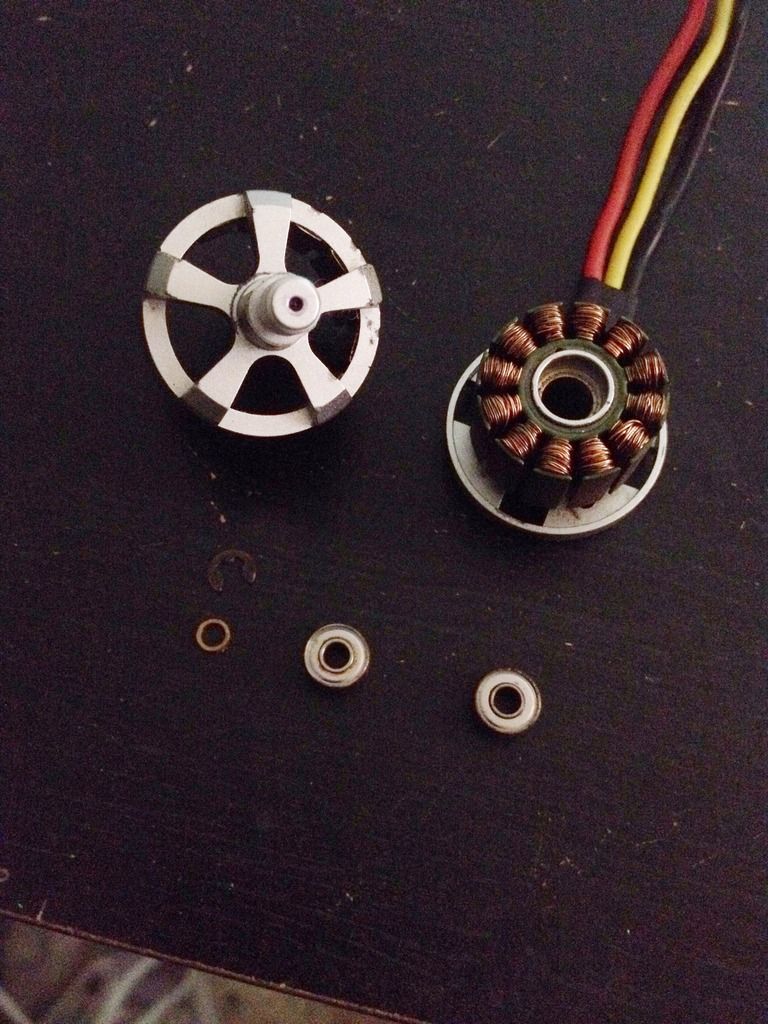
Here is the pictures of me opening the package.
IMG_1882.JPG

( got Bearings x8, Lightening oil, and receipt )


BOCA Bearings
Bearing kit # H26-01C-OS. / Item # 23040
IMG_1884.JPG

IMG_1886.JPG


Lightning Lube high speed oil
Item # 13931
( bocabearings.com )
IMG_1885.JPG

IMG_1883.JPG

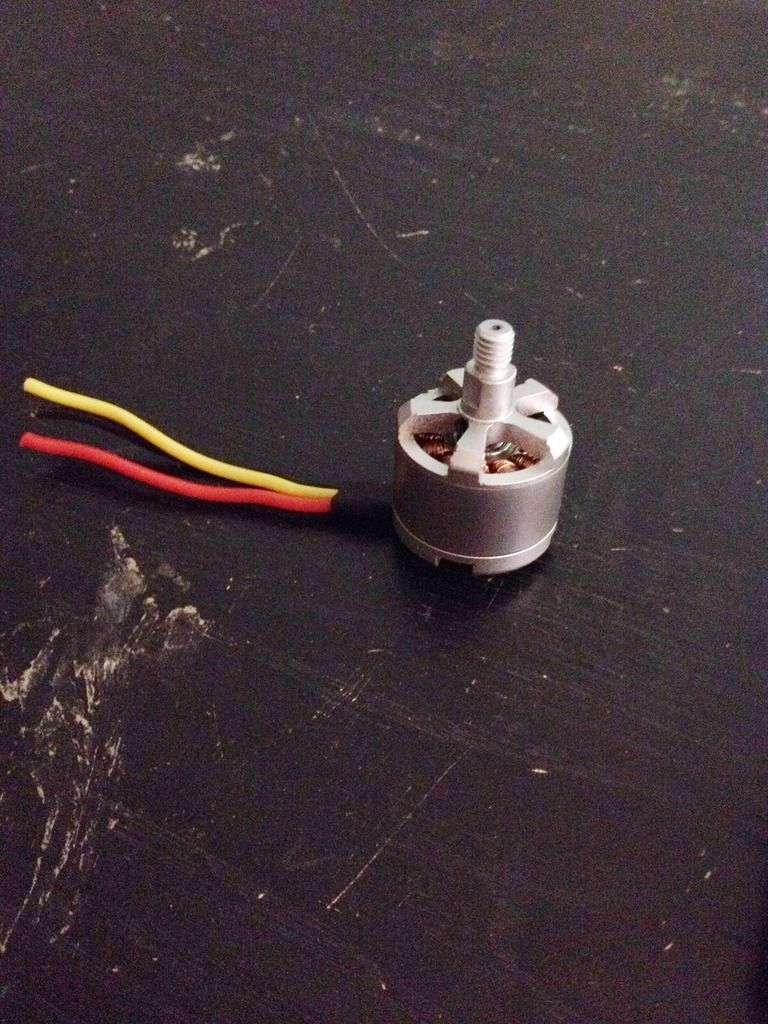
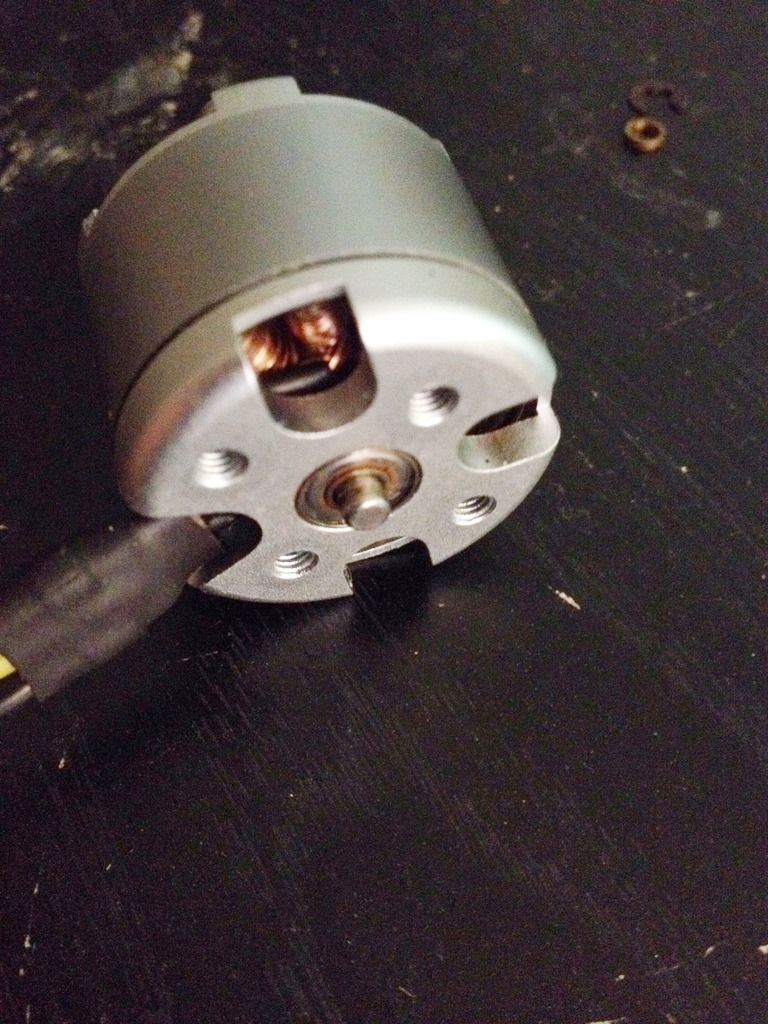
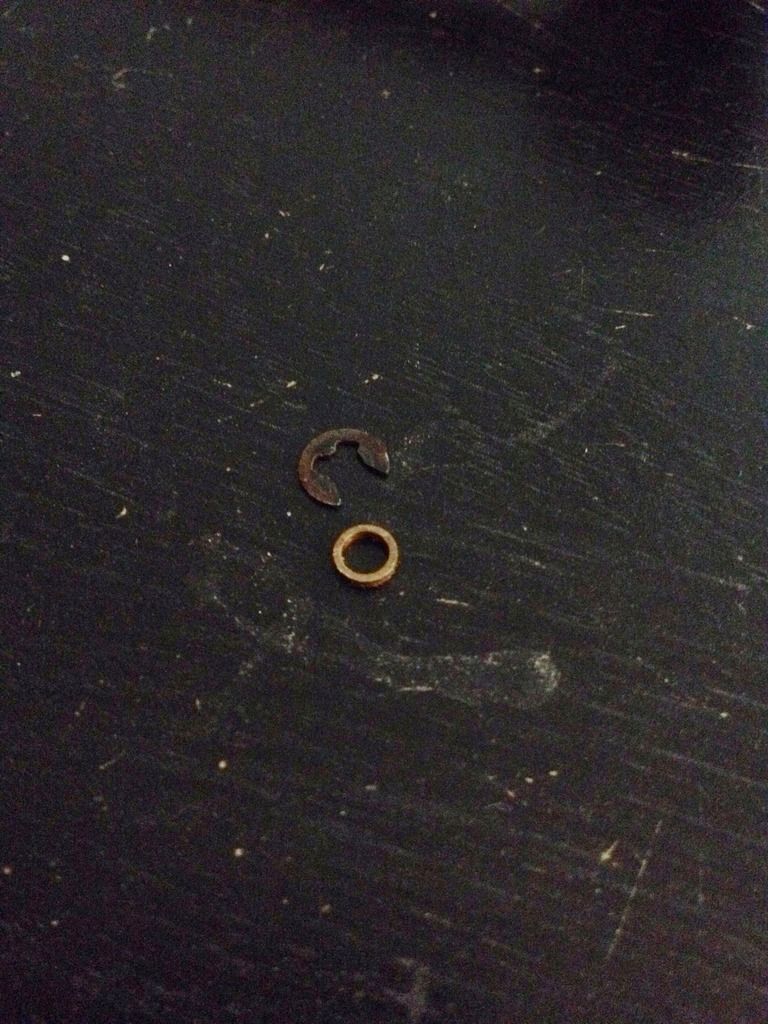
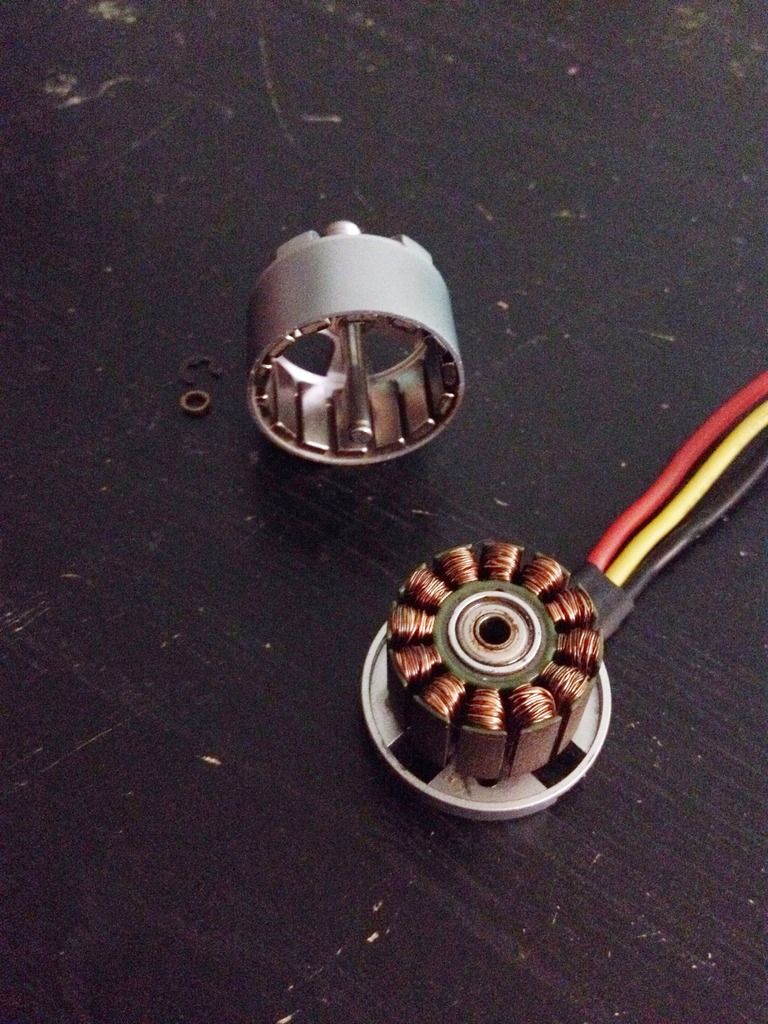
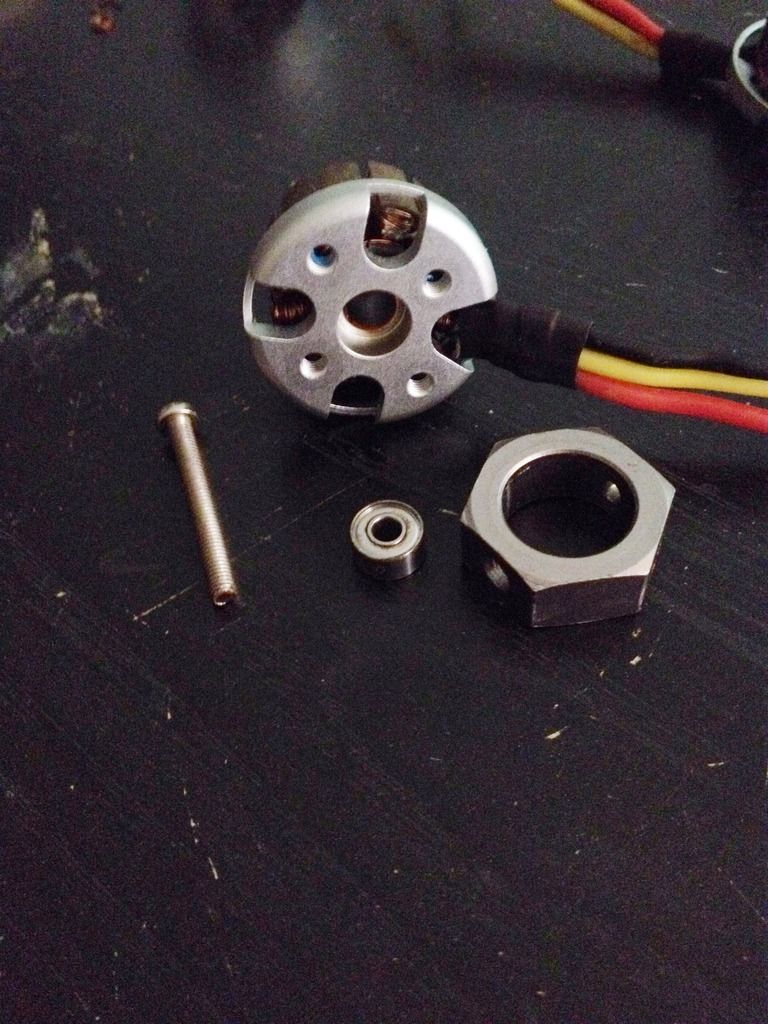
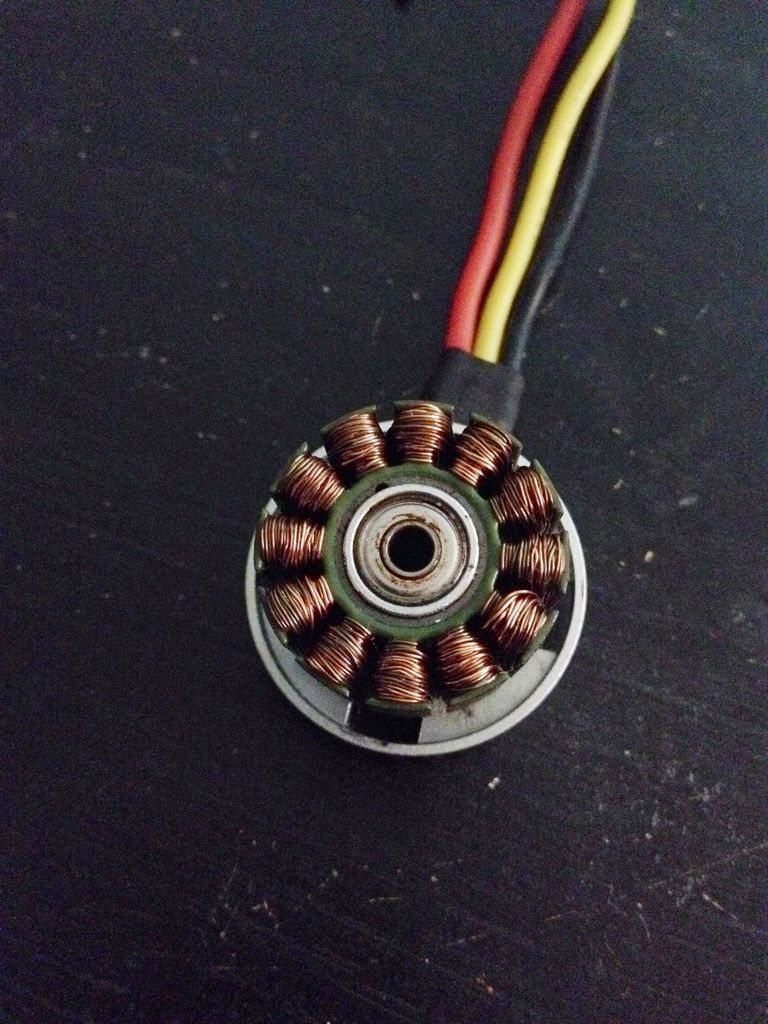
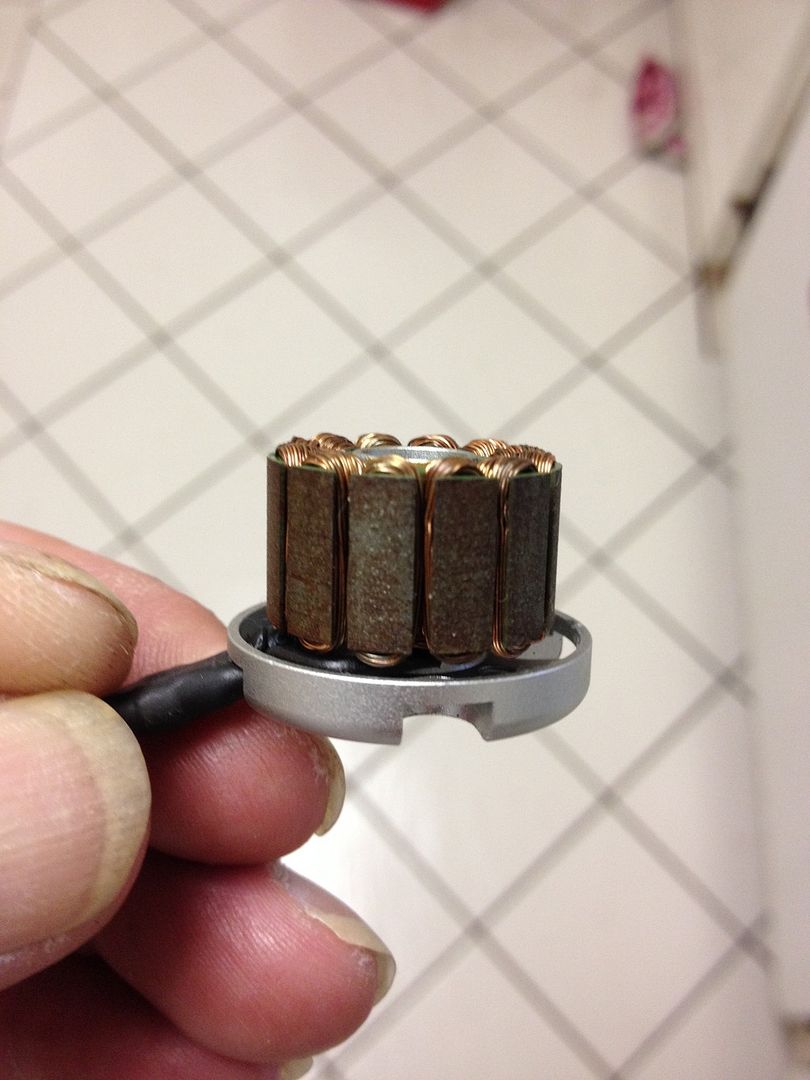
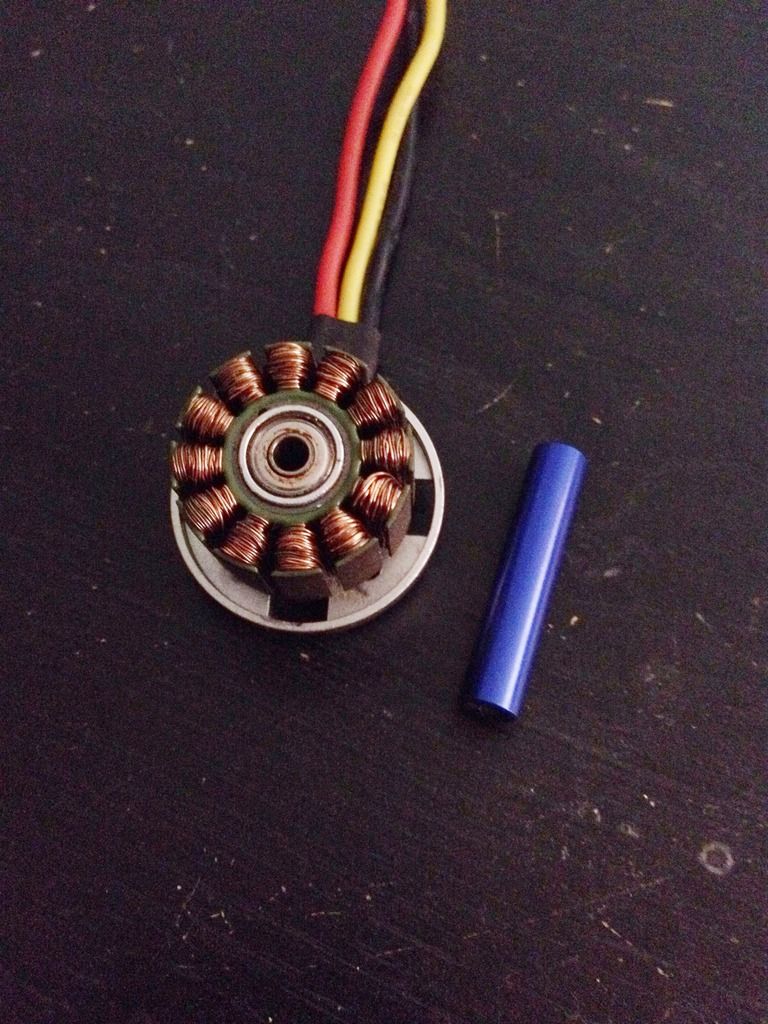
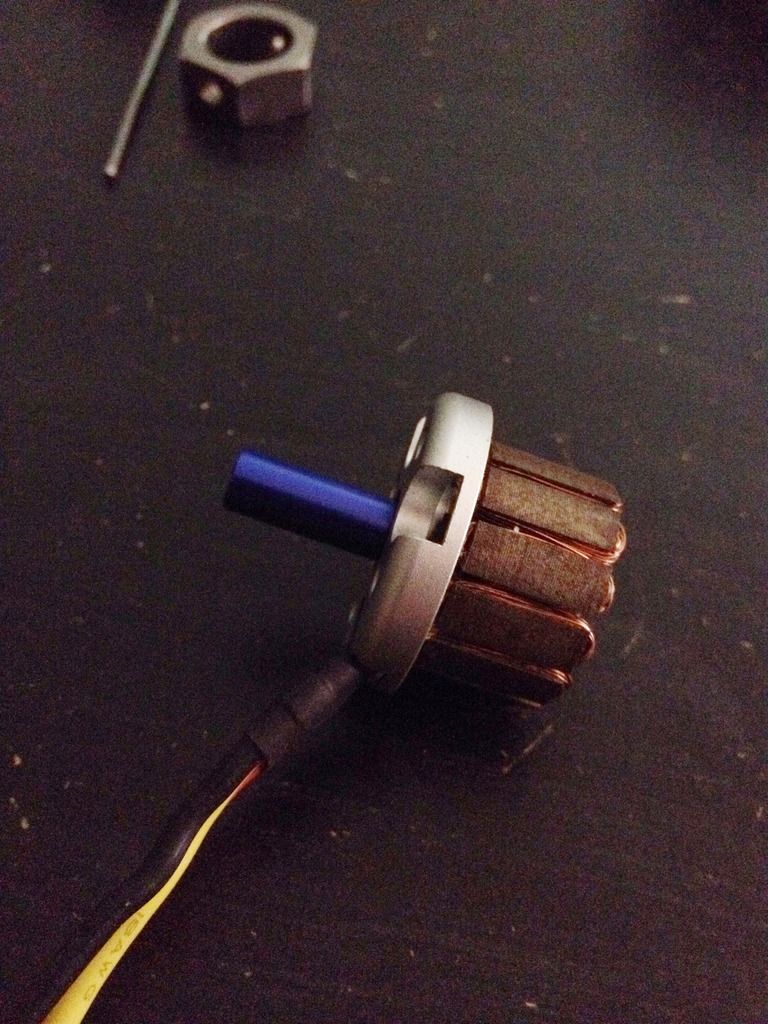
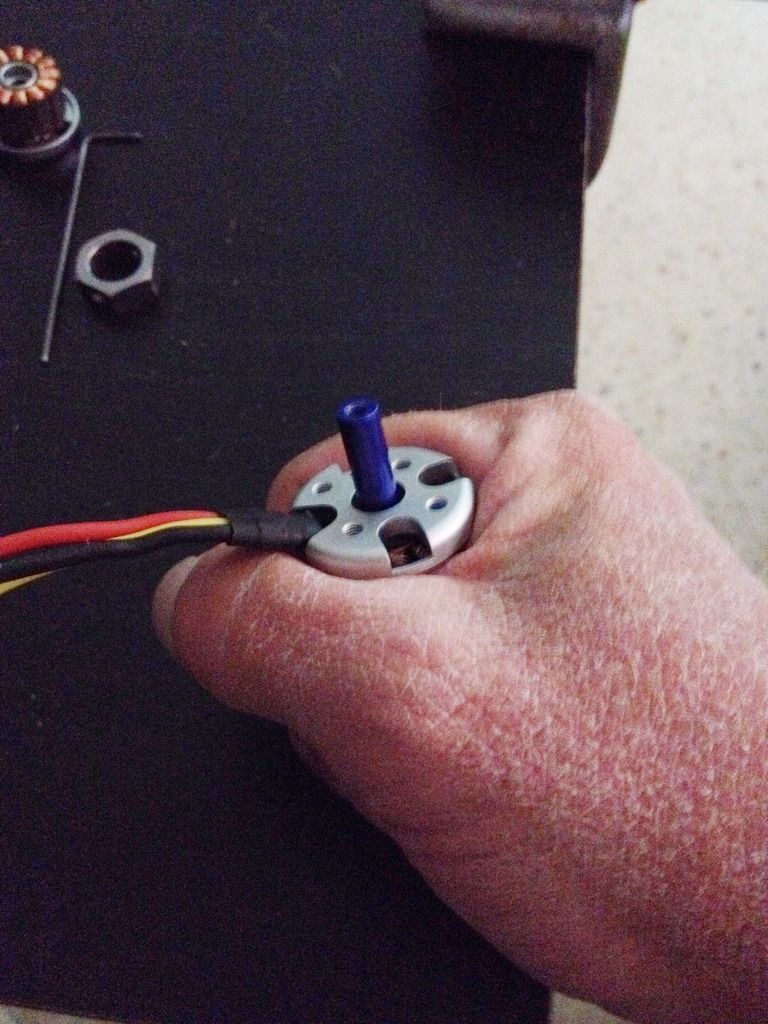
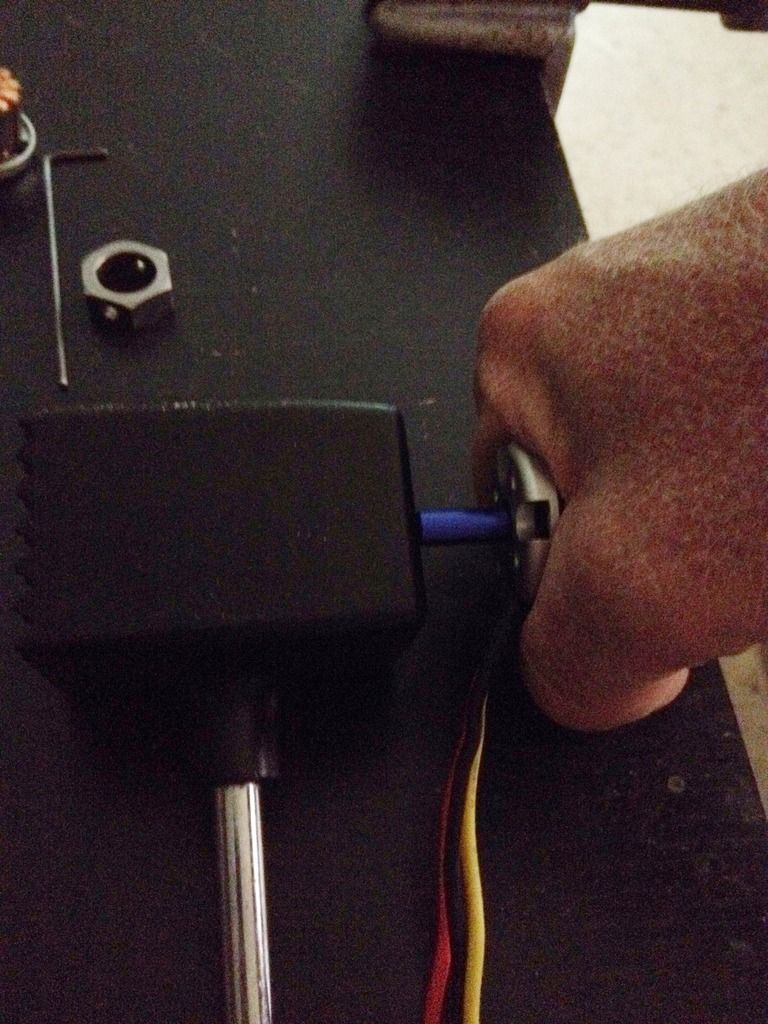
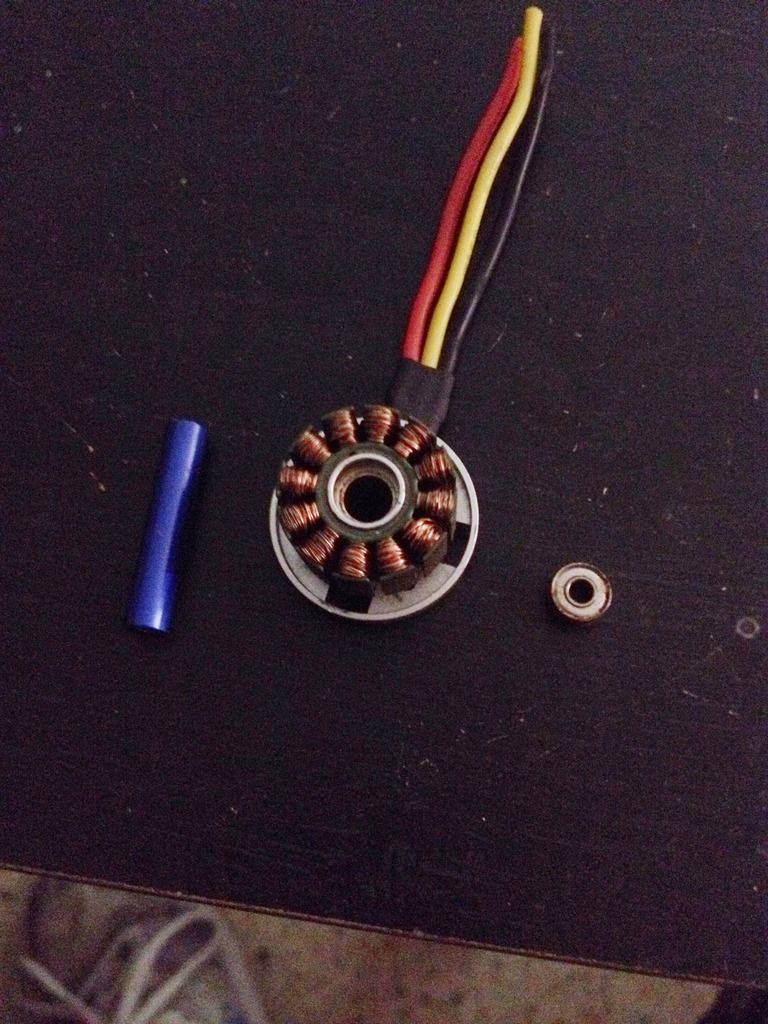
I will do pictures of the mod, and share with you, AS USUAL! Lol.

Take care, Fly safe!
J Dot
 
Last edited:
I have 600+ hours on two 450 CP-heli motors with no OEM bearing issues.

This seems more like a 'between the ears' mod. rather than something really necessary.

Now you have to lube and deal with the issues surrounding that.

Let us know what the realized benefits of this are.
 
  • Like
Reactions: J Dot
I have 600+ hours on two 450 CP-heli motors with no OEM bearing issues.

This seems more like a 'between the ears' mod. rather than something really necessary.

Now you have to lube and deal with the issues surrounding that.

Let us know what the realized benefits of this are.


Will Do,
You are correct, I could have easily, went with the stock replacements! I actually bought that set, and have it on hand! But a friend of mine told me about BOCA Bearings, and how he upgraded to them, after burning through 2 sets of stock bearings on his phantom 1. So I called Boca asking them almost that same question? Why upgrade? Is it worth the cost? What do I gain?

They explained about the many attributes, their bearings offer. Nearly 0 friction, no heat, smoother spin, longer life, free seal replacements for life, bearings guaranteed for life ( defects, not negligence ) and the oil is self penetrating, I add a couple drops every few months, no disassembly of bearings required.

So I went for it, since I have to replace anyway, I splurged a bit!

I will post how to safely remove bearings without damaging motor or bell, clean, and reinstall procedures, for whatever bearings they use, I figure that will be helpful in itself!
I will post if there are any noticeable differences, as I have my thermal heat tester, am going to fly test sound, heat, balance, ect. With stock bearings ( 1 might be bad? ) hearing a CLICKING in the video, then I'll change bearings, test again, sound, vibration/balance, heat, after a good flight! And will relay my findings!

Take care, Fly safe!
J Dot
 
Hello All,
Ok while I'm running tests on my OEM Bearings, on my P2v, before I install my BOCA bearings. I wanted to share with you the easiest way I've found, to SAFELY remove stock bearings from motors, without damaging anything!

Tools you need:
1) small flat screwdriver ( tiny one )
2) small Allen wrench ( will go over this later ) don't need it now.
3) 3mm x 1" screw, dowel, or similar
4) 6mm x 1" dowel, rod, or alike
5) access to a vice ( I use a $8 harbor freight one hobby size )
6) some kind of spacer ( socket or alike ) hole needs to be larger than bearing.

Ok
First you need to open phantom, and remove motors from arms. It is better to do 1 at a time, then place a nut, old prop, or piece of tape, something to mark the motors you have completed ( no room for mistakes )

Ok
Now first motor removed,
( I'm using an old motor that took a swim in the ocean, so this should be fun, all rusty and sticky!

So,
We have our tools, first we need to REMOVE "E" clip AND brass spacer from bottom of motor, careful not to lose anything. Here are some pictures.
D7F84D39-E800-42C5-B108-D070CA8E7CBA_zps47cqhuo1.jpg


80CF356D-1299-428A-85C1-AA7ED28C2275_zpsnmwttn8c.jpg


Take,
The small flat screwdriver, and carefully pry off the E clip, careful as it can fling off easily ( I use my other hand to shield it so it does not shoot off ) remove E clip & Brass spacer, place aside ( preferably in a bowl or container of some sort )
Pics:
0FC8D53D-E2B6-4A73-B4BA-62E80CDD8BDF_zpsymyif1yg.jpg


D1500822-3EB6-477F-9348-E5E47E84EB04_zps0tifgtyl.jpg


26ED9405-3B08-4A6B-A23D-DB901A668B87_zpsm3q6xt0j.jpg


Now,
Simply pull apart motor halves ( bell, windings )
Pic:
04B65EB6-9917-4C93-AC30-22A9492C17C2_zpsjrwbntxm.jpg


now we will need ( spacer and 3mm x 1" screw ( I use round head, as we need to ANGLE it a bit ) and vice.
A13892A9-9582-4685-8E6F-45A755332D5F_zpsfvtpvkle.jpg


E97580DA-C835-42B1-9AE9-47C18D6236C9_zps9adlwsnm.jpg


First
Use spacer like this ( slightly larger hole than bearing )
E8213CF0-2042-43E6-91A7-9588EB7842C9_zpso5p8jrow.jpg


With
That in mind place spacer on bottom of motor, then motor, then 3mm screw ( put screw through top bearing, SLIGHTLY ANGLED , to hit against top of bottom bearing ) not straight through other side! Should look like this:
8A49DBBB-DCE1-4BB9-BEEA-F7E653BC883B_zpsksmk5ujt.jpg


Slowly tighten vice until bearing pops out
281EE0F7-2C40-4E4F-ABD0-3CD5192B6524_zpsue7tuokf.jpg


9699A409-A844-4211-90C2-9C952B6095E7_zpsoo91npma.jpg


Ok,
Now top bearing is much harder, as we cannot remove the same way ( as windings protrude past top of bearing, and would get damaged!
A5CD08A6-048C-4B9F-9D14-612A7486C388_zpsfncrmijl.jpg


0D1E3B13-4821-4363-87E2-F24B57DBC282_zpsj2pma3f0.jpg


So,
We need the 6mm dowel, and a hammer ( I use a plastic meat tenderizer ) small but works well, without damaging anything .
A2A6B463-C093-4DEA-8DBC-4533A34DC089_zpsu4wk5jyx.jpg


Slide the dowel through the the hole in motor bottom where old bearing was,
CF3A4CCD-AE3A-45DD-B156-10BF5D7FEF4C_zpsjoknaz5a.jpg


Then hold motor in your hand ( tightly ) and gently hit dowel until bearing falls out in your hand!
3D6EDB94-14FB-4132-AD8F-39A069D3985D_zpsyza9t99c.jpg


EF2065B9-F31A-45C5-8C50-6D8091E38474_zpscbwonidn.jpg


9A5DA95F-B259-437B-A976-55908410CF42_zpsjdz7mw1w.jpg


Here are the parts:
51AA7904-AB81-4664-8500-D1C1BE855F9B_zpst3ocoifs.jpg


That is it, wipe holes out, or blow them off with compressed air, place new bearings in ( might have to gently tap them in if they are really tight, reassemble motor halves, place brass spacer on, then replace E clip, bolt motor back to phantom arm ( mark completed motor ) move to the next one, and so on, and so forth!

Take care, Fly safe!
J Dot
 
Last edited:
Sweet bro !! Have a set of 2312's that will be coming your way for the good one's !
No need in me trying as it looks like ya got it down pat :D;)
 
  • Like
Reactions: J Dot
Lol Dirk!
Bring them on, no problem! Be glad to do it for you!
I'll try to finish my install and post this weekend!
I did not realize pictures were so DARK, and hard to see?
I'm going to go into editor and see if I can lighten them up a bit?
Sorry bout that!

Take care, fly safe!
J Dot
 
  • Like
Reactions: dirkclod
No problem,
Fixed the pictures, you can see them now!

J Dot
Yep better now !!! I also see ya need some utter butter on them hands bro ! ;)
Ya in da sun too much :eek:
 
  • Like
Reactions: J Dot
Ha ha ( utter butter )
Grouted all day! I hate grout!
But pays the bills, and I got the BONUS grandpa hands! :rolleyes::cool:

J Dot
 
  • Like
Reactions: dirkclod
I have 600+ hours on two 450 CP-heli motors with no OEM bearing issues.

This seems more like a 'between the ears' mod. rather than something really necessary.

Now you have to lube and deal with the issues surrounding that.

Let us know what the realized benefits of this are.
I would think the benefits would be that he can and did do it !
Is fun to do these things and get that little bit of satisfaction that it works .
Have not heard the "between the ears mod ' before :D
 
  • Like
Reactions: J Dot
Ha ha ( utter butter )
Grouted all day! I hate grout!
But pays the bills, and I got the BONUS grandpa hands! :rolleyes::cool:

J Dot
Really bro !! Use it all the time when messing in wet concrete as I know ya know what that does to ya hands ;)
utter.jpg
 
  • Like
Reactions: IflyinWY
A+
And 10-4 good buddy! I usually rub lotion on them at night, but I'll give it a shot, can't hurt!

J Dot
 
  • Like
Reactions: dirkclod
Hey J Dot, Dirk's not kidding. Udder Butter is very popular here in the High Plains, because of the low humidity and stuff we work with... works good, lasts long time. :)

Drywall, joint compound, cement, grout... Udder Butter will counteract it all.
 
  • Like
Reactions: dirkclod
Hello Everyone,
I completed initial tests with STOCK bearings, on my P2v. My findings were less than impressive! I could not believe the CRAPPY quality these DJI motors are! I'll walk you through:

First,
I decided to run some sound, and heat tests on stock motors, with stock ( OEM ) bearings. Here is what I did, and my findings
( tests done with fresh battery, and freshly balanced props ( stock props )
I placed some dive weights, over the landing gear, so craft cannot lift off, for these tests.

I used my iPad as a timer , used a voice recorder for sound, and a thermal heat gun to test heat at each motor!

DA0A2318-8911-4800-A505-96452B9800F1_zpsm7elemgp.jpg


Test #1
( no props )
1) test sound at idol
2) test sound at full throttle
3) test sound motor #1 full ( LF )
4) test sound motor #2 full ( RF )
5) test sound motor #3 full ( RR )
6) test sound motor #4 full ( LR )
7) idol
8) test heat
Motor #1 = 84.1 F
Motor #2 = 82.3 F
Motor #3 = 83.4 F
Motor #4 = 83.8 F

Sound:
Test 1:
Loud, hear clicking, not uniform.

Test 2
( props on )
1) test sound at idol
2) test sound at full throttle
3) test sound motor #1 at full ( LF )
4) test sound motor #2 at full ( RF )
5) test sound motor #3 at full ( LR )
6) test sound motor #4 at full ( RR )
7) test sound idol
8) test heat
Motor #1 = 83.1 F
Motor #2 = 84.4 F
Motor #3 = 88.9 F. ( ?????? )
Motor #4 = 86.8 F
( seems like motor #3 is running HOT )
Sound:
Very loud, clicking worse, noticed a bad vibration motor #3. Also found 1 prop tip higher than other ( so I fixed the prop )

( NOTE: when balancing your props, also check the tips TRACK the same, you don't want them wobbling UP-DOWN, as well. )
144DBA45-E06C-482F-9135-CA61B030E534_zpscjs9civg.jpg


Ok,
My next test, is to run all motors full throttle with props on, test heat.
Here is my findings.
After 5 minutes ( full throttle ) props on:
Motor #1 ( Front left ) = 106.0 F
Motor #2 ( Front Right ) = 103.8 F
Motor #3 ( Rear Left ) = 134.8 F ?
Motor #4 ( Rear Left = 99.9 F

As you can see , motor #3 running extremely HOT! I aborted further tests, as not to damage my motors worse! So I decided to take motors apart, inspect, remove old bearings, clean, install new bearings , reassemble, run further tests with new bearings ( BOCA lightning bearings )

Disassembling motors:

Motor #1:
Upon disassembly, I found 1 loose WINDING, came off winding post, and was flopping around, hitting magnets, as they spin ( clicking sound I heard ) reassembled winding onto post with plastic razor blade, also noticed BLUE EPOXY like stuff in bell housing ( scraped out what I could ) magnets all straight, installed new bearings, bolted motor back on!

Motor #2
Upon disassembly, windings good, magnets straight, but had to scrape more blue Crap out of magnets? WTH is up with this blue CRAP! Anyhow put new bearings, bolted motor back on!

Motor #3
( this motor was in unbelievably bad shape )
Upon opening motor, I found A LOT of blue Crap inside magnets, just gunked in there ( requiring intense scraping ) as it was on magnets, then after I scraped it all out, I noticed 1 of the magnets was factory installed CROOKED! Cannot be fixed, as they are welded on. ( no wonder the motor is overheating )
Installed new bearings, bolted back on!
Pics
Blue Crap pic #1
4B9373B2-B3C8-4F6F-8810-CEB6C0FB5466_zps5hdvxrd0.jpg


Blue crap pic#2
F93DCD67-FB4D-47D3-BE6F-5A028F978530_zpsbgbmpqy1.jpg


After scraping blue Crap out:
pic #1
7F804D26-6AEE-45C7-A395-AA1634301BF3_zpsyn94s80f.jpg


Pic #2
C9F0F689-4FF3-449B-B315-E0F0B4EFFDFE_zpsggdjmmjr.jpg


Out of level magnet
Pic #1
859E55FC-D55A-42BC-8238-C1E6D7897535_zps0jzclydn.jpg


Pic #2
C396D37B-FD7C-44B8-8C76-1AA1AFEA71AC_zpswlwfldxf.jpg


Motor #4
Upon opening motor, found blue Crap, but very little, needing no scraping,
Magnets all straight,installed new bearings, bolted back on!

Will perform final tests today, as it got too late last night

Ok
Next , I wanted to touch base on these BOCA bearings. I did a little test with old/new bearings, and a motor bell.

I spun it 4 times, 1st 2 spins with stock bearings ( original bearings )
2nd 2 spins with BOCA lightning bearings!

TAKE NOTE OF SPIN TIMES!!!!!!!!

To view this content we will need your consent to set third party cookies.
For more detailed information, see our cookies page.

Take care , Fly Safe!
J Dot
 
Last edited:
I just wanted to add:

After I do final tests with BOCA bearings installed ( same tests as I did with OEM bearings above )

I plan on doing a video, or slide show with sound attached! I did no sound above for you to hear, but I will in final post!

Thanks for your patients!
Take care, Fly safe!

J Dot
 
J-Dot...Where are you ?!?!?! This is one of the best threads evah bro !
What happened? It's been almost 4 months?

I'm wanting to upgrade my bearings and this thread had everything I was looking for and more.

Did the Boca Bearings work out or not?

PhantomPilots to J-Dot....calling J-Dot....Come in J-Dot ..............
 
I'm here, IM HERE! Lol
Yes, the bearings are AWESOME, I did find out you do not need the Lightning oil, as these are lifetime maintenance free bearings! I fixed my bad motor, with a new bell, clicking stopped, also all 4 motors now run around 80 degrees, about 20 degrees cooler than stock. Spin test says it all! I'm very happy with them.
Also
I just received an email from boca they invented a whole new bearing, 100% ceramic ( 0 wear ) and it run on something called ANGULAR LOAD Bearings, non magnetic, non corrosive, 0 friction, ect. They don't have a phantom kit yet, but they will, and most likely carrying a $100 price tag!

J Dot
 
Last edited:

Recent Posts

Members online

No members online now.

Forum statistics

Threads
143,066
Messages
1,467,352
Members
104,933
Latest member
mactechnic