

- Joined
- Jun 18, 2015
- Messages
- 63
- Reaction score
- 42
- Age
- 55
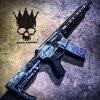
I figured it would be cool to get a thread full of pictures of what people have done to there phantom 3 to give others ideas of how to make there's different from stock...,
I used the krylon fusion matte black.
I could have spent more time on it but it turned out pretty nice.
To be honest. *dont cringe*
I removed the camera and gimble. I removed the vision sensor on the bottom and that's about it.
I split the top and bottom and painted separately.
Top was no problem and the bottom all I did was tape off the wires for the vision sensor, camera and motors.
I just put the bottom section with the electronics facing down on a cardboard box and sprayed away. There was a little overspray on the circuit board but it was all on the component side so I wasn't too worried. I'm sure I could have taken a lot more care to protect stuff but I was more concerned with not getting it back together than a little overspray! All in all it looks really good and still flys with no issues.
Hardest part was the 4 pins that come off the circuit board for the vision sensor. Other than that it was about 24 or so screws and splitting the top and bottom was a pain cause it feels like your gonna break it!
Got a few more touches to add to the top in a few days to add some more white to it all I'll update with pictures hopefully Wednesday.


 but still work fine.

